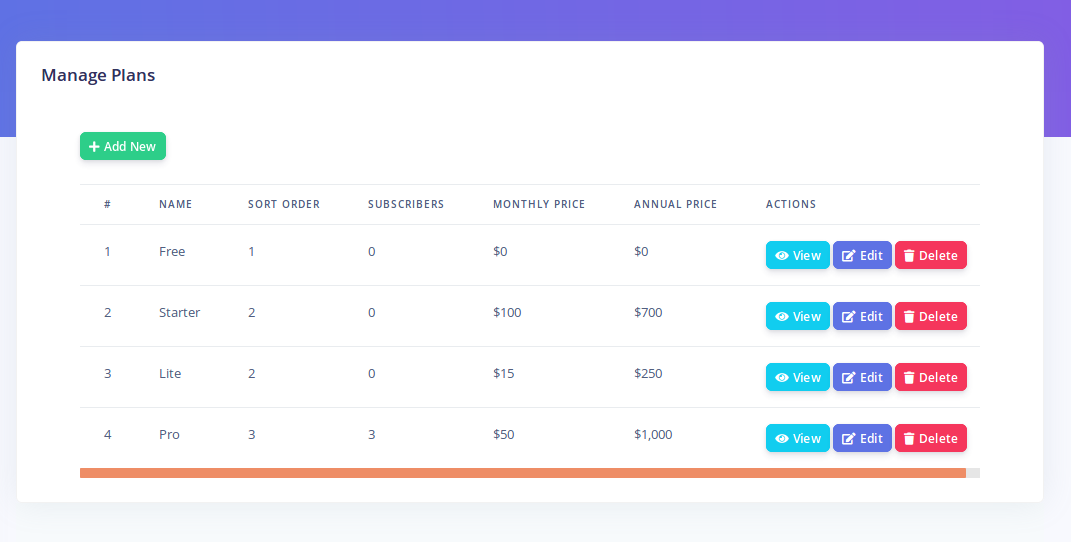
Managing Plans
You can create as many subscription plans on the application. Each plan can have a monthly and annual price.
You can set the various limits available for each plan.
Creating a plan
Click on 'Plans'-'Create Plan'. The following page will appear:
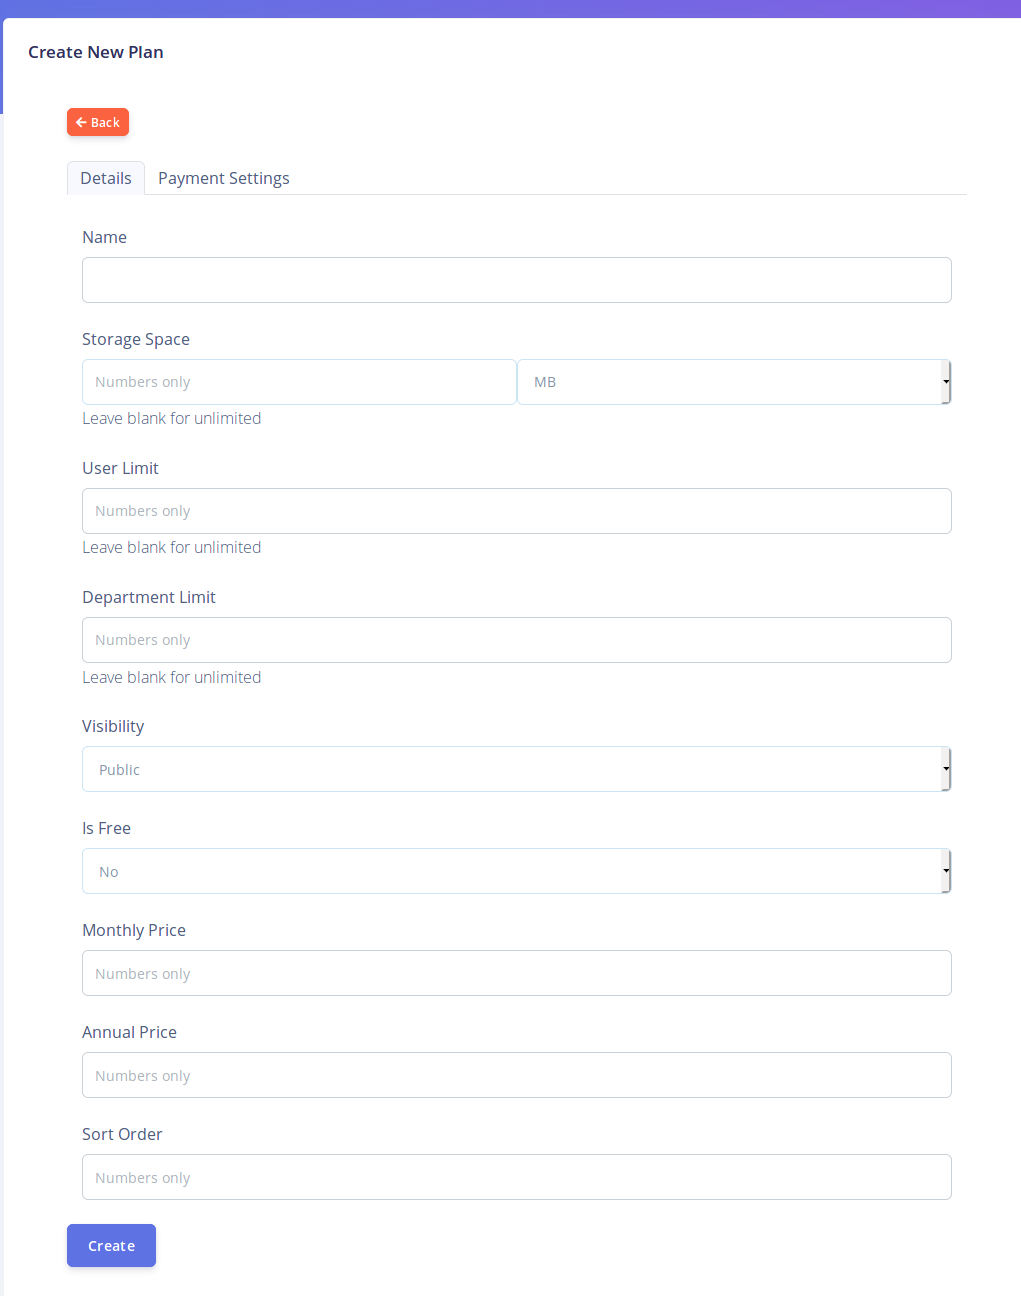
You will see two tabs on this page. 'Details' and 'Payment Settings'. Under the
details tab, you get to set the main options for this plan
- Name: Give the plan a name e.g Pro . This is the name display for subscribers
- Storage Space: Specify how much disk space users are allowed to use. The system will prevent users from uploading more files once they reach or exceed this limit. Leave blank for unlimited
- User Limit: Specify the maximum amount of user accounts (either admin or members) that this plan will allow. Users will not be able to create new accounts (or registrations) once this limit is reached or exceeded. Leave blank for unlimited
- Department Limit: Specify the maximum number of departments this plan will allow. Leave blank for unlimited.
- Visibility: This controls if the plan should be visible on the public site or not. You can create private plans if you wish to place some subscribers on custom plans.
- Is Free: Specify if this plan is a free or paid plan.
- Monthly & Annual Price: If the plan is not free, these fields will be available. Set the prices here.
- Sort Order: This controls the order in which plans are displayed on the public site (in ascending order)
Under the 'Payment Settings' tab, you get to setup the
Stripe payment gateway plans that correspond to this plant's annual and
monthly prices. You can skip this if you are
not using stripe.
Also visible on this tab are the webhooks for both Stripe and Paypal. It is CRUCIAL
that you set these webhooks in their
corresponding gateways if you are using any of these
gateways. Failure to do so will prevent your subscriber's invoices from
getting approved after payment.