Creating Email Messages
CarePro comes with a powerful emailing feature that
enables you send out instant or scheduled messages with various types of
attachments. It also supports message templates that enable you easily
send common email content to users.
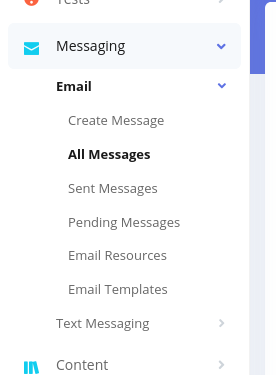
To create a new message, go to 'Messaging'-'Email'-'Create Message'
This brings up the screen for creating a message
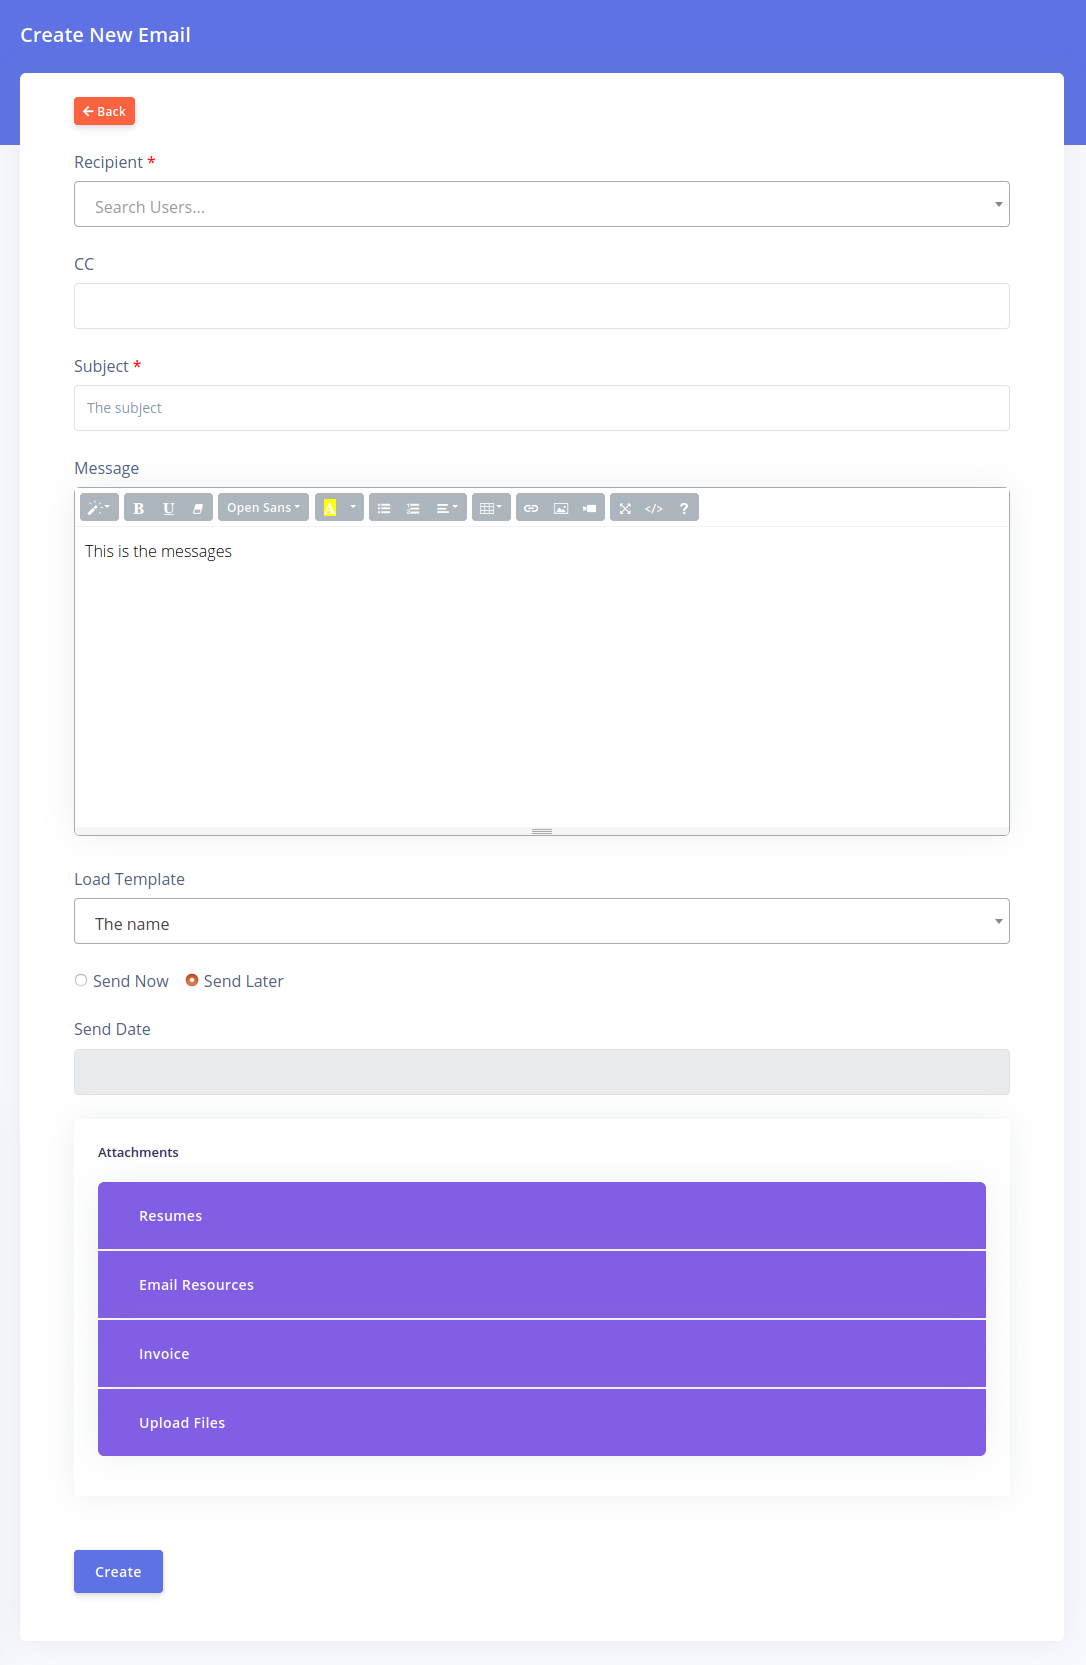
The fields in this page are described below:
- Recipient: Messages are sent to users that
already exist on the platform. Click on the dropdown and start typing
the name or email of a user. Users can either be employers or
candidates.
- CC: you can send a copy of the email to any
email address. You can type multiple email addresses here. Each email
must be separated by a comma.
- Subject: Enter the subject of the email here.
- Message: Enter in the full content of the email here.
- Load Template: This dropdown displays the list
of email templates you have created. Selecting a template from this list
automatically loads it's content into the 'Subject' and 'Message'
fields.
- Send Now: Select this option if you wish for the message to be sent immediately.
- Send Later: Select this option if you wish for
the message to be sent at a scheduled date. If you select this option,
the 'Send Date' field will become visible below it.
- Send Date: Specify the date you would like this
message to to be sent. Please note that messages are sent at midnight of
the date you specify.
ATTACHMENTS
One of the main features of the messaging feature is
to enable you easily send special attachments generated by or stored on
the portal. The various panels of the 'Attachments' section are
explained below
- Resumes: This enables you to easily send resumes
of candidates to employers. Resumes are generated based on the
candidate's profile on the system and not their uploaded CVs.
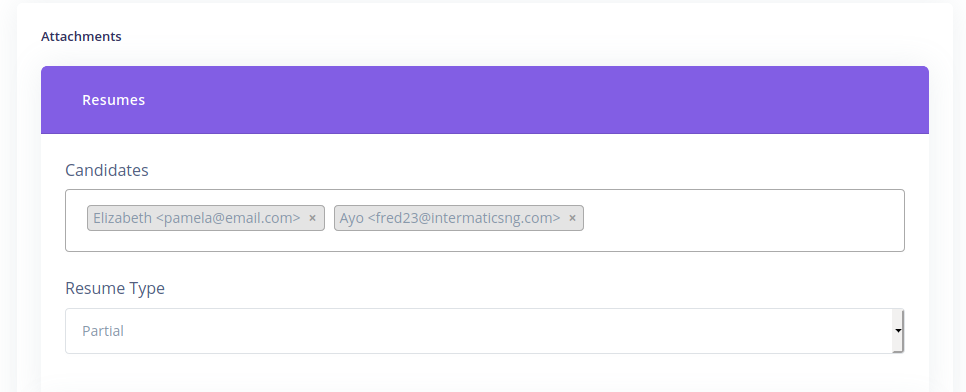
The
'Candidates' dropdown enables you to search for a candidate using their
name or email. Start typing the name of a candidate and select the
candidate from the dropdown. You can add as many candidates as you wish.
The 'Resume Type' field enables you specify if you wish for the
generated Resume to be full or partial. Partial Resumes will exclude
candidate profile sections that have the 'Visible to public and in
partial profiles?' option set to 'No'.
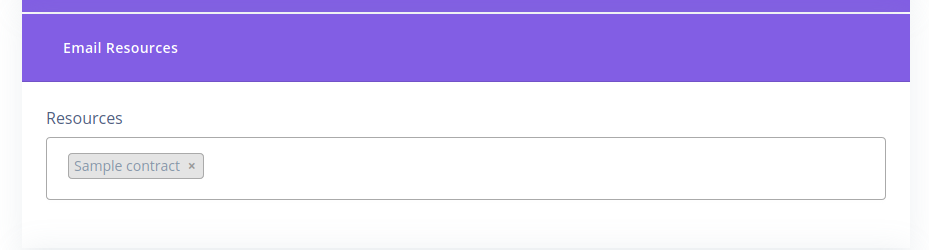
- Email Resources: Email resources are files you
have uploaded previously for easy reuse in email messages. Select as
many files you wish to add to this list and they will be attached to the
sent email.
- Invoice: This allows you to generate an invoice
and attach it automatically to the email. A PDF version of the invoice
will be attached to the email and a link for online payment will also be
attached automatically.
- Upload Files: You can use this to easily upload attachments from you computer for this email alone

Click on the 'Create' button to create your message.
Viewing Email Messages
To view you list of messages, click on the 'Messageing'-'Email' menu option
You can view 'All Messages', 'Sent Messages' or
'Pending Messages'. Pending messages are scheduled messages that have
not been sent yet.
Clicking any of these options brings up the message list as shown below
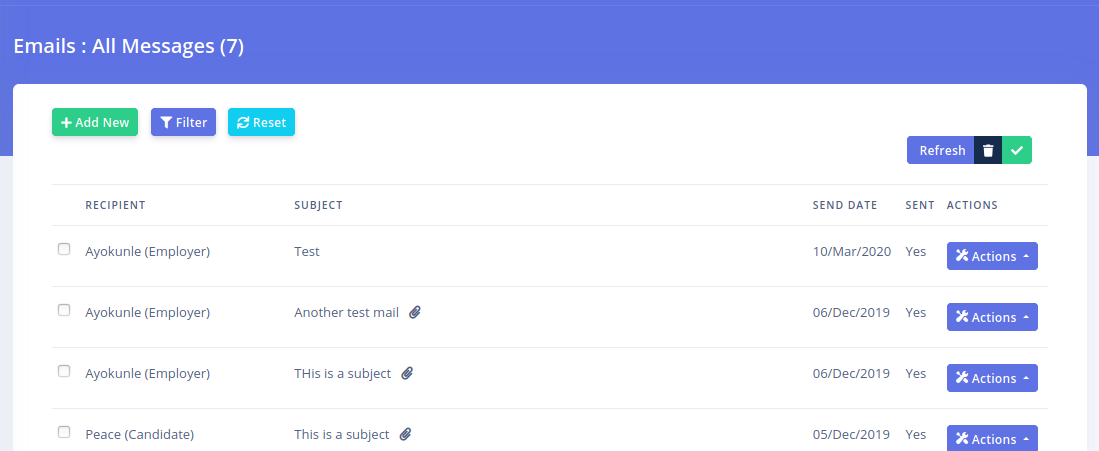
The list contains the following columns
- Recipient: The user who the message was sent to
- Subject: The subject of the message. If you see a
paper clip icon beside the subject, it indicates that the message
contained at least one attachment.
- Send date: The date the message was sent or will be sent.
- Sent: Indicates if the message has been sent or not.
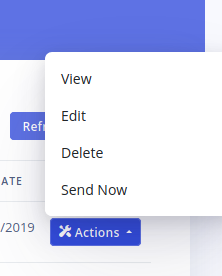
The 'Actions' button beside each message enables you view, edit, delete or send a message.
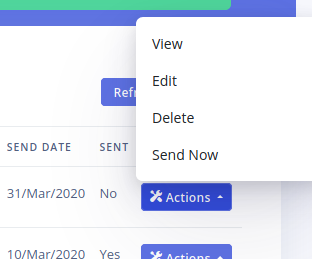
Please note that the 'Edit' and 'Send Now' options
will only be available if the message has not been sent yet. The 'Send
Now' option will send the message immediately irrespective of its send
date.
The 'Filter' option at the top of the list gives you options for filtering the message list
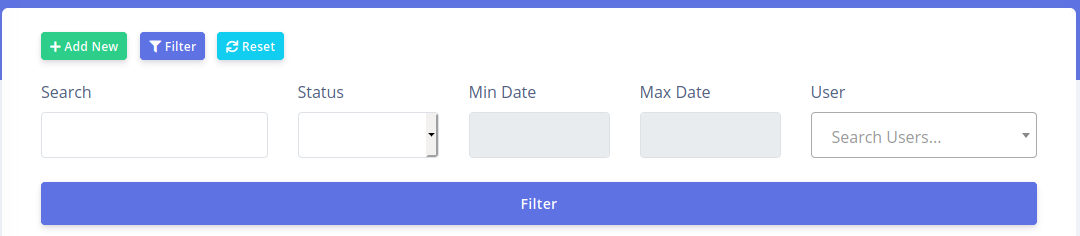
You can search based on recipient's name, message
subject or content. You can filter based on send status, send dates
(min or max) as well as selecting a specify user to filter based on.
Managing Email Resources
The 'Email Resources' feature is designed to make it
easy to reuse common files in messages sent to employers or candidates.
You need to upload these files first before they can be uses in your
emails.
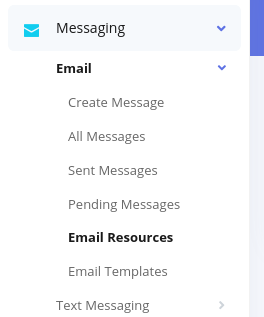
To get started, click on the 'Messaging'-'Email'-'Email Resources' menu option
This brings up the list of resources
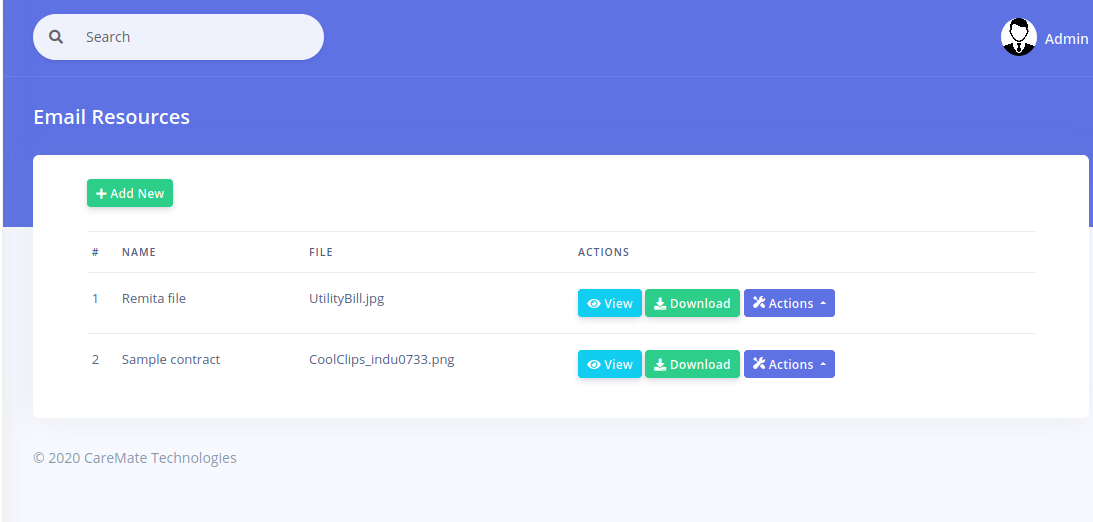
The 'Name' of the resource is the name you choose to
give it for internal reference. The 'File' column lists the name of the
uploaded file. This is the name that will be used when the file is
attached to the email. The 'Search' box at the top can be used to easily
find a particular file.
Under the 'Actions' column are options for Viewing,
Downloading and Managing a resource. Note that you can only View the
file online if it is an image.
Click on the 'Add New' button to create a new resource
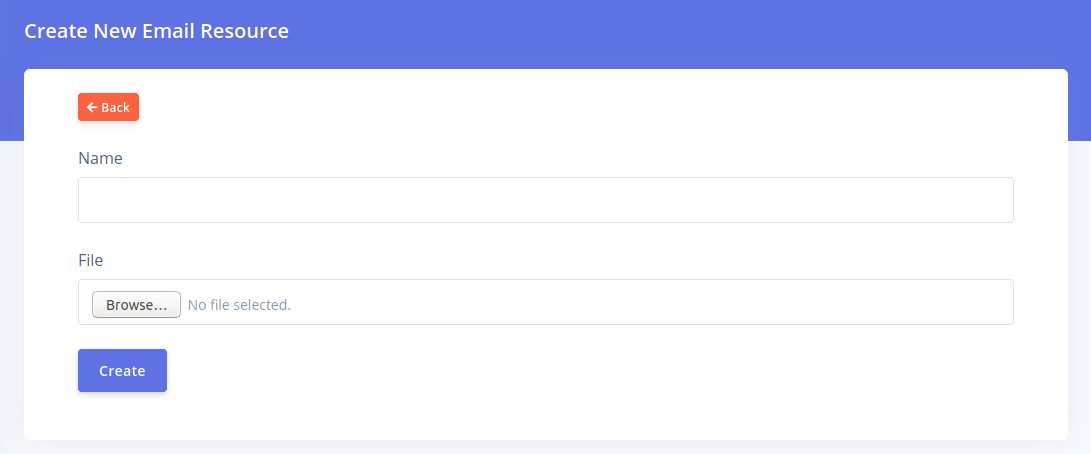
Enter the name of the resource and select the file from your computer. Click on the 'Create' button to add your resource.
Managing Email Templates
Email Templates allow you to create reusable messages that can be easily sent to candidates or employers.
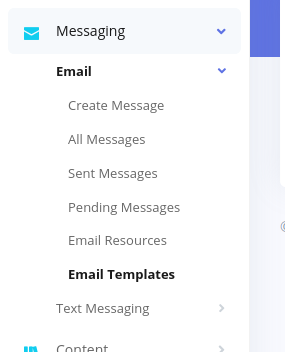
To manage your templates, click on the 'Messaging'-'Emails'-'Email Templates' menu option.
This brings up the list of templates
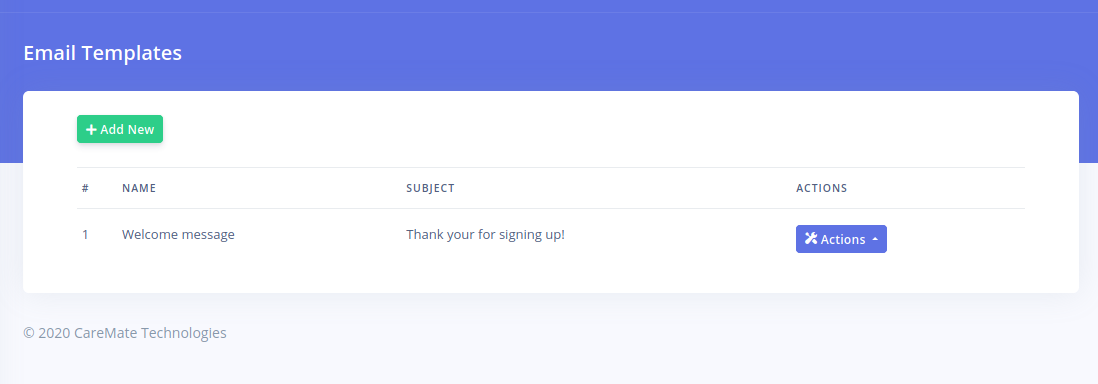
The name is the internal reference used to identify
this template. The subject is the actual email subject loaded on the
email editor. The 'Actions' button gives you options to view, edit and
delete a template.
Please note that the content of email templates can be edited before sending.
To create a new template, click on the 'Add New' button. This brings up the following page
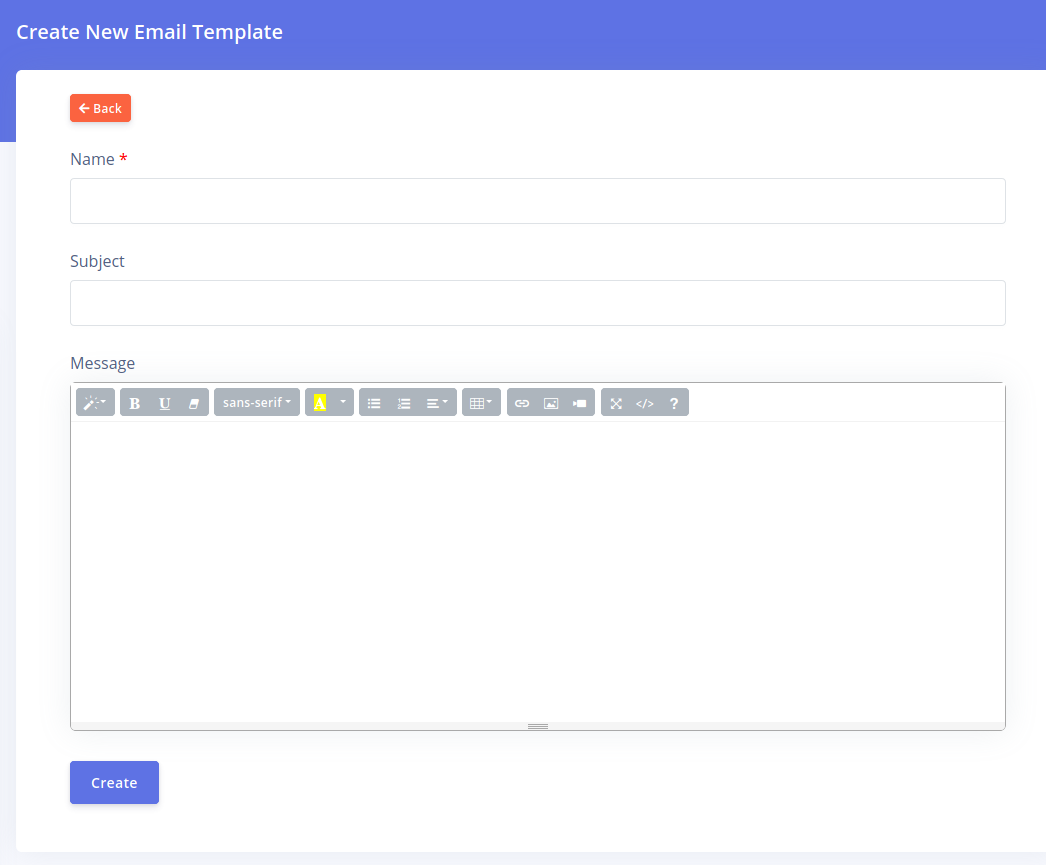
The 'Name' field is for internal identification of
the template. The Subject and Message fields are the main email creation
items. Click on 'Create' once you have composed the message.
Creating Text Messages
CarePro comes with a powerful text messaging feature that enables you send SMS text messages to employers or candidates.
Unlike the Emailing feature which was designed for
sending messages to single users, our Text Messaging feature is designed
for sending bulk messages to multiple candidates or employers.
CarePro supports multiple SMS gateways, you can
configure and enable your gateways of choice and send messages via your
preferred gateway during creation. Please note that you will need to
fund your account with your selected gateway before you can send
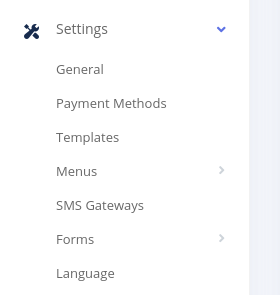
messages. SMS Gateways can be configured on the 'Settings'-'SMS
Gateways' page.
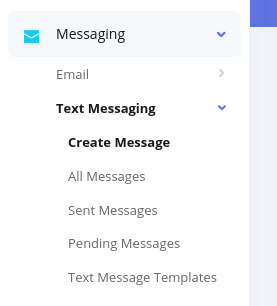
To create a new text message, click on the 'Messaging'-'Text Messages'-'Create Message' menu option
This brings up the message creation page
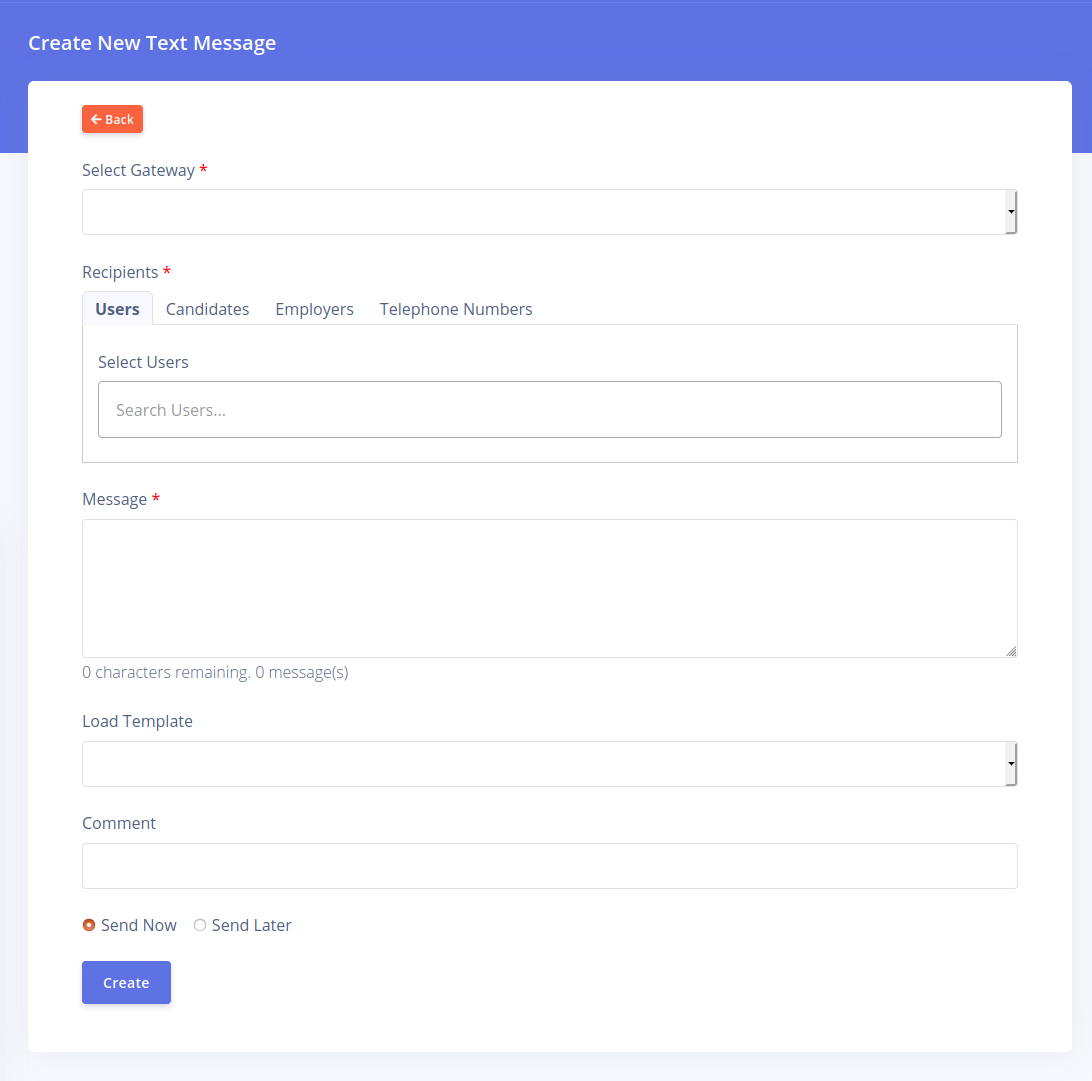
The various sections of the message creation page are explained below:
- Select Gateway: This enables you to select your
preferred gateway from a dropdown list. Please note that your gateway
must be enabled before it can be available on this list. Your selected
gateway will be used for sending this message only.
- Recipients: This section gives you different tabs for specifying who will be receiving this message.
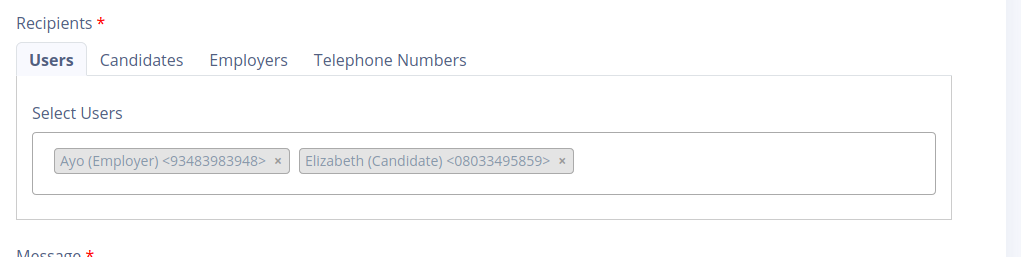
The
'Users' tab allows you to select multiple users. Users can either be
employers or candidates. Start typing the name or email address of a
user and select your preferred option from the list. You can select as
many users as you wish.
The 'Candidates' tab enables you to send to all candidates or to specific categories of candidates.
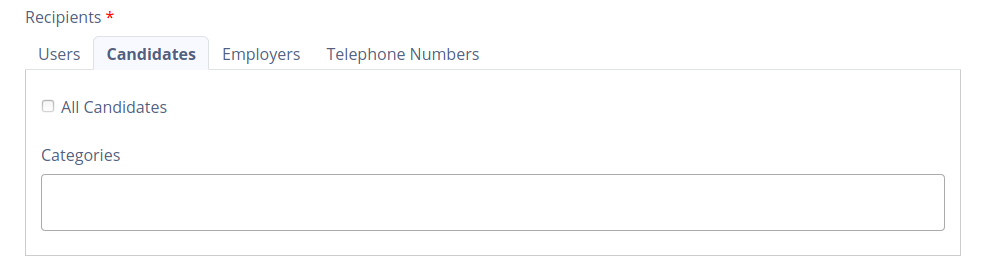
To
send to candidates within a category, start typing the category name in
the 'Categories' dropdown. Select your preferred option from the list.
Select the 'All Candidates' checkbox to send to all candidates on the
system.
The 'Employers' tab allows you to send to all employers

The
'Telephone Numbers' tab allows you to enter in specific telephone
numbers to send messages to. These numbers do not have to belong to any
user on the system.
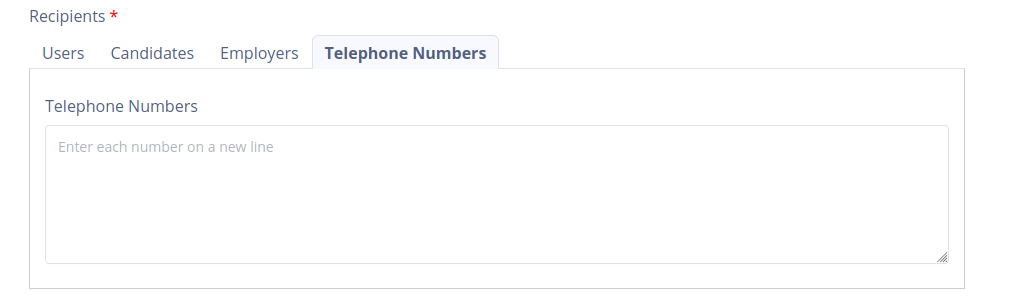
Please note that each telephone number needs to be entered on a new line.
- The 'Message' box is where you type in the actual text message that will be sent
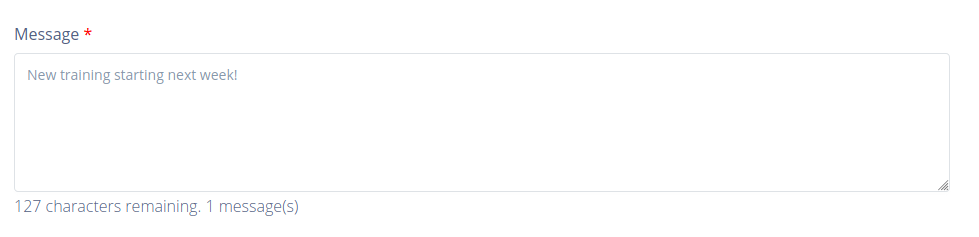
The
character counter beneath the text box tells you how many character
remain for the page you are on. Text messages are divided into multiple
pages of 160 characters each. Note that, depending on your gateway,
composing messages for more than one page will usually attract extra
costs.
- The 'Load Template' box allows you to load a Text message template you have created previously.
- Comment: This field allows you to specify a
comment for this message for internal reference only. The comment is not
attached to the actual message send the recipients.
- The 'Send Now' and 'Send Later' options allows
you to specify if you want the message to go out immediately or at a
specified date respectively. Selecting the 'Send Later' option will
reveal the 'Send Date' box which can be used for selecting a date.
Click on the 'Create' button to create your text message once you are done.
Managing Text Messages
To view your list of existing text messages, click on the 'Messaging'-'Text Messaging'-'All Messages' link
You can also click on the 'Sent Messages' or 'Pending
Messages' option. These will display only messages that have been sent
or those that are scheduled for a future date respectively.
The message list appears as below:
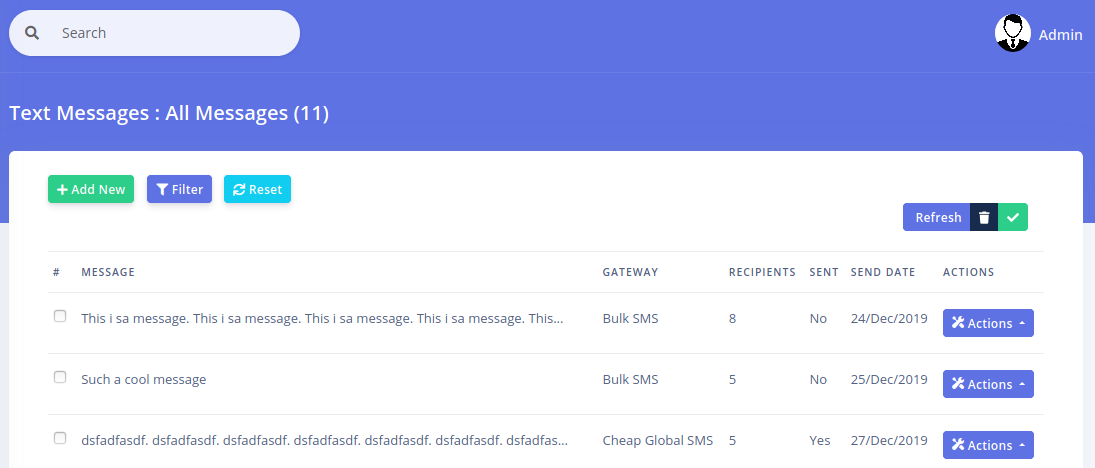
The 'Message' column displays a snippet of the
message. The 'Gateway' column shows the selected gateway for this
message. The Recipients column shows the total number of recipients for
this message. The 'Sent' column indicates if the message has been sent
or not. The 'Send Date' column shows the date the message will be sent
out.
The 'Actions' column is displays options for viewing, editing or deleting a message
There is also a 'Send Now' option that will be
visible if the message has not been sent yet. The 'Edit' option is also
only available for unsent messages.
Clicking the 'Filter' option reveals options for filtering the message list
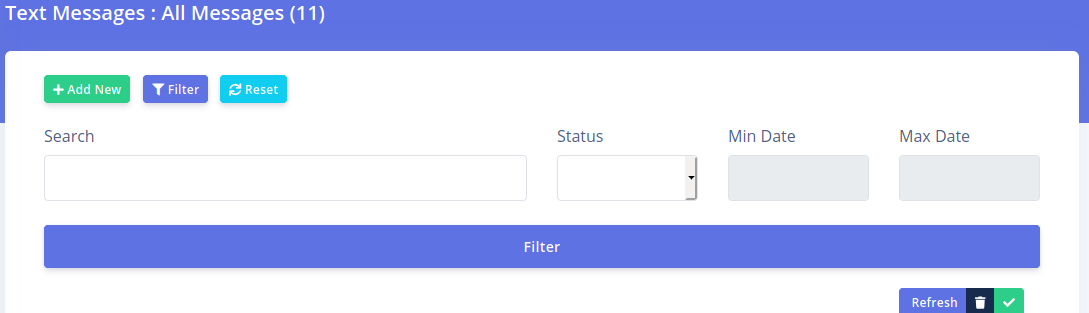
You can filter based on the message content, its sent status and it's send date.
Text Message Templates
You can create templates for your text messages.
These allow you to easily reuse common messages that you would send
often to users.
To Manage text messaging templates, go to 'Messaging'-'Text Messaging'-'Text Message Templates'
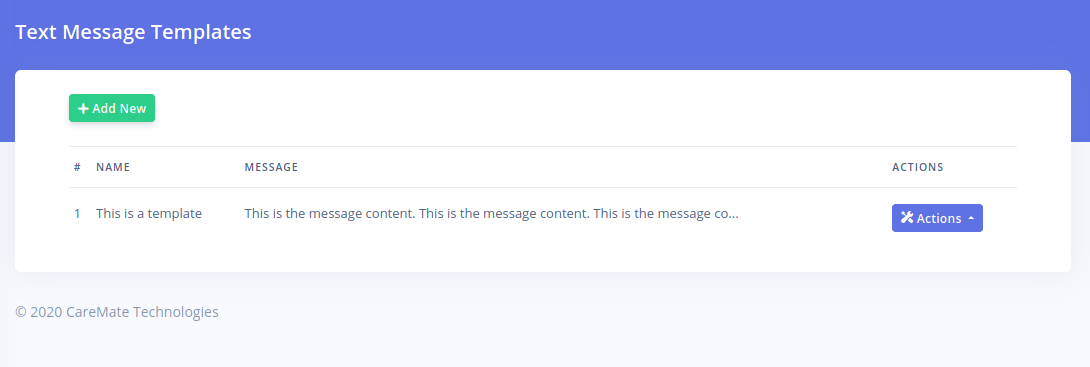
The list displays the name of the template and a
snippet of it's content. The 'Actions' button give you options for
viewing, editing and deleting a template.
Click on the 'Add New' button to create a new template
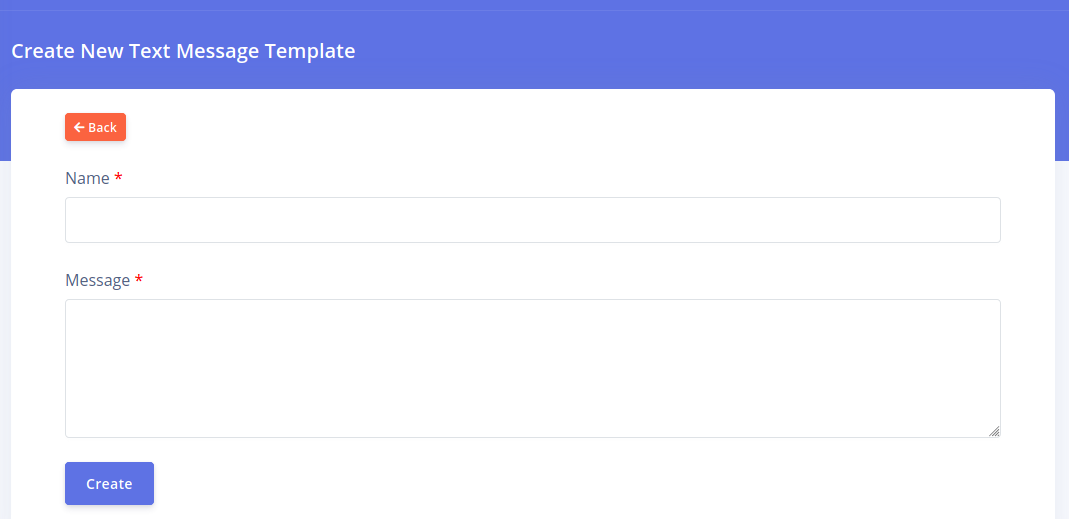
Enter your the Name and the Message. The name is
simply for identification of the template while the message is the
content that is actually loaded into the text message text box during
the creation of a text message.
Note that a text message template content can be modified after it is selected for creating a message.