Settings
The Settings section allows you to control several aspects of your TalentScreen installation.
General Settings
Click on the 'Settings-'General Settings' link to open the General Settings page:
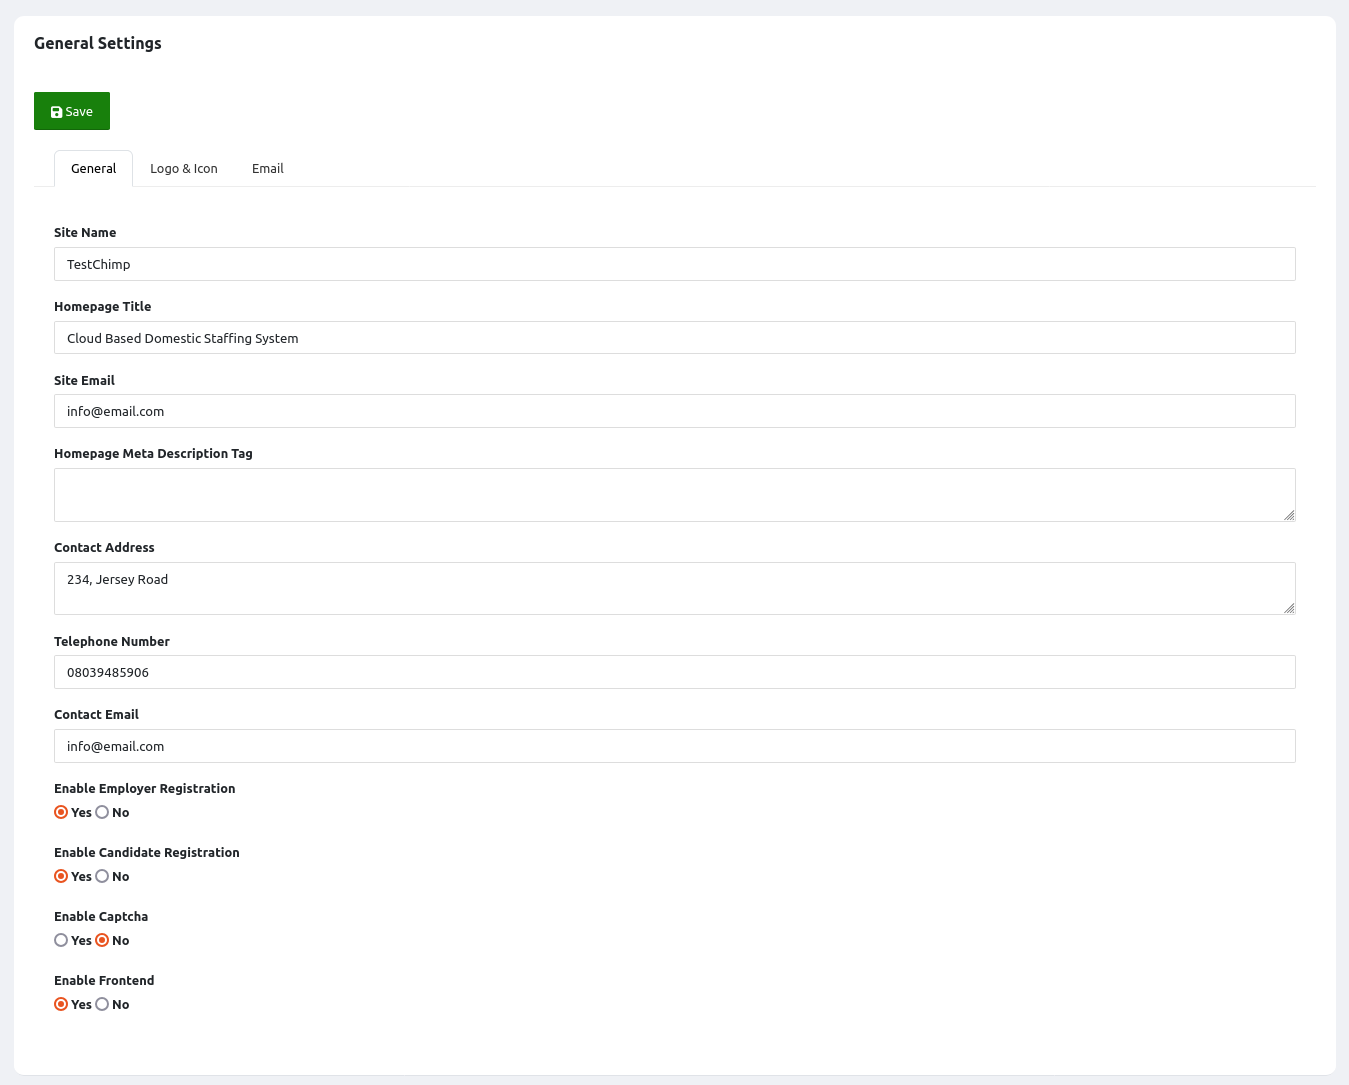
Under the 'General' Tab, you have the following options:
- Site Name:This is the general name of the sides or your company
- Homepage Title: This is the content homepage title tag. This is displayed on browser tabs and search engine result pages.
- Site Email: This is the email address that will be used as the 'From' email when sending out email notifications to your subscribers e.g. subscription expiration reminders
- Homepage Meta Description Tag: This is the content for the Meta Description tag for the homepage. This is used by search engines and may be displayed on search engine result pages.
- Contact Address:specify your contact address here. This will be displayed on the Contact Us page
- Telephone Number:specify your telephone number here. This will be displayed on the Contact Us page
- Contact Email:specify the email address that you would like to make publicly available. This will be displayed on the Contact Us page
- Enable Employer Registration:use this to enable or disable the registration option for employers
- Enable Candidate Registration:use this the disable or enable the registration option for candidates
- Enable Captcha: Use this to enable an image captcha on the registration forms and contact us form
- Enable Frontend: Use this option to disable your front end. This will disable your homepage, articles, blog posts, and Contact Us page. The documentation pages will still be accessible. Users what visit your URL will be redirected to your login page.
The Logo & Icon tabcontains fields for setting the logo and site icon for your installation. The logo is displayed at the top of the site's pages while the icon is displayed on the browser's tab.
The Email Tab allows you to configure the way your installation will send out email. If you set the protocol to 'Mail', the system will use the default Laravel email configuration that is configured in your .env file. If you wish to easily configure SMTP credentials, change the protocol to 'SMTP' and set your credentials. We recommend that you verify the accuracy of your SMTP credentials before saving them in this form. You can use a tool such as:https://smtpserver.com/smtptest
AI Settings
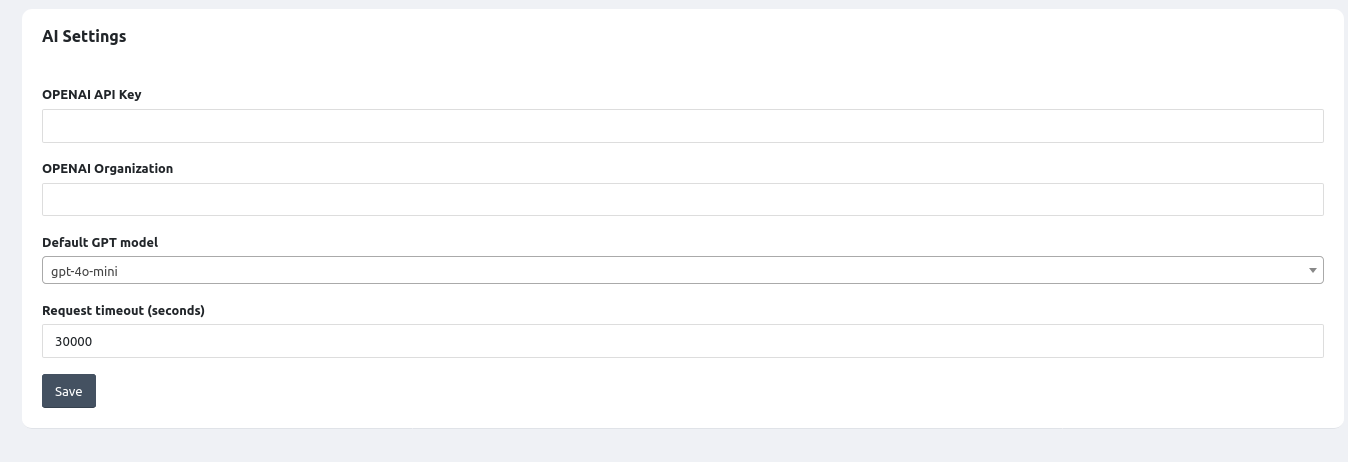
The AI settings page allows you to configure your Open AI credentials. This is necessary for the system to be able to use AI. Get your credentials (API key and organization) from your Open AI account. The GPT model is the model that will be used for requests. We recommend that you use the most capable models and test their output when generating or evaluating tests. The request timeout is how long the system waits for Open AI servers to respond. You can leave the default setting.
Payment Methods
TalentScreen comes with multiple payment gateways that you can use to collect payments from your subscribers. The following gateways are supported out of the box:
- iPay
- iPaymu
- Payfast.co.za
- Paypal
- Paystack
- PayTabs
- Payu
- Payu.in
- Rave by flutterwave
- Stripe
- 2Checkout
TalentScreen also supports multiple currencies so you can collect payments in the preferred currency of your user. You need to configure your desired payment gateway before they can be used. Please ensure you have an active account for the payment gateway you would like to use.
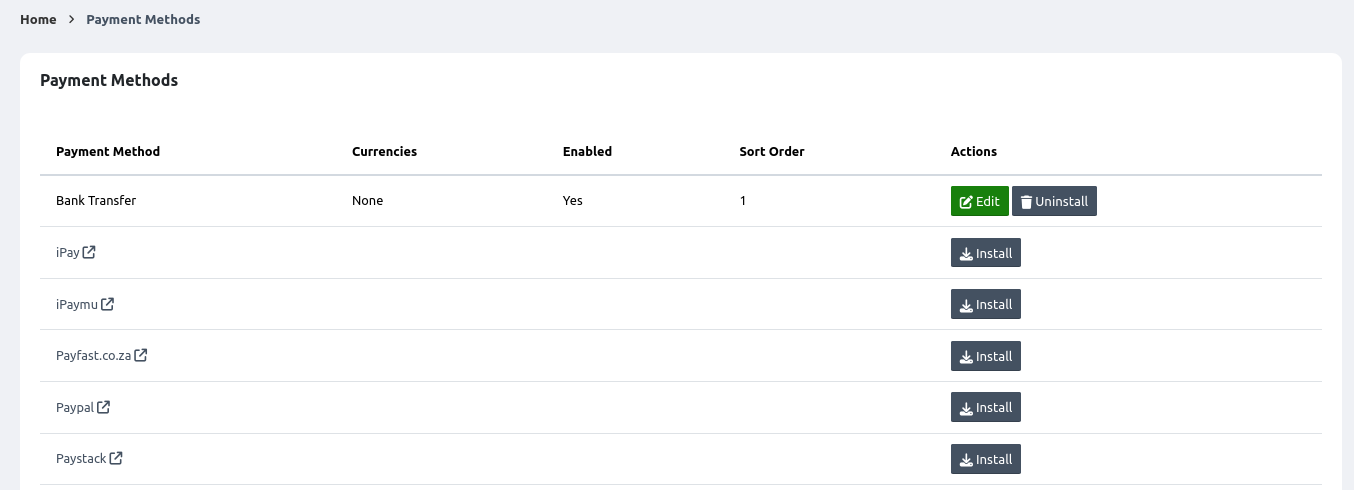
Here you will see the full list of available payment methods. Click on the install button for your preferred payment method. Once installed, click on the edit button for that method.
On the edit page, you can fill in the available fields for that method. You will also notice the 'All Currencies' checkbox. Select this if you want the payment method to be active for all configured currencies. Otherwise, select the currencies you would like this payment gateway to be active for.
To configure your currencies, click on the currencies menu option under the settings menu option.
Currencies
You can install multiple currencies for your installation. Click on the 'Settings'-'Currencies' link to open the currencies management page:
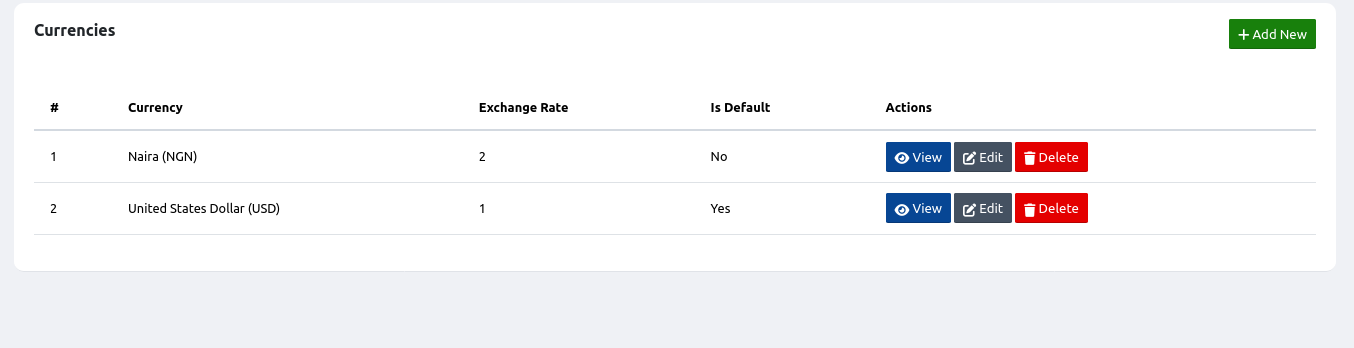
The table lists your currently installed currencies. The system must have one default currency. This is the main currency that others will be converted from. This is the currency with which you price your subscription plans. The exchange rate displays the number that will be multiplied by your subscription fees to produce the new currency. So if, for example, your default currency is USD and you wish to add Euro as a second currency, get the Euro to Dollar exchange rate. If the rate is 1 Euro to 1.08 USD, then set 1.08 as your exchange rate for Euro.
To add a new currency, click on the 'Add New' button
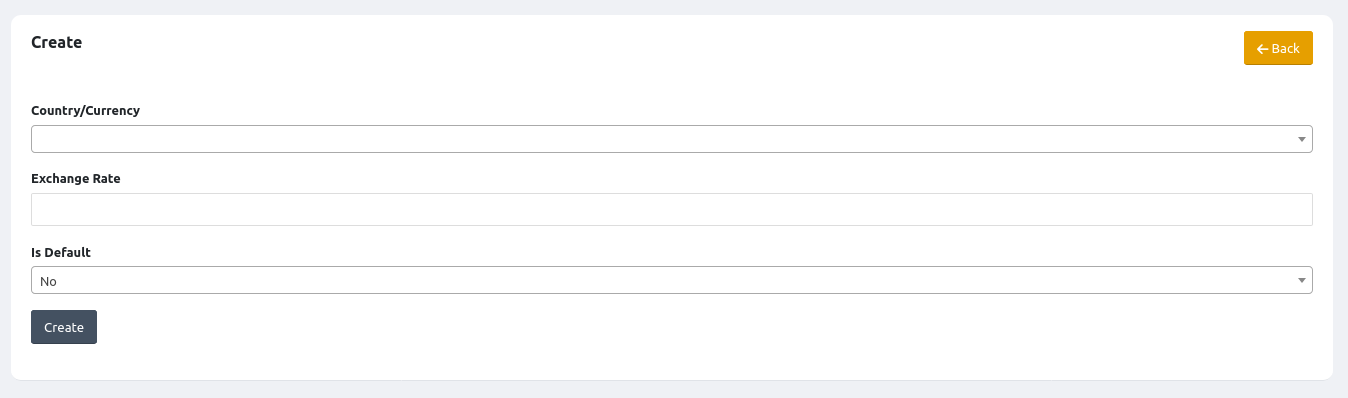
The form provides the following fields:
- Country/Currency: Select the currency you wish to add from the dropdown
- Exchange Rate: Enter your exchange rate. If this is your default currency, set the exchange rate to 1.
- Is Default: Specify if the currency is the default currency or not.
Language
TalentScreen supports 25 languages out of the box! In order to change the system language, go to 'Settings'-'Language'. Select your new language from the dropdown and click 'Save'

Theme
TalentScreen supports a theme-based layout for your front end. You can install new themes by uploading them to the public/templates directory. To customize your theme and activate an installed theme, click on the 'Settings'-'Theme' link: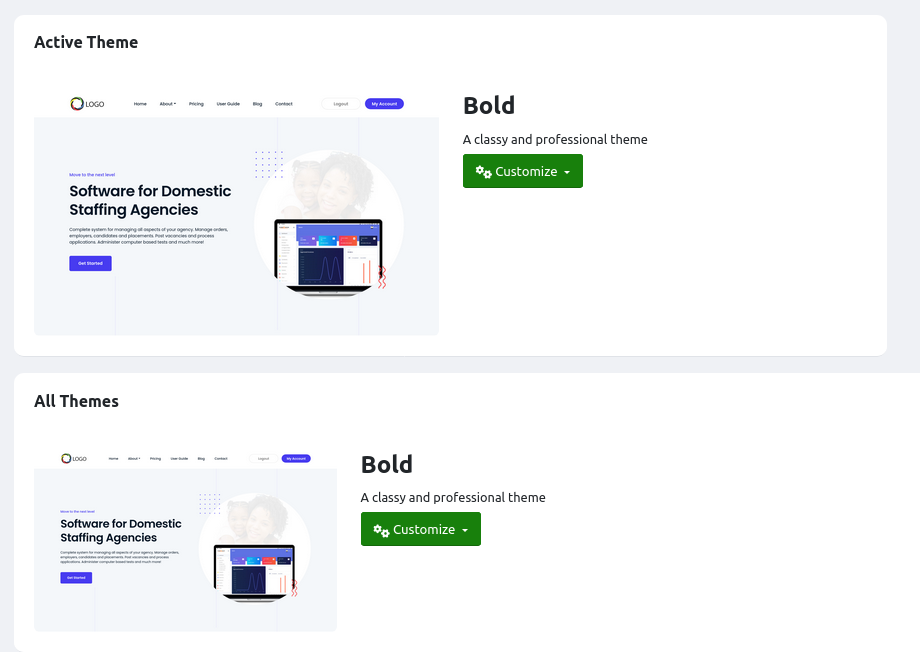
For any theme, you have the option to customize both the settings, which are the text and images of the theme as well as the basic colors used by that theme. The active theme is displayed at the top. Click on the customize button and select either the 'Settings' or the 'Colors' option.
Click on the 'Customize'-'Settings' option for a theme. This will lead to the theme customization page:
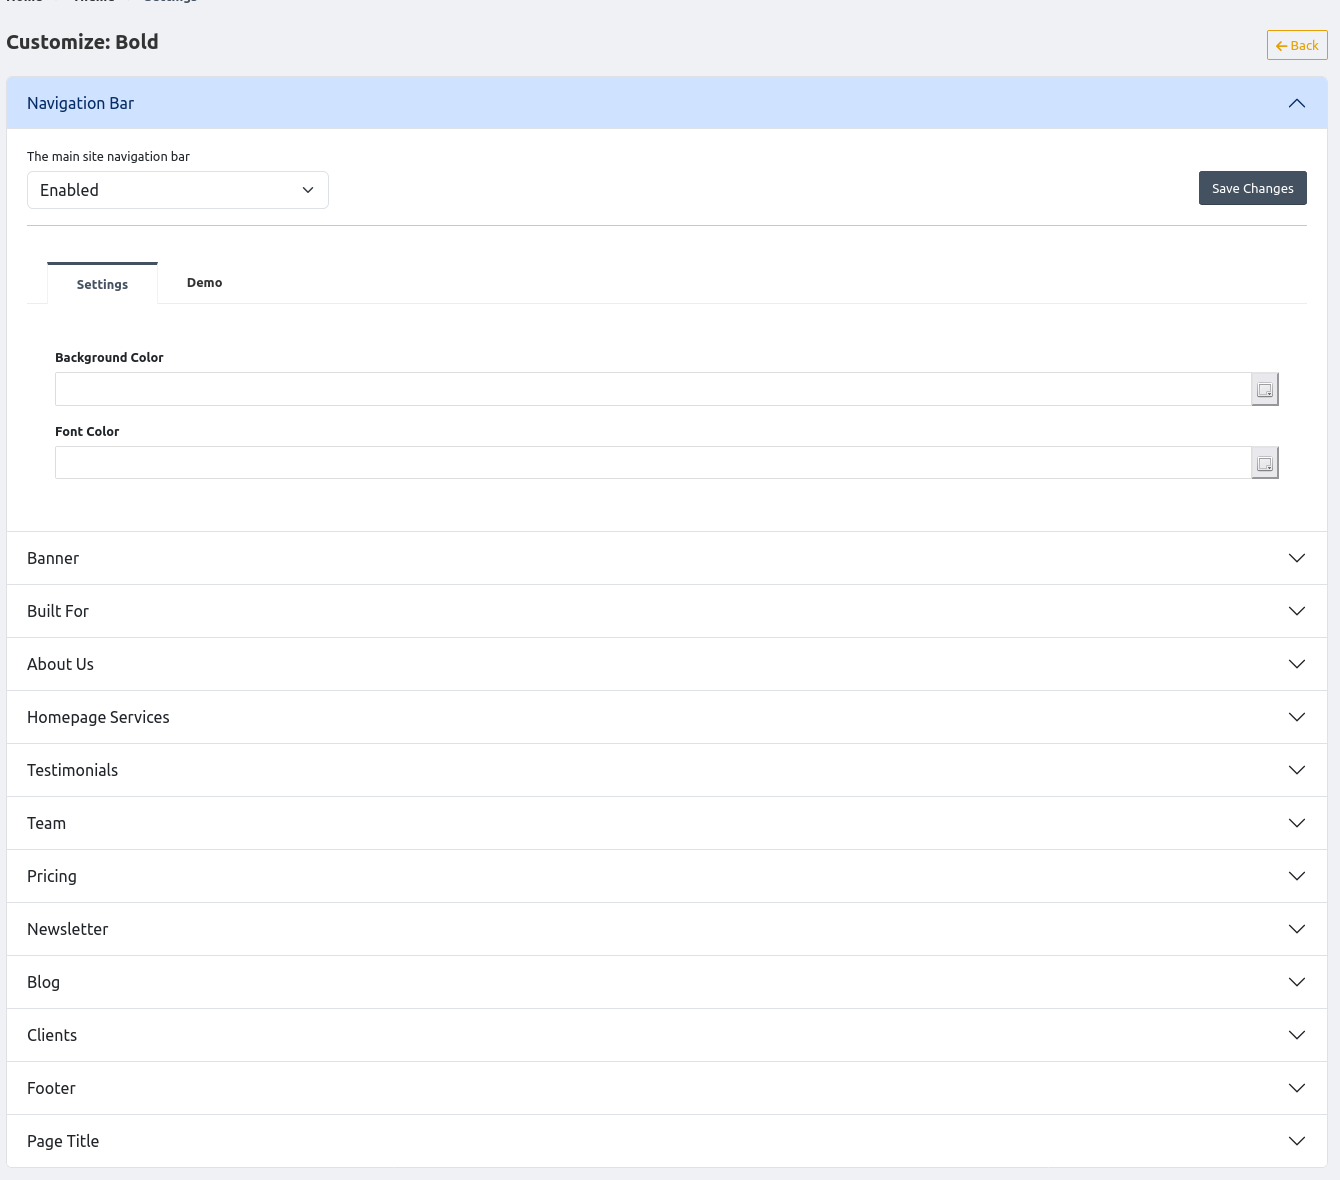
The settings customization page contains multiple collapsible widgets that each control a specific aspect of them. Open a widget, make your changes, and then click on the 'Save Changes' button for that section to apply it.
The 'Colors' option for a theme allows you to change the main colors used by the theme. This includes elements like buttons, backgrounds, etc. Click on the 'Customize'-'Colors' option for a theme. This will lead to the colors customization page:
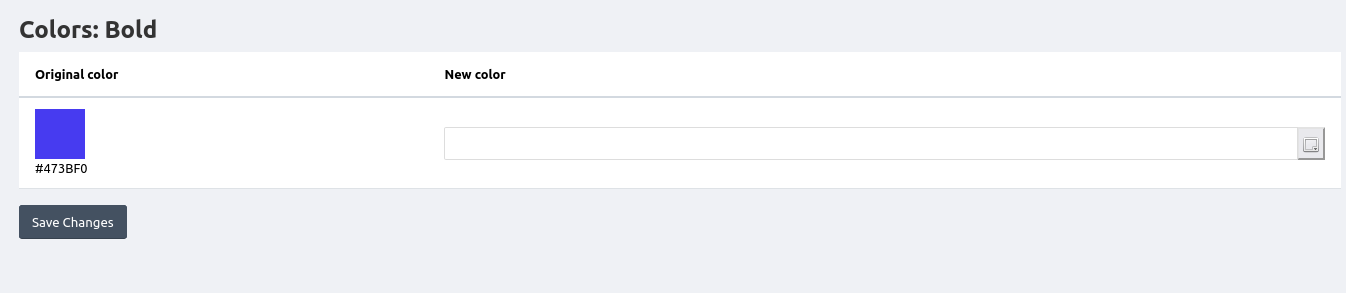
The 'Original Color' shows the currently used color. You can change this by selecting a color from the 'New color' field using the color picker. If no color is set, the original will be used.
Header & Footer Menus
The header and footer menu features allow you to configure the links that are at the top and bottom of your site's frontend pages. Clicking the 'Settings'-'Header menu' link will lead to a page like shown below
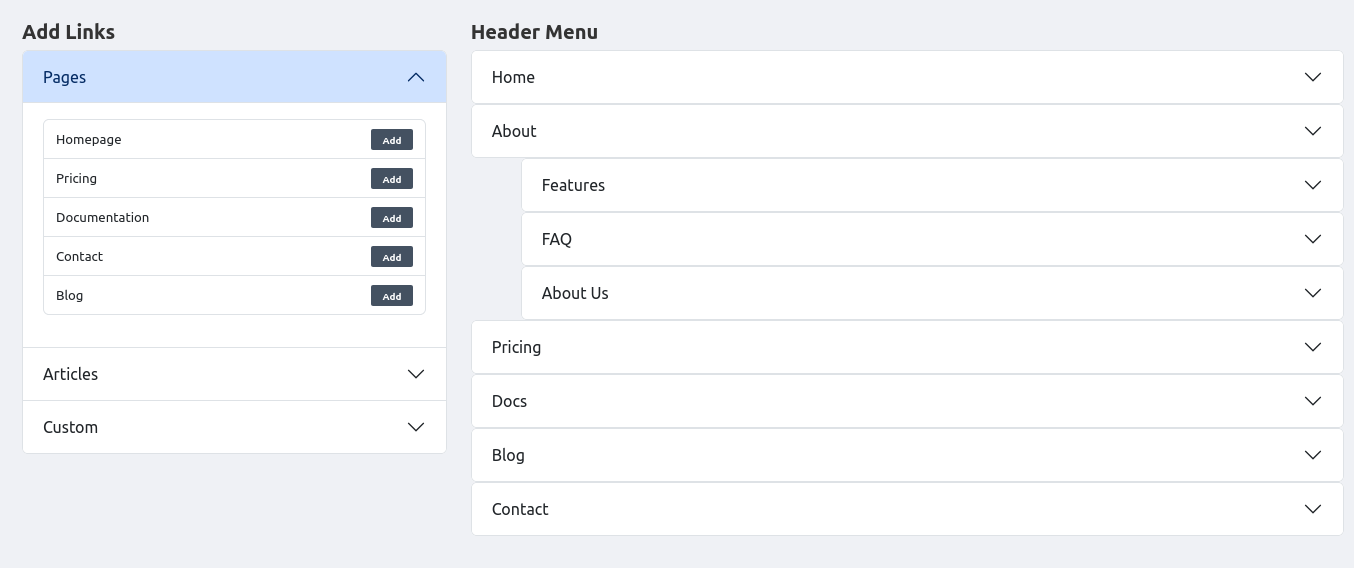
On the left-hand side, you will see the options of different pages that you can choose from.The pages are grouped into categories (Pages, Articles, Custom). The 'Pages' link allows you to select specific fixed pages. The 'Articles' link will enable you to choose an article. The custom box allows you to add a custom link anywhere on the site or outside the site.
The footer menu setup page is identical the the header menu page.