Invoices

Creating Invoices

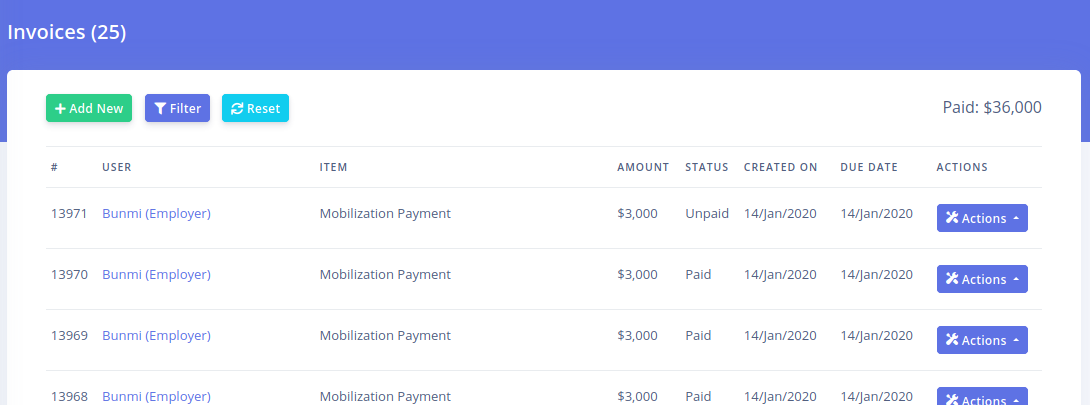
CarePro comes with a powerful invoicing feature.

Invoices can be paid for online or approved manually from the backend.

To create an invoice, click on the 'Invoices'-'Create Invoice' link.


The invoice creation page will come up as below:

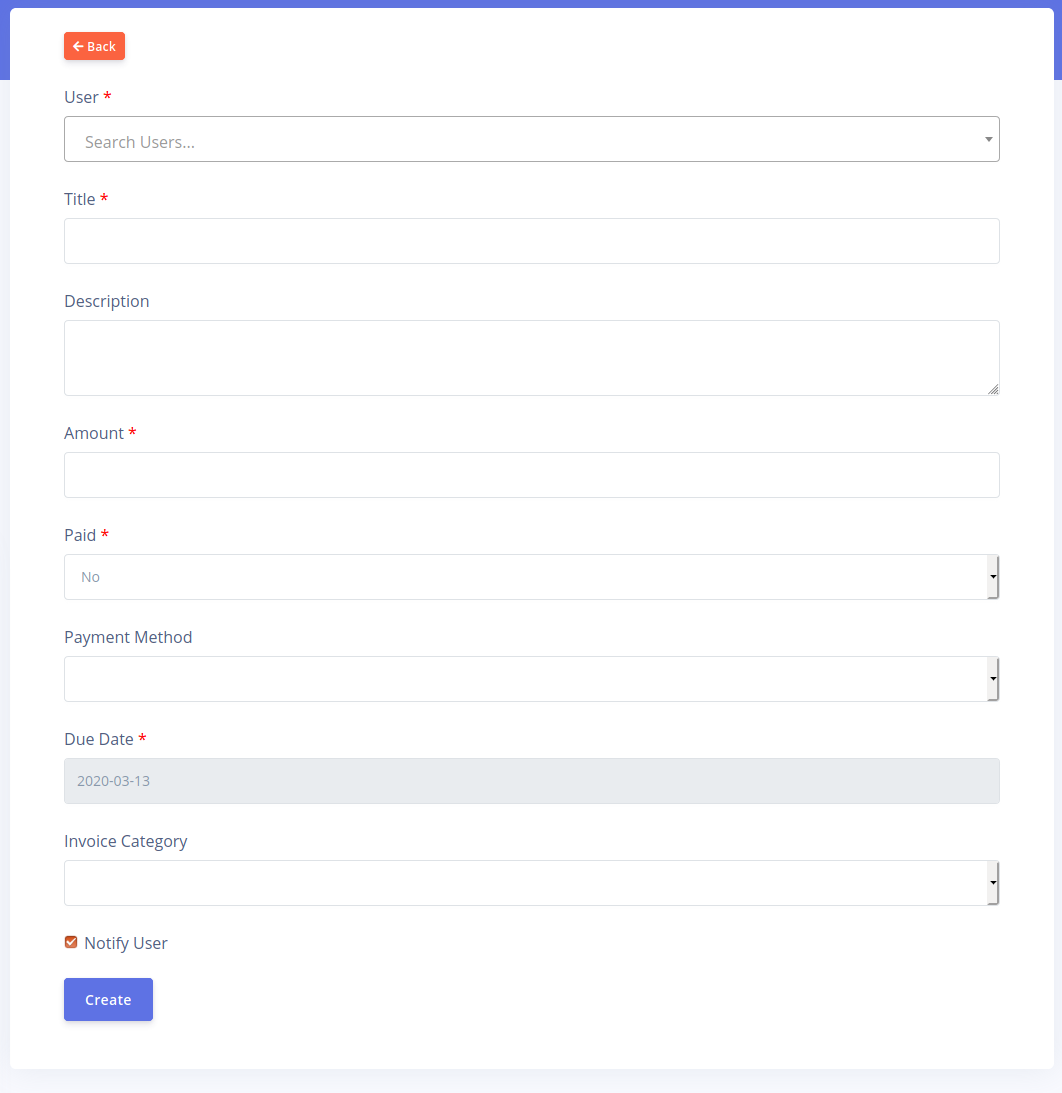
The invoice creation fields are described below:

  1. User: Invoices can be created for either employers or candidates. Use this field to search for an existing user as the recipient for the invoice.
  2. Title: Enter in the main title for the invoice e.g. 'Mobilization Payment'.
  3. Description: Enter in the details of what this invoice is for e.g. 'Payment for mobilization of candidates for interview'. This field is optional.
  4. Amount: Enter in the amount that is to be charged. This field accepts numbers and decimal points only.
  5. Paid: Specify if the invoice has been paid for already or not.
  6. Payment Method: If the invoice has been paid for already, you can specify the payment method used to make the payment.
  7. Due Date: Specify the due date for the invoice.
  8. Invoice Category: Specify what category this invoice belongs to. This is optional but helps you organize your invoices.
  9. Notify user: Select this if you wish for the user to get notified once the invoice is create. If the invoice has not been paid for, they will also receive a link they can use to make payment for the invoice.

Click on the 'Create' button once you have filled your form.


Managing Invoices

To view the list of existing invoice, click on the 'View Invoices' link on the menu

The invoice list page will appear as below:


The buttons above the list allow you to create a new invoice, filter the list or reset it respectively.

The filter button opens a panel that gives you different options for filtering your list


You can search for invoices based on users, title or description. You can also filter based on payment status and dates. Finally, you can view all invoices within a certain category.


Approving Invoices

If you wish to change the status of an invoice from 'Unpaid' to 'Paid', the recommended way is to use the invoice approval feature.

Clicking on the 'Actions' button on the invoice list will reveal the 'Approve' button


When you click on the 'Approve' button, the user will get an email notification informing them that their invoice has been approved. If however you simply edit an invoice and change it's payment status, this email will not be sent.


Invoice Categories

You can organize your invoices into categories. This makes it easy for you to sort our your invoices.

To view existing categories or create new ones, click on the 'Categories' link

This brings up the invoice category listing page

The 'Actions' button gives you the options to view. edit and delete a category. Deleting a category does not delete the invoices associated with it.

The category listing page also displays the count of invoices in each category.
2024 © Intermatics Software Services.