Managing Assessments
Theassessment page is the first page that employers will meet when they are logged into their accounts.
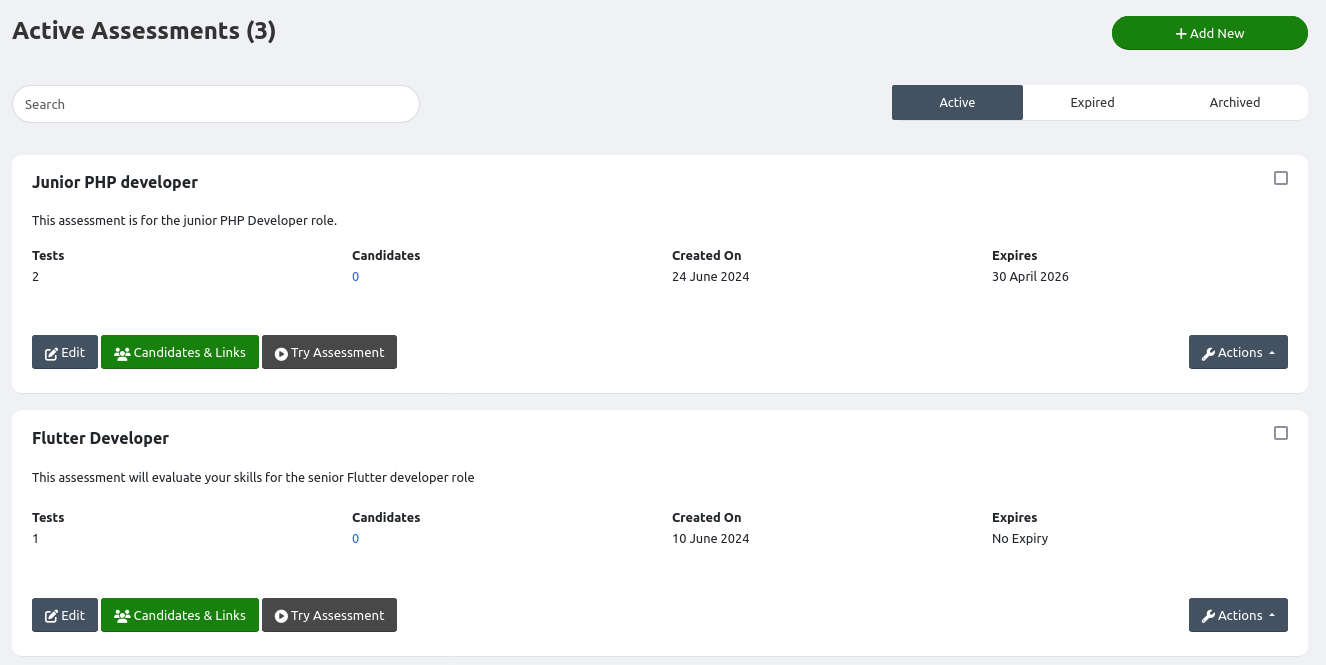
The list displays 3 categories of assessments: Active, Expired, and Archived. Active assessments are assessments that are unarchived and have a future expiration date. Expired assessments are assessments that are unarchived but have a past expiration date. Archived assessments are those that have been marked as archived.
To create a new assessment, click on the 'Add New' button
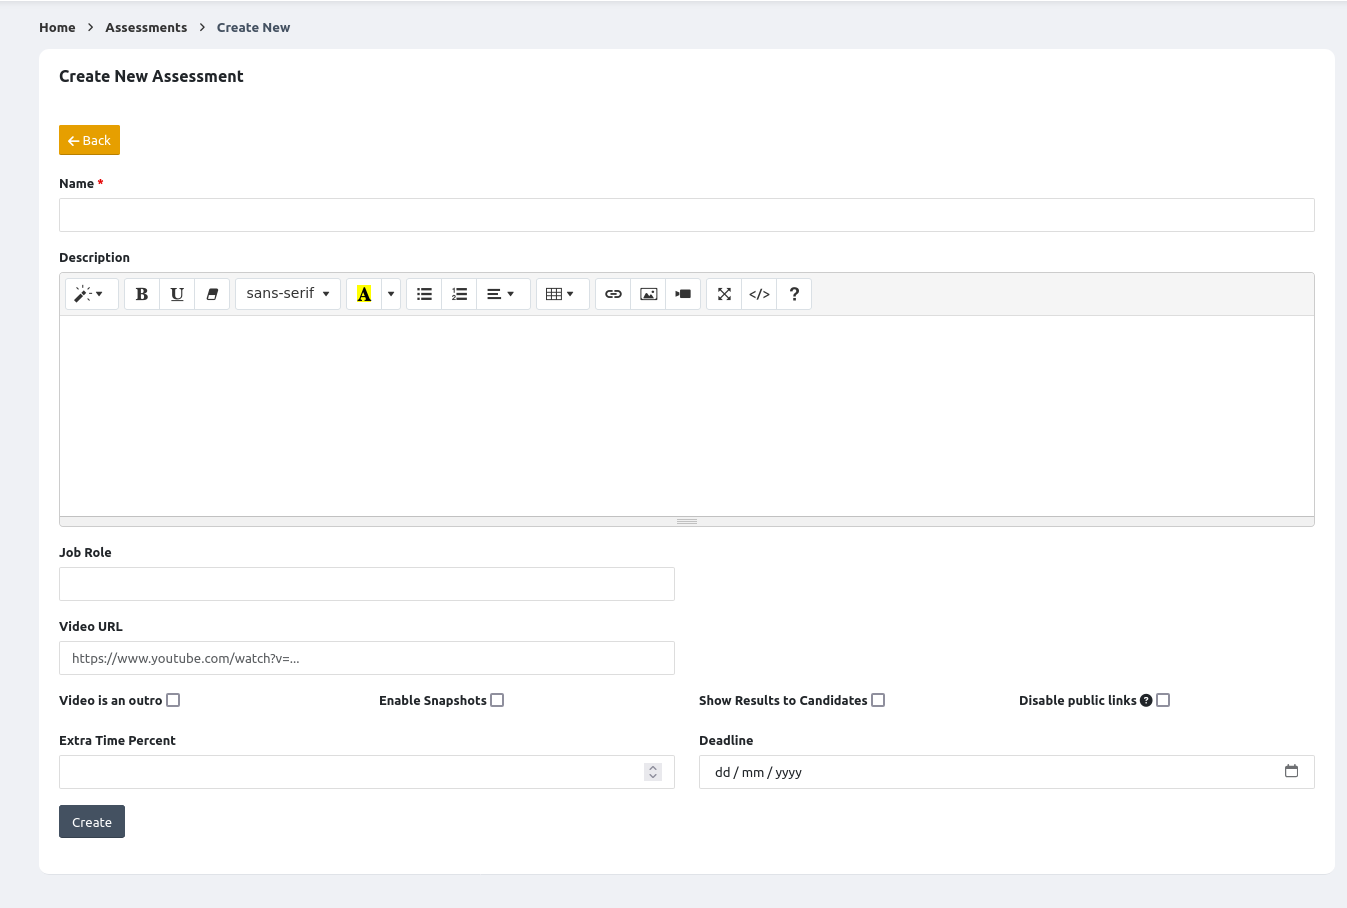
The following fields are displayed:
- Name: The name of the assessment
- Description: The description of the assessment. This will be displayed to the candidate when they start the assessment.
- Job role: The job role you are testing for
- Video URL: This is an optional video you can embed that will be displayed to candidates before or after they take the assessment
- Video is an outro: Indicates if the video should be displayed after the assessment if completed
- Enable Snapshots: This indicates if you would like to take periodic snapshots of the candidate via their webcam while they take the tests in the assessment.
- Show Results to Candidates: Indicate if you would like to display the candidate's status (passed or failed) for each assessment test at the end of the assessment.
- Disable public links: Indicates if you wish to disable public links. This means that only candidates you invite will be able to take the assessment.
- Extra Time Percent: Use this field to add extra time to all tests in the assessment. The extra time will be a percentage of the configured time for that test.
- Deadline: Specify the deadline after which no candidates will be able to take the assessment again. You can leave thisblank if you do not wish for the assessment to ever expire.
After an assessment has been created, you will be redirected to the page for adding tests to it. This is actually the assessment edit page so you can get to this page at any time by editing the assessment.
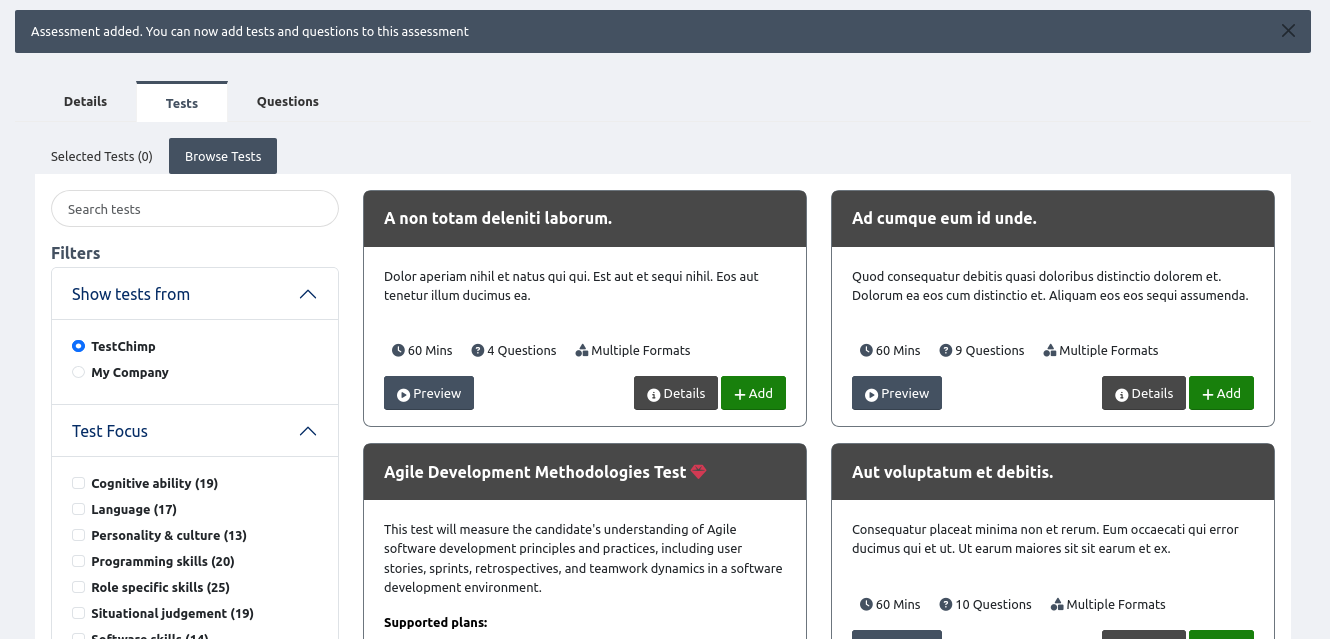
You can browse all tests available in the library or custom tests created for your company. Click on the 'Add' button to add the test to your assessment. The test will then be listed in the 'Selected Tests' tab. In the 'Selected Tests' tab, you can drag and drop tests to rearrange the order they will be presented to your candidates.
Similarly, click on the 'Questions' tab to add preassessment questions to the assessment.
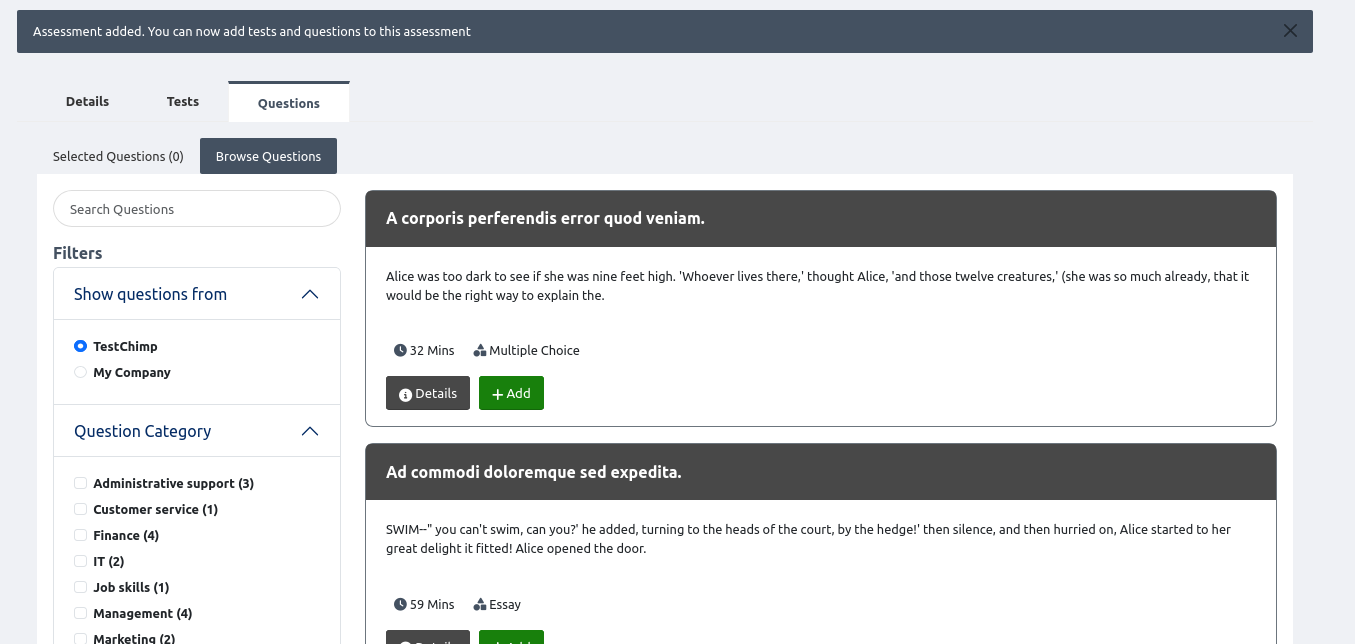
You can browse questions from both the main library and the company library. Questions can also be re-arranged with drag and drop.
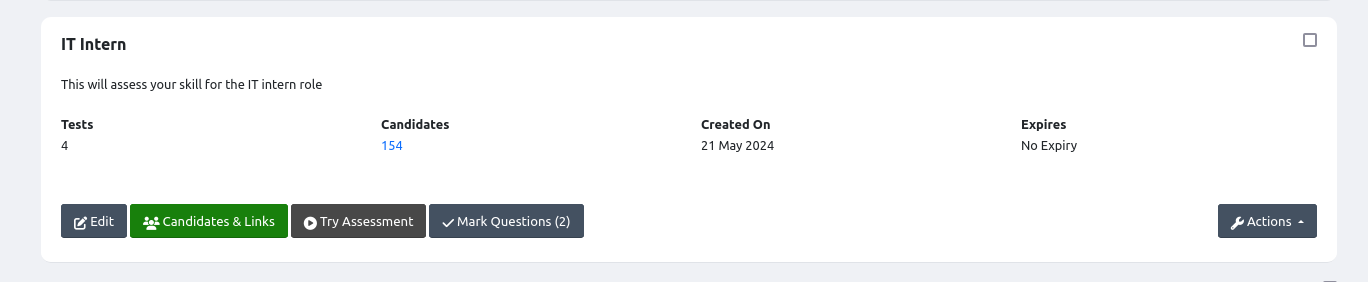
On the Assessment listing page,beneath the title for each assessment, you will see these buttons:
- Edit: Allows you to edit an assessment
- Candidates and Links: Allows you to invite candidates, view existing candidates and results, and manage public links for the assessment.
- Try Assessment: This allows you to try out the assessment just like a candidate would.
The 'Actions' button for each assessment provides links to view, clone, manage access, archive and delete the assessment.
Candidates and Links
Clicking on the 'Candidates & LInks' button will lead to a page like below:

There are three major tabs on the page:
- Candidates: These are all the candidates who have signed up for the assessment
- Invitees: These are the candidates you have invited. These are only email addresses and names (optional).
- Shortlist: These are candidates you have shortlisted
Under the 'Candidates' tab, there are buttons to Filter or Export candidates. The filter button will allow you to sort your candidates based on various criteria. The export button will download the candidates that match your current filter (if any) into an excel file.
On the candidate display table, you can see the progress of the candidates. The actions button allows you to view the candidate's details (assessment performance, question answers, webcam snapshots, and biodata), shortlist the candidate, send a message, or remove the candidate from the assessment. Removing the candidate will not delete their account on the platform.
Inviting candidates
Clicking on the 'Invitees' tab will bring open the list of invited candidates. In this tab, there is a box with three tabs:
- Single: Allows you to invite a single candidate using their email and name (optional). You can also set the expiration date for the invitation
- Multiple: Allows you to invite multiple candidates at once using their email addresses only. Enter each email on a new line or separate them with commas. Please do not mix both formats
- Link: This tab enables you to create public links that anyone can use to take the assessment. You can create as many links as you want and disable or reanable them as needed.
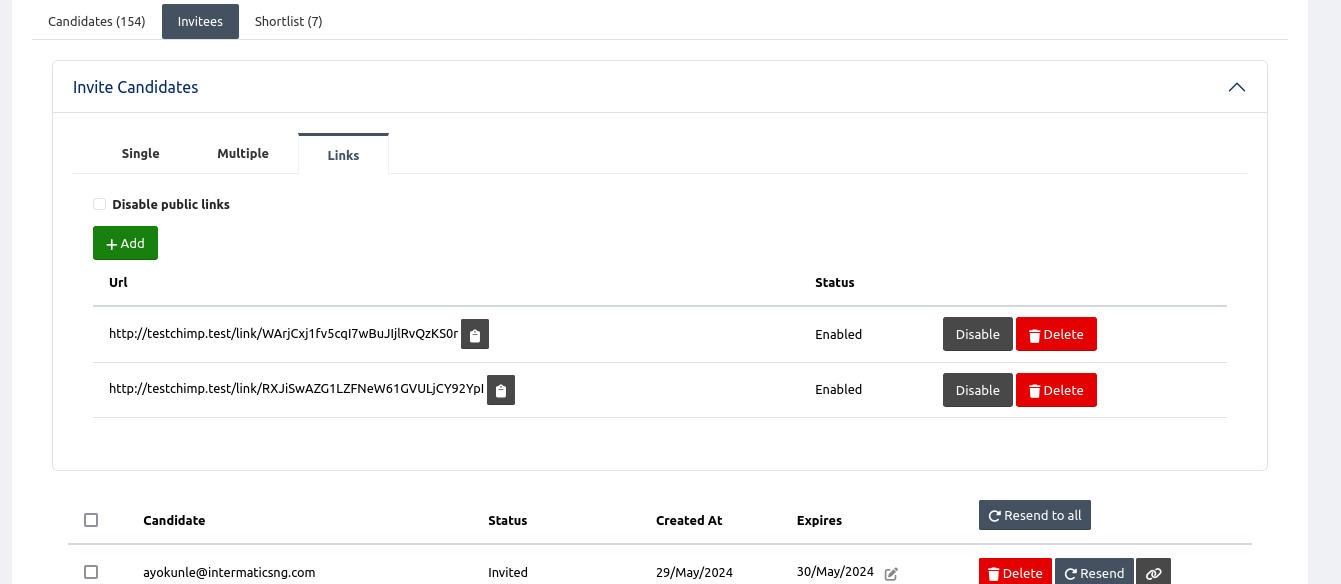
The invitation page allows you to resend the invitation email to some or all of your invited candidates. You can also copy the invitation link for a specific candidate.
Candidate Shortlist
The candidate shortlist page allows you to shortlist your preferred candidates for further action.
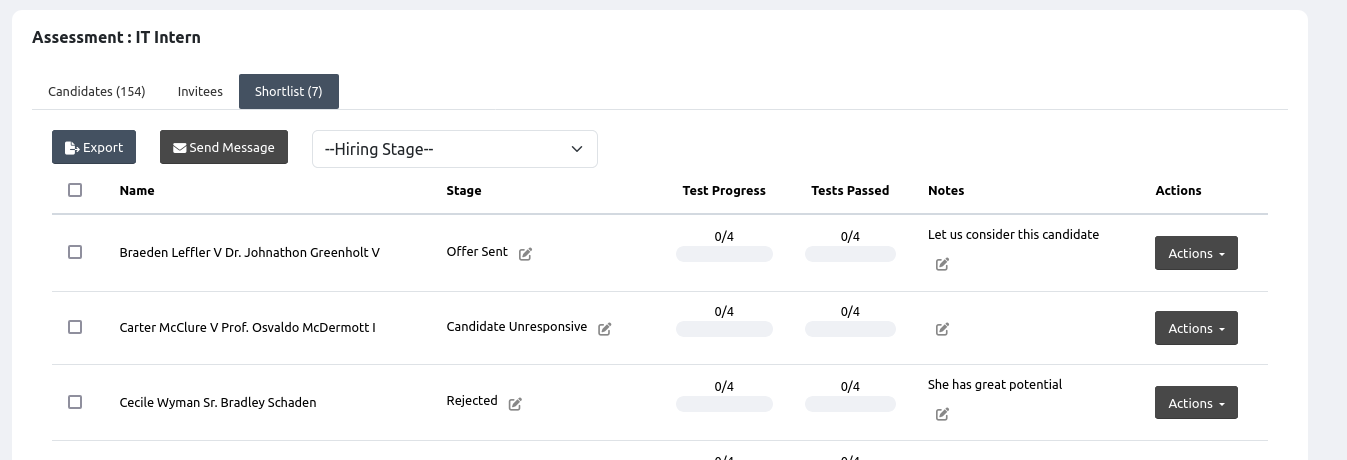
Each candidate in your shortlist has a hiring stage. Click on the pencil icon in that column to set the stage. You can send a message to all or individual candidates. You can also export the candidates. You can set internal notes for each candidate.
Marking Questions
If your assessment contains tests that have questions that require manual marking, you will see a 'Mark Questions' box for that assessment on the listing page:
The button displays the total number of pending responses. Clicking the button will lead to the following page.
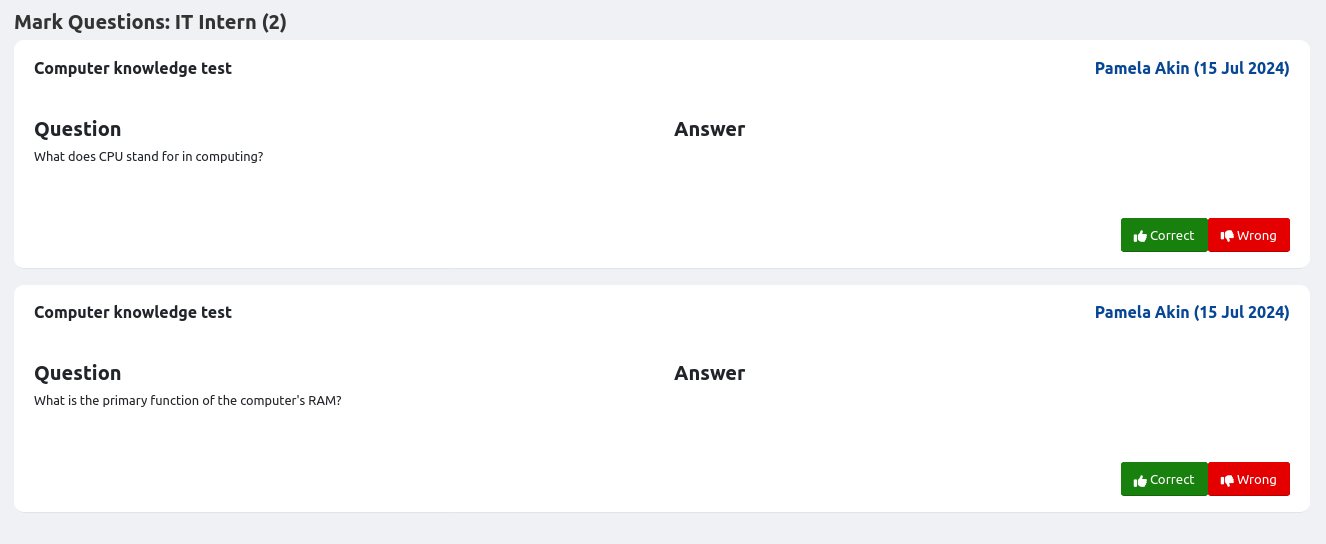
Each listing displays the test name, the question and the candidate's response. Simply click 'Correct' or 'Wrong' for each question response to mark it.