General Settings
To set General Settings for your portal, go to 'Settings'-'General'. These settings are listed under the 'General' tab on the 'General Settings' page.
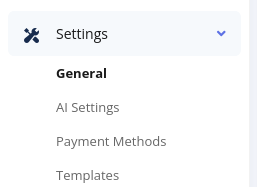
Each field listed on this page is described below:
- Site Name: This serves as the name of the site. It usually corresponds to your company name.
- Homepage Title: This is the browser title of the
homepage. This title is very important for search engine optimization.
You would usually enter text that briefly lists your main services e.g.
'Nanny services, Elderly care, Baby sitters in Lagos'
- Homepage Meta Description Tag: This field is
very useful for search engine optimization. It is usually the text that
search engines display when your website appears in search engine result
pages. Write a short paragraph that briefly describes your services. We
recommend you keep the length between 50160 characters.
- Site Email: This is the
default email address that the system uses to send out emails. It is not
displayed on users on the frontend but they will see it if they receive
an email from the portal. Ensure you use a functional email otherwise
you may not receive replies from users.
- Contact Address: Enter your company's contact address here. This is displayed on the 'Contact Us' page of the portal.
- Telephone number: Enter your company's telephone number here. This is displayed on the 'Contact Us' page of the website.
- Contact Email: This should contain your company's contact email. This is displayed on the 'Contact Us' page of the website.
- Enable Employer Registration: Specify if you
want employers to be able to register on the site. If you disable this,
you can still manually create employers from the backend.
- Enable Candidate Registration: Specify if you want candidates to be able to register on the site. If you
disable this, you can still manually create candidates from the backend.
- Header Scripts: In this
box, you can place code that should go to the 'Head' section of all your
site's frontend pages. Such code could include Google analytics code,
Live chat code, Facebook advertising pixel e.t.c
- Footer Scripts: In this box you can place code that should go before the closing tag of all your site's pages.
- Currency Symbol: Enter in
the currency symbol to be used on your site. Whatever symbol you enter
here will be prepended to all prices that are displayed on your portal.
- Currency Name (plural): Enter the name of your currency in plural form and lowercase e.g. dollars, pounds, rand, naira etc.
- Disqus Shortcode: This field is for enabling
comments in your blog. If you wish to enable commenting, you'll need to
get a shortname from https://disqus.com
- Currency Code: Enter the 3 character currency code for your currency in capital letters e.g. USD, NGN, GBP etc.
- Verify Employer Email?: This determines if
employers will need to verify their email addresses before they can
create accounts on the portal.
- Verify Candidate Email?: This determines if
candidates need to verify their email addresses before they can create
accounts on the platform.
- Enable CAPTCHA for employer registration?: If enabled, this prevents registration spam by requiring employers to fill in characters displayed on an image before they can register.
- Enable CAPTCHA for candidate registration?: If enabled, this prevents registration spam by requiring candidates to fill in characters displayed on an image before they can register.
Order Settings
Before you start accepting orders on your CarePro
portal, you should setup some basic order settings. These define a few
options for how orders should be placed on your site.
The order settings are visible on the 'Order' tab of the 'General Settings page
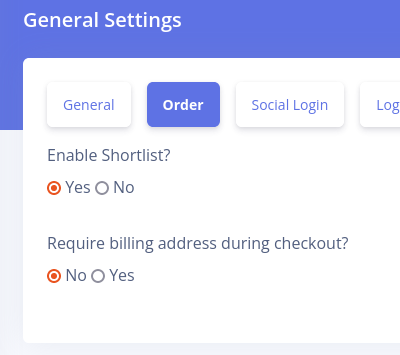
Each option presented in this page is explained below:
-
Enable Shortlist: This specifies if you
would like Employers to be able to shortlist candidates while they are
placing their orders. If you set this to 'No' , then the shortlist
option will not be visible on the site. However, you will still be able
shortlist candidates if you are creating orders manually from the
backend.
-
Require billing address during checkout:
This specifies if you would like to force users to submit their billing
addresses during checkout. This is needed if you are using certain
payment gateways that may require it.
Candidate Profile Form
By default, the registration form for candidates appears as below:
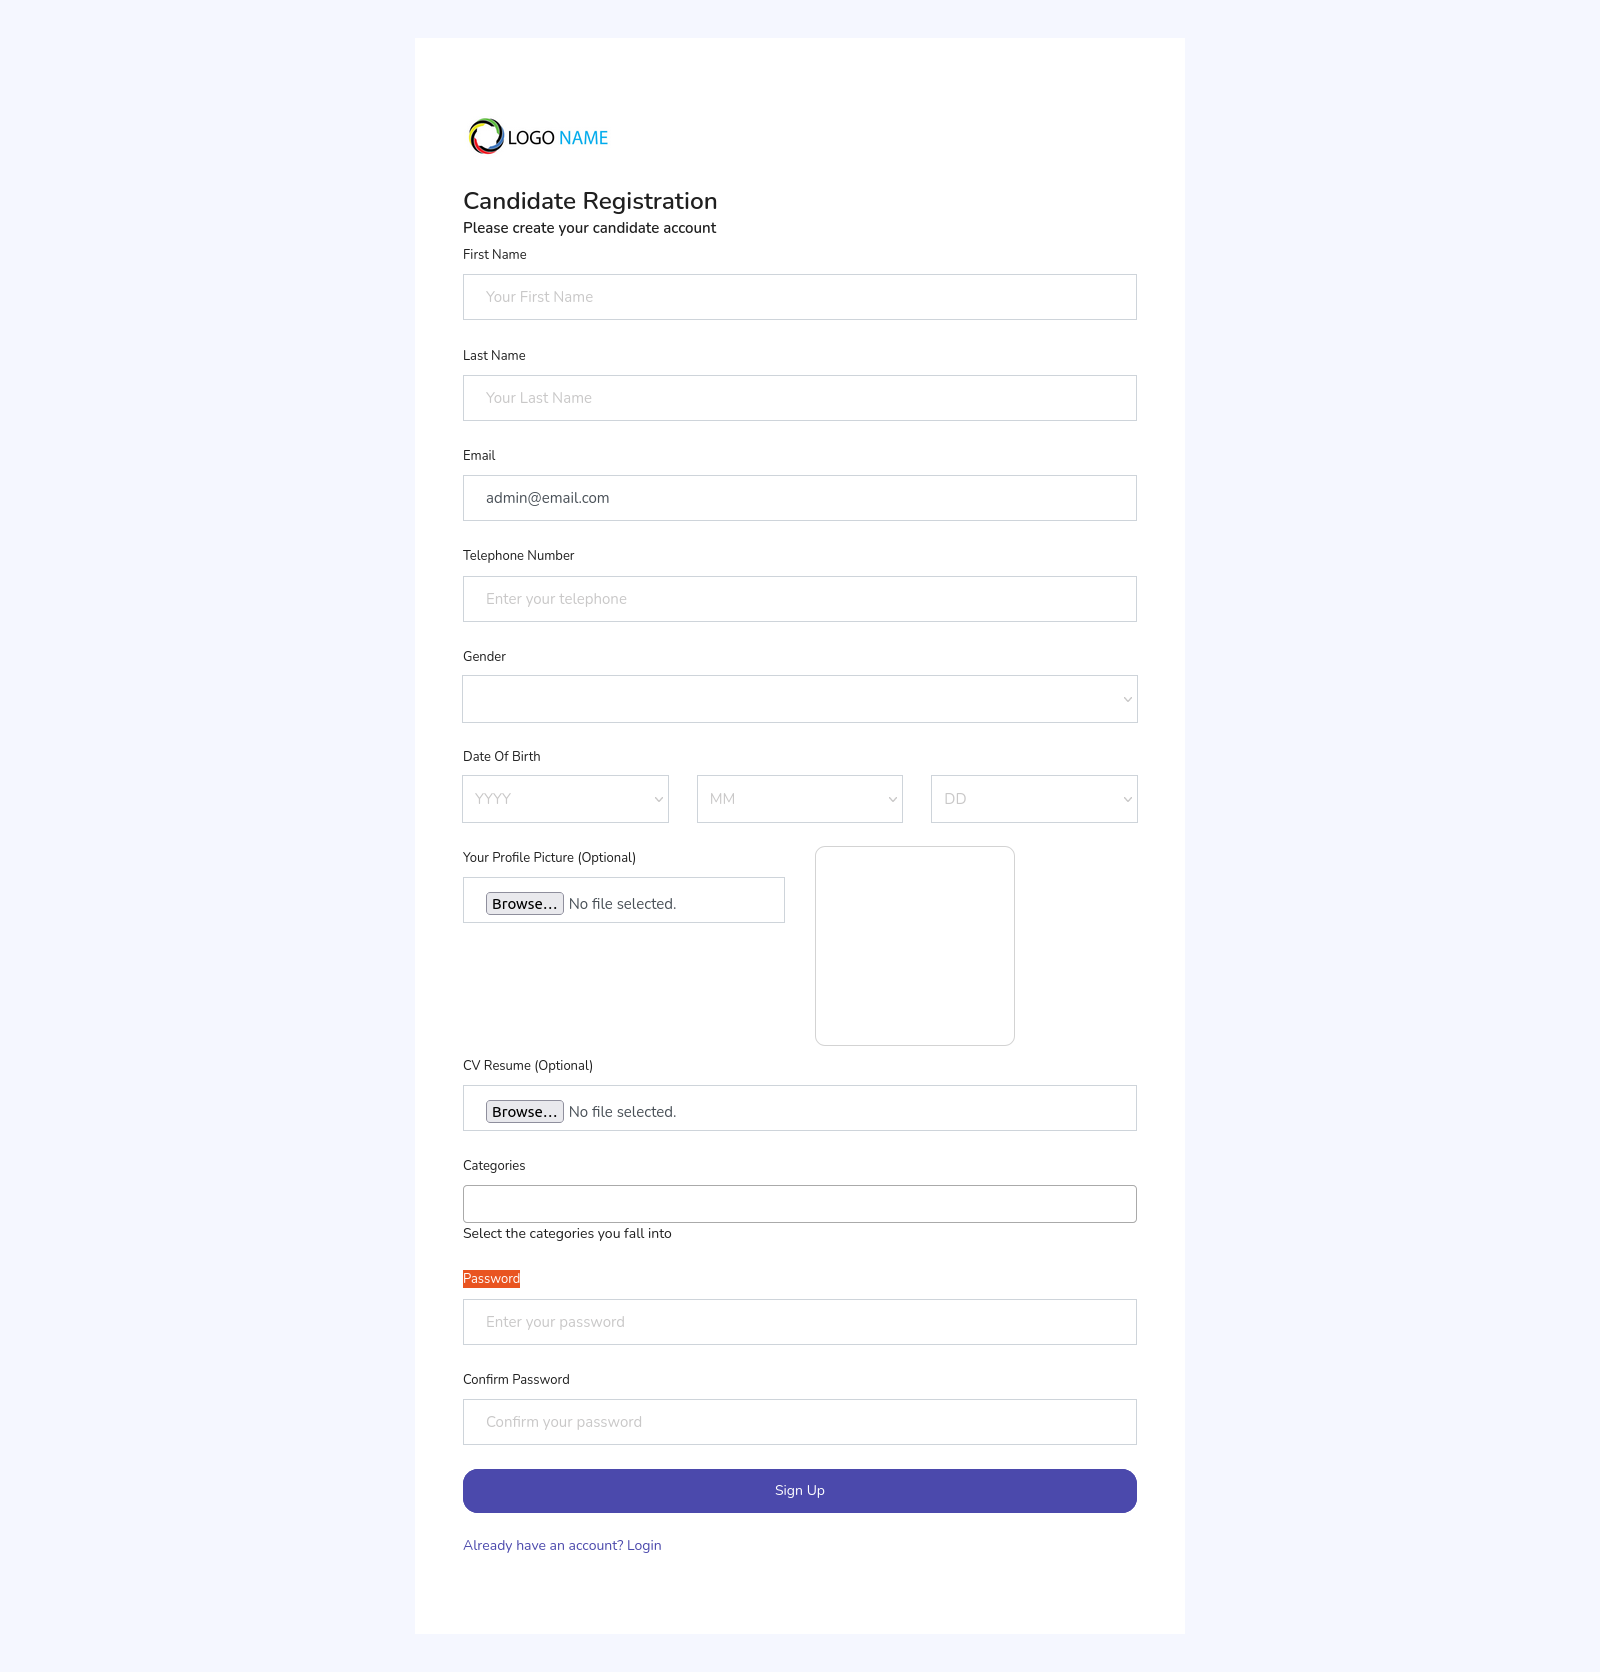
However, if you want every candidate to supply more
information during registration, you can add more fields to the
candidate registration form.
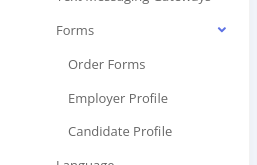
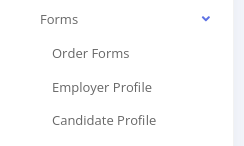
To manage custom fields for candidate profiles, go to 'Settings'-'Forms'-'Candidate Profile'
The candidate profile form page opens as shown below
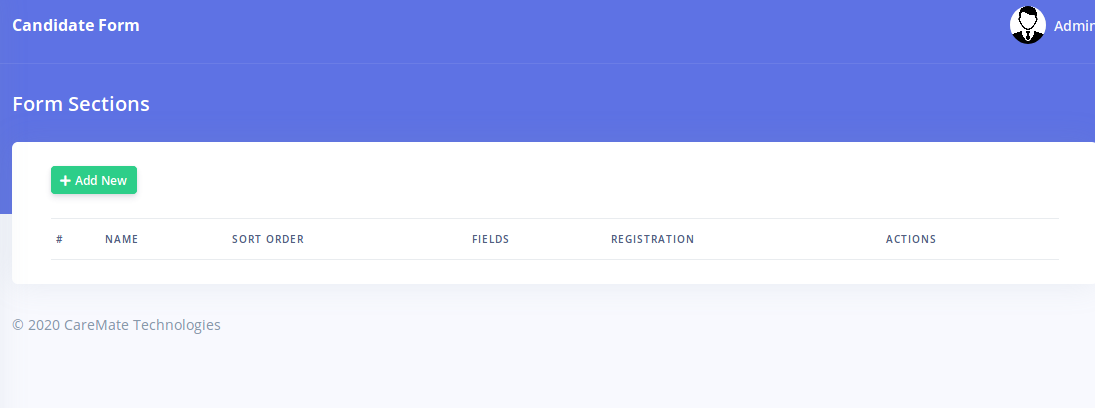
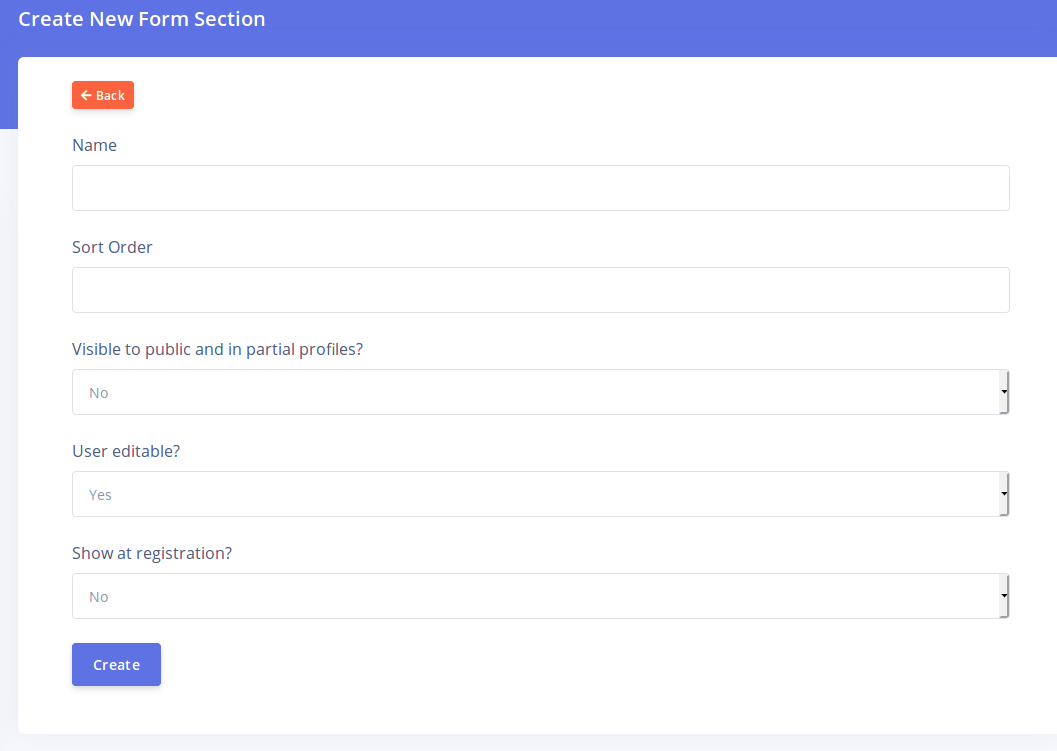
Each field must belong to a section. Sections allow
you to group related fields and makes your form more organized. Click on
the 'Add New' button to create a new section
The different fields are explained below
-
Name: The name of the section. This will
also be visible to candidates. Choose a name that describes what type of
information will be collected by the fields in this section
-
Sort Order: This controls the order of display of this section relative to other sections. Sections will be displayed in ascending order.
-
Visible to public and in partial profiles: This
determines if the data in this section should be viewable by employers
while viewing the candidate's profile on the Frontend (if the
candidate's visibility is set to public). It also determines if the
section should be visible partial profiles i.e partial resume PDF
downloads/emails.
-
User Editable: This determines if the
candidate can make changes to the fields in this section. If set to
'No', then only the admin will be able to view and edit the fields in
this section. Also, setting this to 'No' will hide this section and its
field from the candidate registration form.
-
Show at registration: This determine if
this section and it's fields will be visible during registration. This
option is only visible if 'User Editable' is set to 'Yes'. If you set
this option to 'No' then candidates will not see this section and its
fields when they are registering for the first time. However, they will
still see this section if they choose to update their account from their
account's profile page.
Once you have created a section, you will be directed back to the section list page.
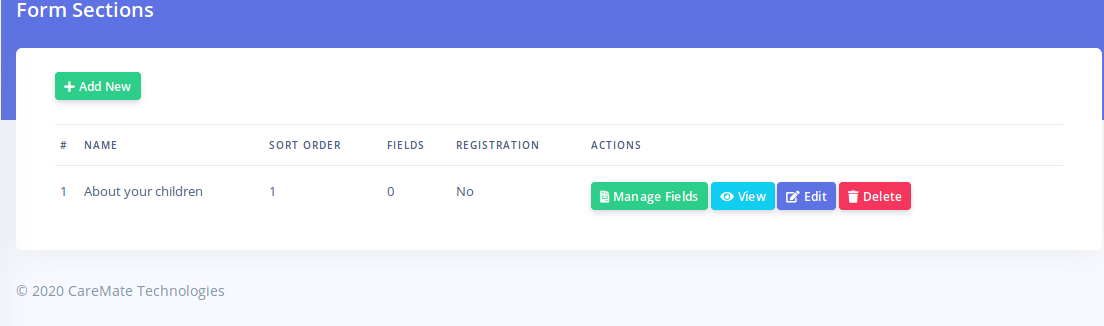
Click on the 'Manage Fields' button for a section in
order to create fields for it. Creating fields here is similar to the
process for creating order form fields.
Employer Profile Form
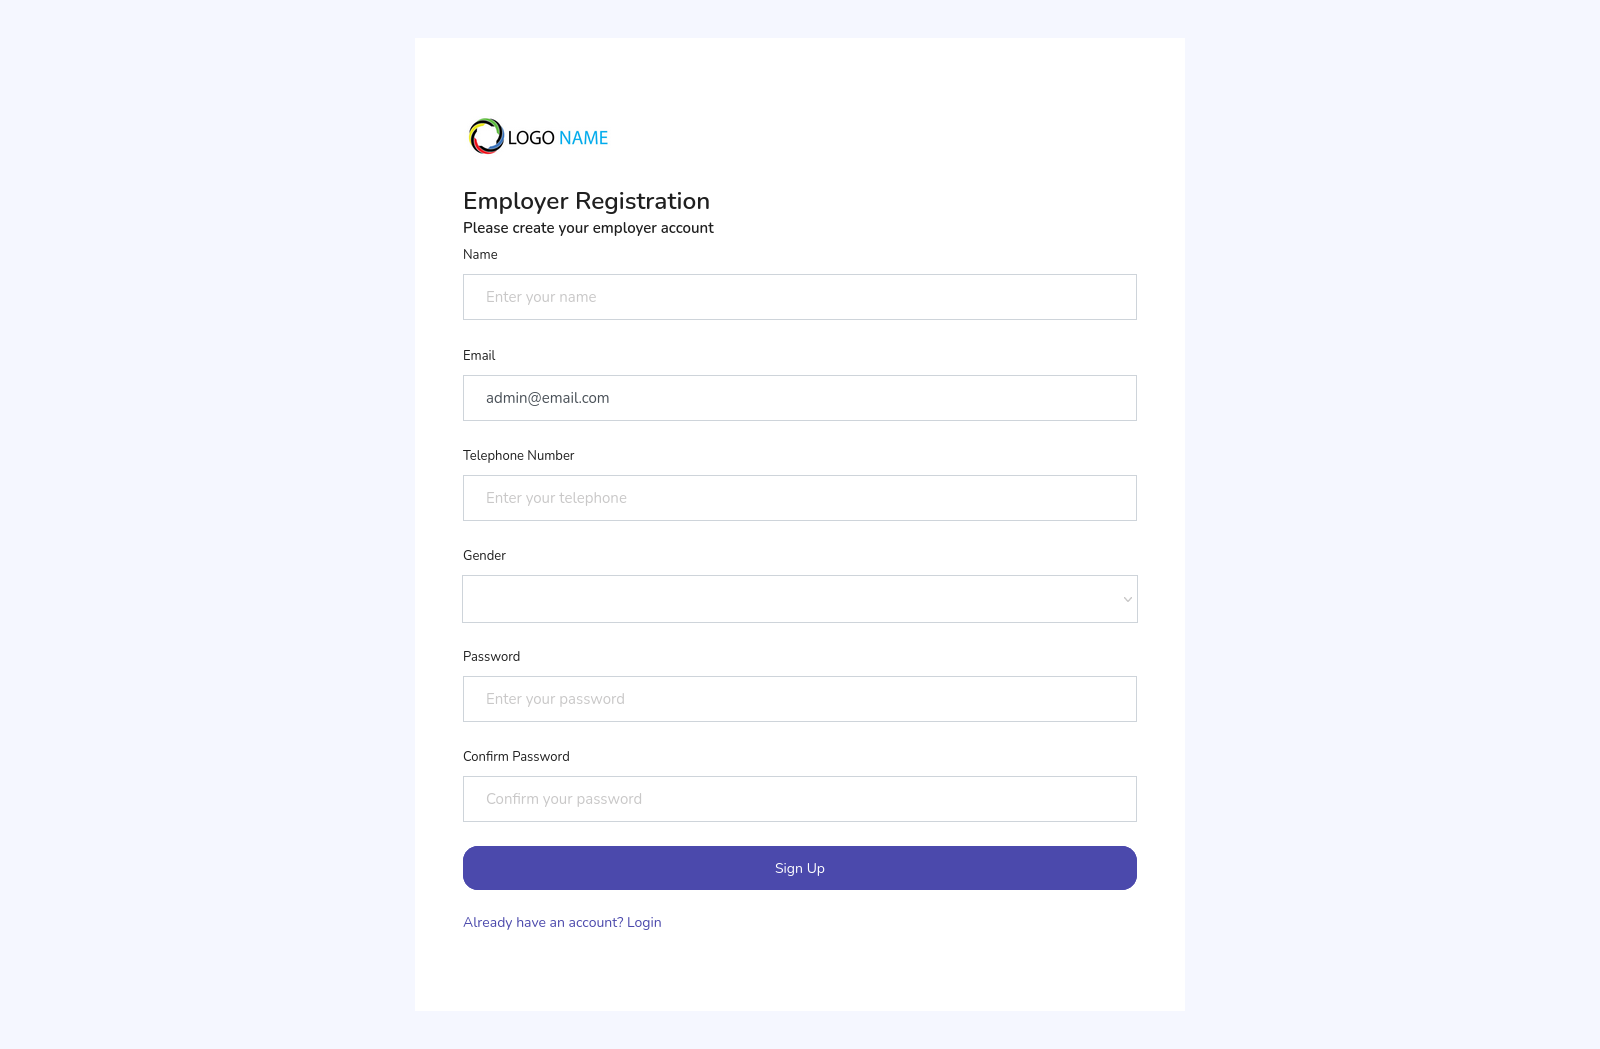
By default, the registration form for employers appears as below:
However, if you want every employer to supply more
information during registration, you can add more fields to the employer
registration form.
To manage custom fields for employer profiles, go to 'Settings'-'Forms'-'Employer Profile'

The employer profile form page opens as below
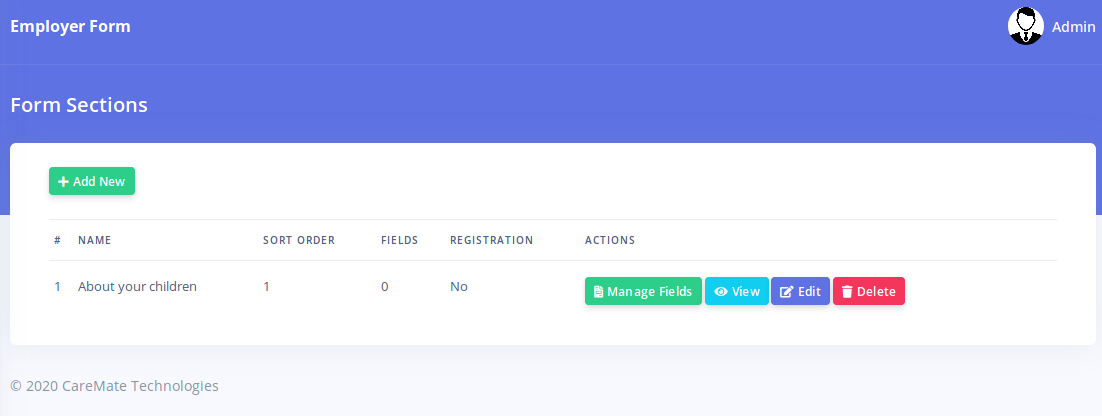
Each field must belong to a section. Sections allow
you to group related fields and makes your form more organized. Click on
the 'Add New' button to create a new section
The different fields are explained below
-
Name: The name of the section. This will
also be visible to employers. Choose a name that describes what type of
information will be collected by the fields in this section
-
Sort Order: This controls the order of display of this section relative to other sections. Sections will be displayed in ascending order.
-
User Editable: This determines if the
employer can make changes to the fields in this section. If set to 'No',
then only the admin will be able to view and edit the fields in this
section. Also, setting this to 'No' will hide this section and its field
from the employer registration form.
-
Show at registration: This determine if
this section and it's fields will be visible during registration. This
option is only visible if 'User Editable' is set to 'Yes'. If you set
this option to 'No' then employers will not see this section and its
fields when they are registering for the first time. However, they will
still see this section if they choose to update their account from their
account's profile page.
Once you have created a section, you will be directed back to the section list page.
Click on the 'Manage Fields' button for a section in
order to create fields for it. Creating fields here is similar to the
process for creating order form fields. Please click here to read about field creation
Order Forms
CarePro allows you to create multiple order forms. An
order form is a dedicated form accessible only to Employers. Employers
can use these forms to place orders for your services.
Each order form can be customized in order to receive
the right type of information you need from your various types of
Employers. For example, if you run a Nanny agency that caters for
Parents and Creches, you can choose to create two order forms, one for
Parents and the other for Creches. Links to the order forms can be
placed on your Navigation menus for easy location by Employers.
In order to create an order form, login to your Admin account and navigate to 'Settings'-'Forms'-'Order Forms'.
The Order Forms page will open which shows the list of all available forms.
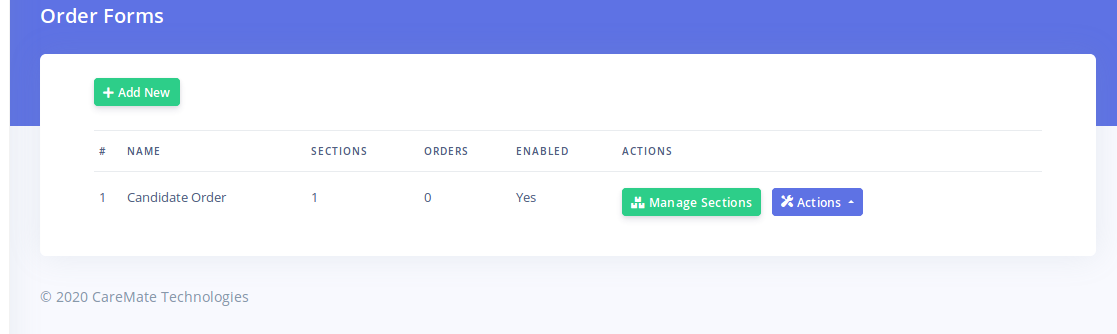
In order to create a new form, click on the 'Add New' Button.
The order form page will open up which contains the following fields:
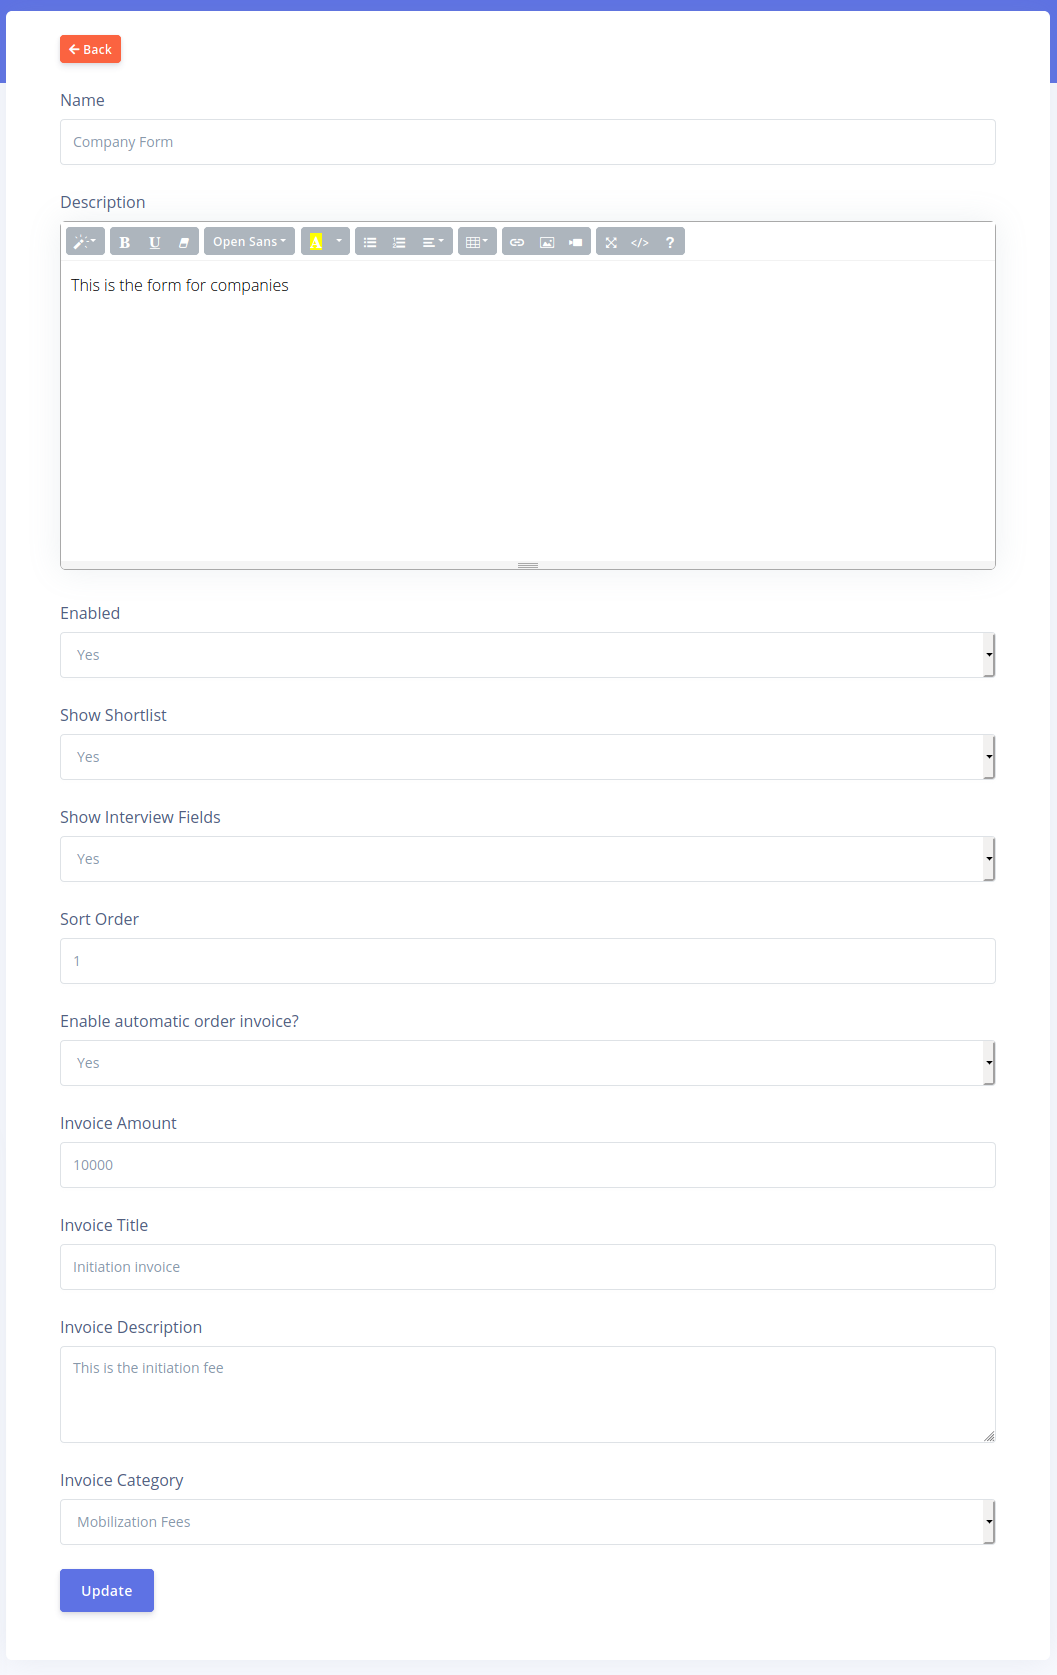
-
Name: Enter the name of the form. Choose a
name that is descriptive of the Form's function as this name will be
displayed as the Title of the form when employers open it.
-
Description: The description of the form
should contain instructions you would like employers to read before
filling the form. This description will be visible on the first section
of each Order Page an employer attempts to fill. It will also be visible
on the order form list that gets displayed if there are more that one
active order forms.
-
Enabled: This specifies if a form can
receive responses or not. If disabled, employers will not be able to
view the form even if they have the url.
-
Show Shortlist: When an employer is
placing orders, they may wish to shortlist candidates from your public
list. This setting determines if the shortlisted candidates will be
visible on the form while it is being filled. You may wish to disable
this if you do not expect Employers the form was designed for to be
interested in shortlisting.
-
Show Interview Fields: Typically, order
forms are used to place orders for candidates and this usually results
in an interview being scheduled. By default, forms have some fields that
enable employers set their preferred interview details such as
Interview date, Interview location and Interview Time.
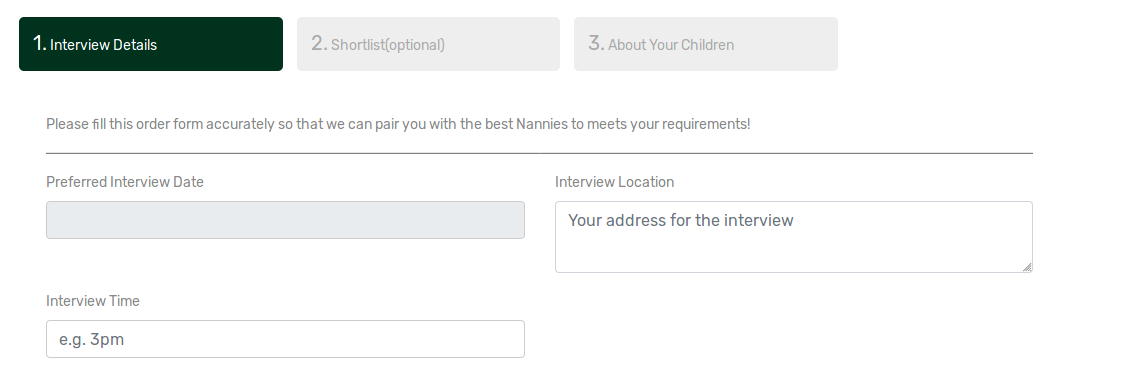
If you wish to hide these fields in a form, you can do so using this option.
-
Enable automatic order invoice: This
specifies if you would like and invoice to be generated automatically
every time an employer successfully creates an order. This is especially
useful for collecting mobilization fees. If set to yes, then and
invoice will be automatically generated for the employer and they will
be redirected to the payment page after they place their order.
-
Invoice Amount: This option will only
have an effect if the 'Enable automatic order invoice' option is set to
'Yes'. This specifies the amount that will be charged on the
automatically generated invoice.
-
Invoice Title: This option will only have
an effect if the 'Enable automatic order invoice' option is set to
'Yes'. This defines the title of the invoice that is generated
automatically.
-
Invoice Description: This is the description of the invoice item for the automatically generated invoice (if enabled).
-
Invoice Category: CarePro enables you to
categorize your invoices for easy sorting. You can specify the Invoice
Category that the automatically generated invoice (if enabled) will
belong to by default.
Once you have successfully created a form, you can
proceed to create sections for that form. Each order form is comprised
of 'Sections'. You can create as many sections as you wish for each
form. Each section can contain multiple fields. Fields are the actual
form controls that the employer fill input data into. Fields can be of
various types such as Text boxes, Text area, Select, Radio buttons,
Labels, Checkboxes and File input.
To create a new section, click on the 'Manage Sections' button for the Order Form you are modifying
Next, click on the 'Add New' button.
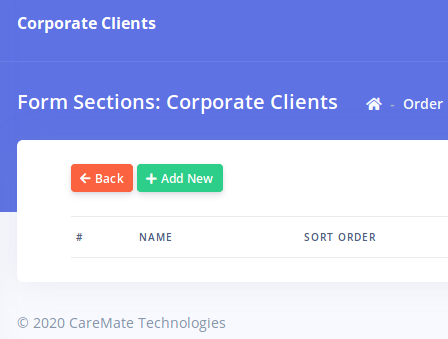
The Order Form Section creation page will open as shown below:
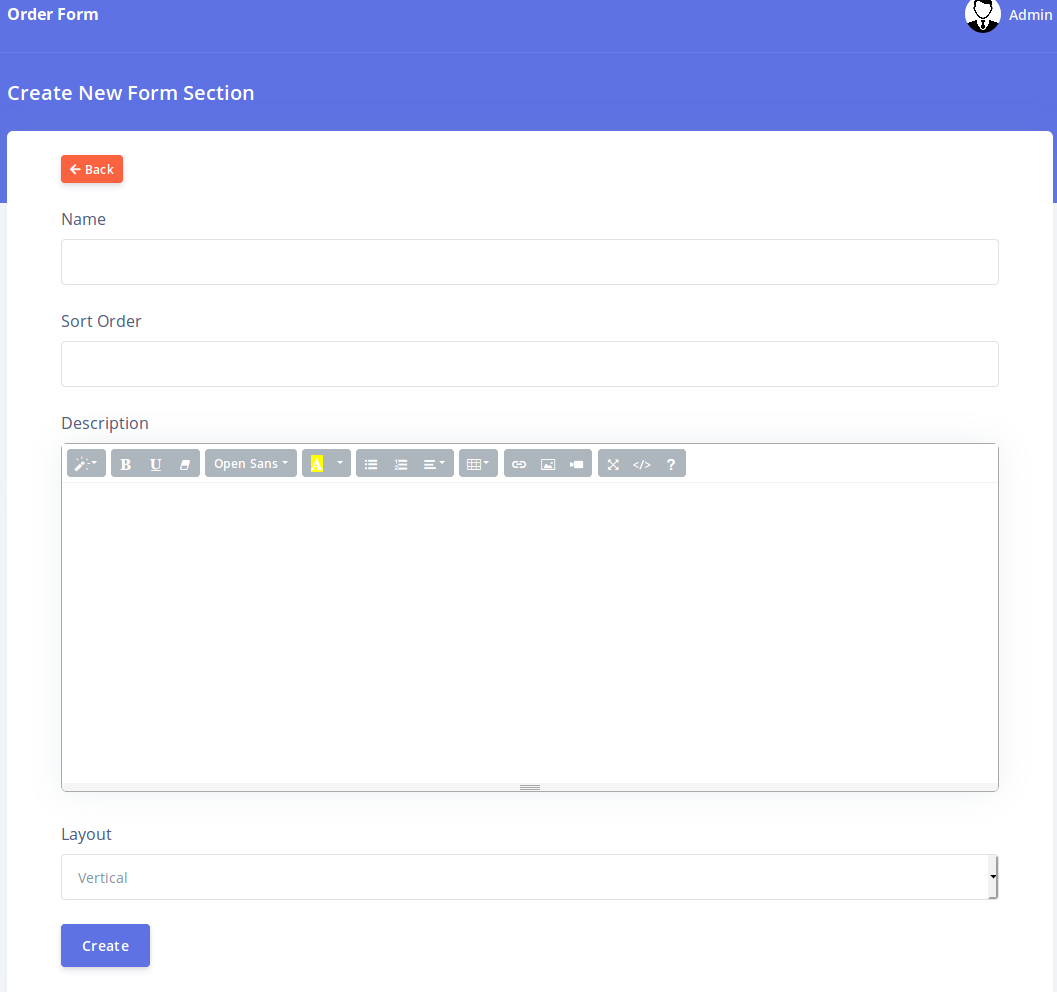
The different fields on this page are explained below:
-
Name: This is the name of the section.
Enter a name that is descriptive of this section. However, ensure that
you do not make your name too long as this is what is displayed as the
title of the form section on the order form as show below
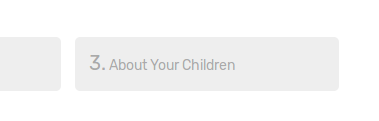
We recommend you use just three or four words as your section name.
-
Sort Order: The sort order is a digit
that controls the order of display of this section relative to the order
sections on the same form. Sort orders must be an integer (e.g. 1,2,3).
The sections are displayed in ascending order of the sort order. Hence,
if you assign the number 1 as a sort order for a section, it will be
the first section that is displayed after the 'Details' and 'Shortlist'
(if enabled) sections.

We
recommend you do not repeat section sort orders in a single form i.e.
do not give two sections in the same form the same sort order number.
This is to make sure your display order is predictable.
-
Description: This is descriptive text
that explains how the fields in this section should be filled. This is
displayed to employers when they navigate to this section in the order
form.
-
Layout: The layout field is used to
define the order in which fields will be displayed on the form. The
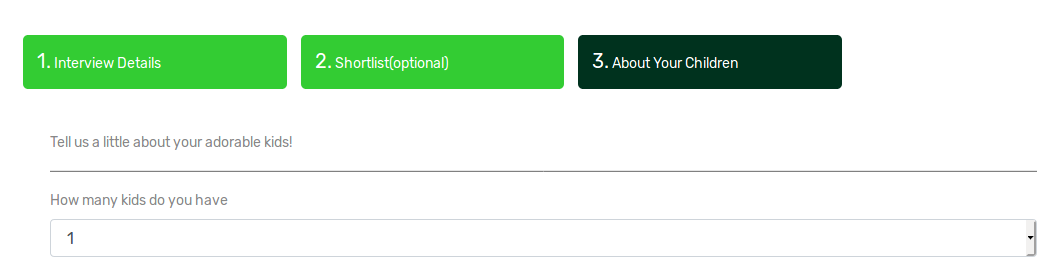
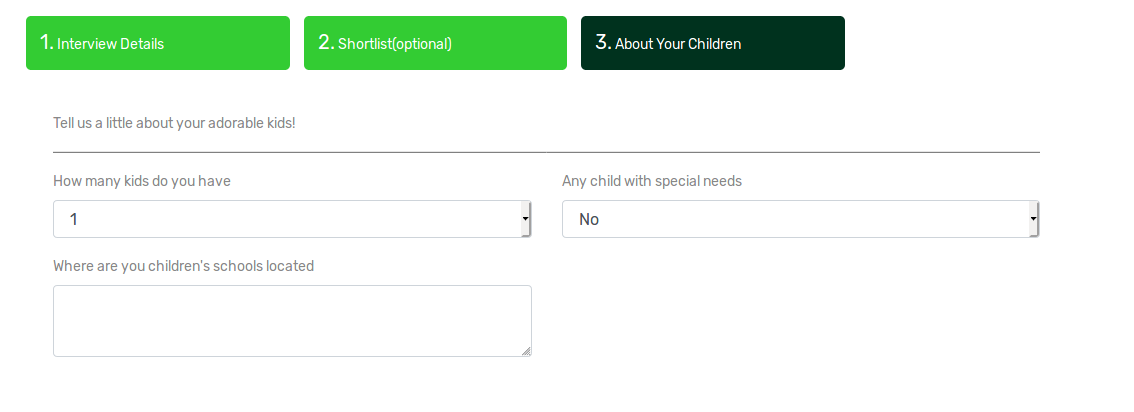
layout can either be 'Vertical' or 'Horizontal'. If set to 'Vertical'
then the order fields will be laid out vertically on the form e.g.
However,
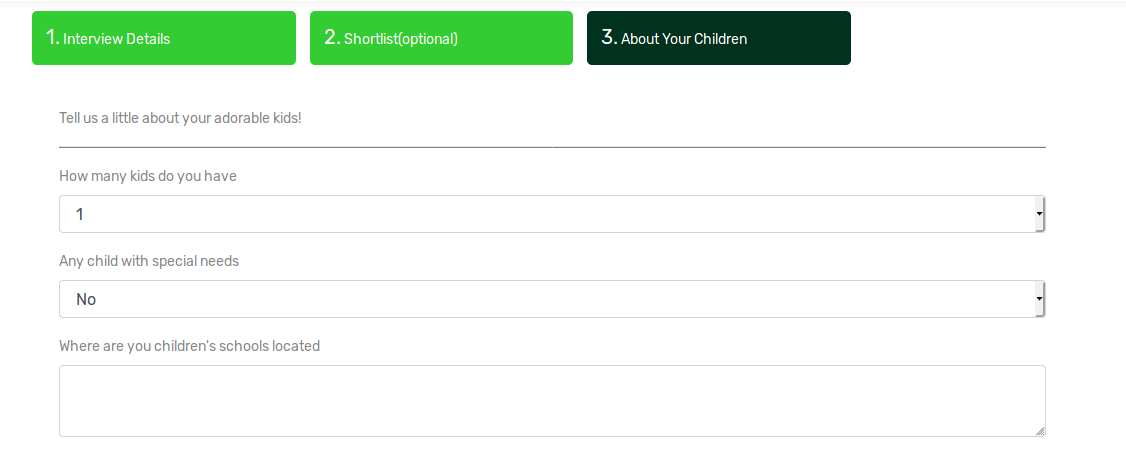
if you set the layout to 'Horizontal', you can arrange the fields in
that section in a grid format. Selecting the 'Horizontal' option will
reveal the 'Column Width' option
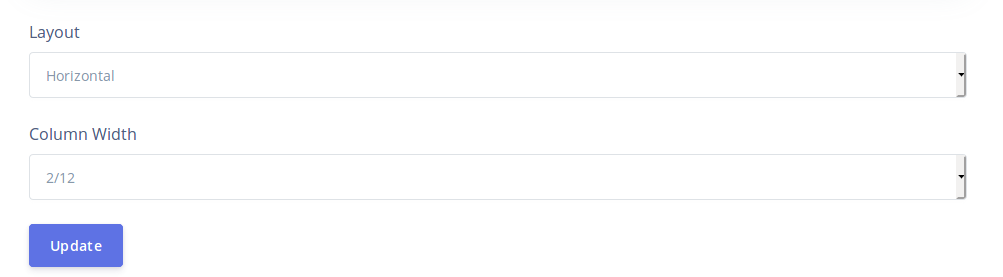
The
grids are laid out in blocks of 12. You can specify how many blocks out
of 12 each column in the section should occupy. For example, if you
specify 6/12 as the column width, then each field will take up half of
the space in the section as show below:
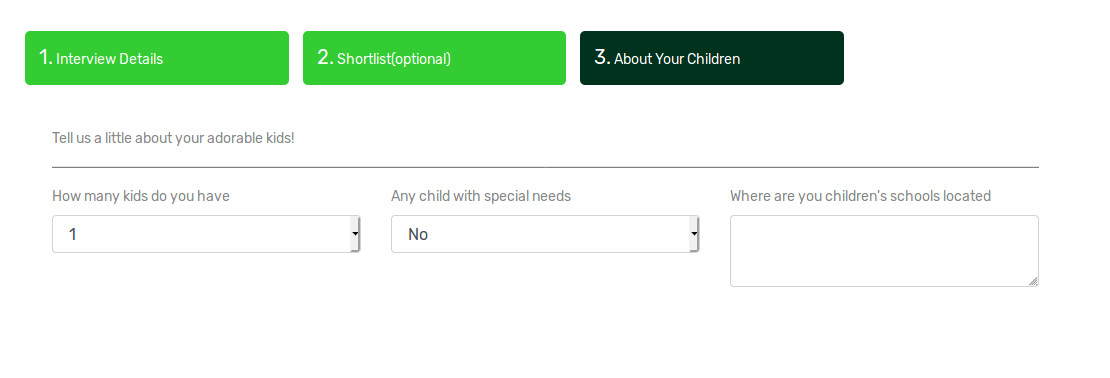
If you set to 4/12, then each field will occupy one third of the space in the section like below:
Creating Fields
After you have successfully created your sections,
you can then create fields. Each field (except the 'Label' field)
represents a piece of data you wish to collect from an employer. To
create or manage fields for a form section, click on the 'Manage Fields'
button for that section:
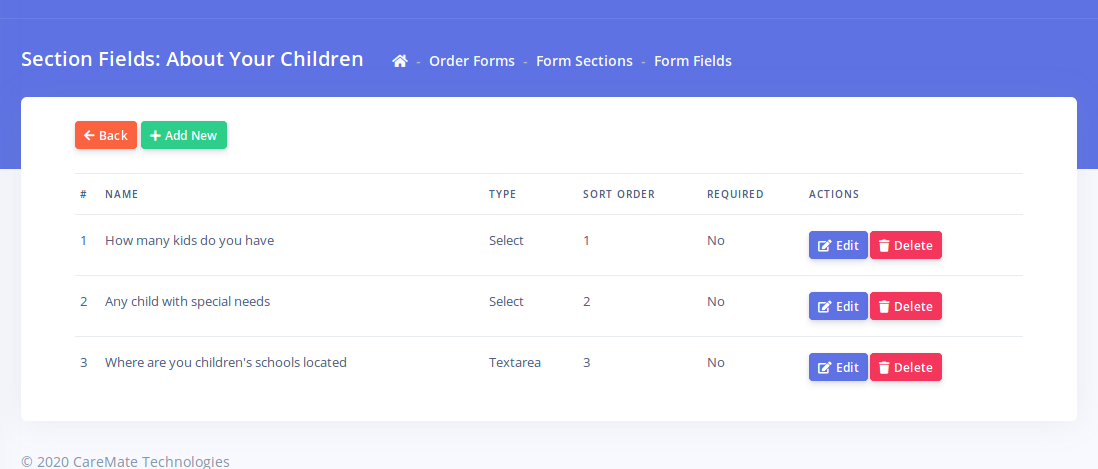
This brings up the list of all the fields in that
section. You can see the field type, sort order and if the field is a
required field or not.
Next click on the 'Add New' button. This will bring up the field creation page:
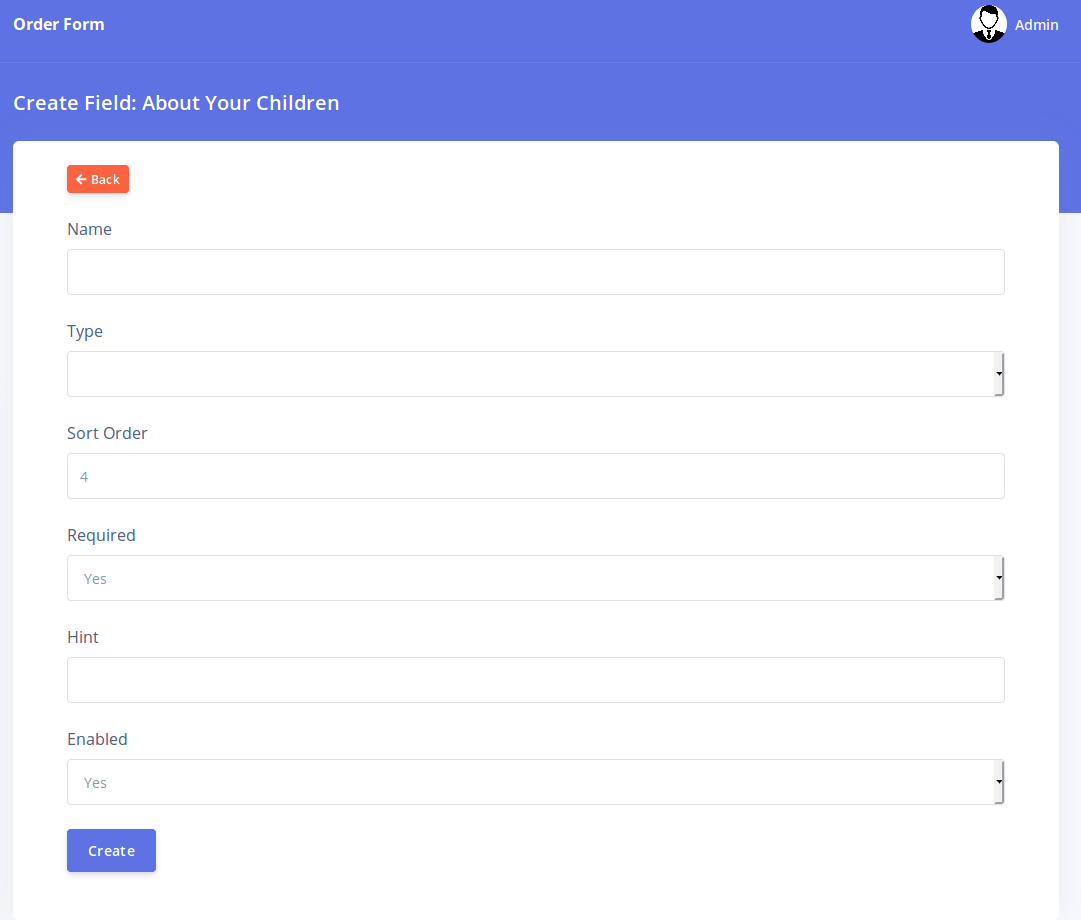
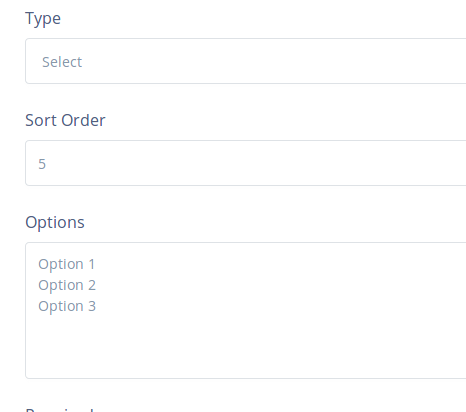
Each option in this page is described below:
-
Name: This is the title of the field.
Please give each field a name that clearly describes the type of data
that should be inputted into it.
-
Type: This describes the nature of the Form field that will be created. The following type of fields are supported:
- Text: This accepts a single line of text e.g

Use this field type to collect small pieces of text.
-Textarea: This accepts multi-line paragraph text. e.g.
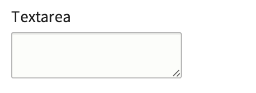
Use this field type to collect larger amount of text.
-Select: This creates a drop-down control that allows the user select from a list of options e.g.

Use this option if you would like to restrict user input to a predefined set of options.
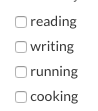
-Radio:
This creates a list of options similar to the 'Select' above. However,
for radio buttons, each option is displayed on the page without the user
needing to click on the control e.g.

Use this option for smaller list of options.
-Checkbox:
Checkboxes are used to create 'Yes' or 'No' fields. If the user selects
the option, its value is set to 'Yes'. If not selected, its value is
set to 'No' e.g.
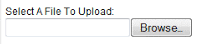
-File: This allows a user to upload a file e.g.
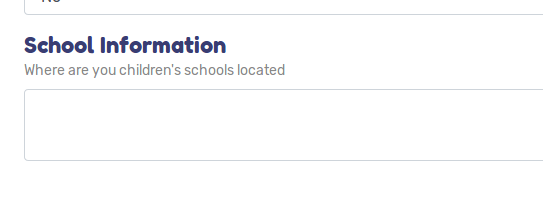
-Label:
The label field is a special option that does not actually collect any
data. This field type is simply used to create a heading withing form
fields. This is very useful if you wish to separate fields within a form
section. For example see the 'School Information' label below
-
Sort Order: This defines the placement of
the field relative to others in the same section. The fields are
arranged in ascending order. The sort order must be an integer. We
recommend you do not repeat sort orders for fields in the same section.
-
Options: The options box is only visible
if you select the 'Select' or 'Radio' field types. This box allows you
to define the options that can be selected from. Please note that you
need to enter each option on a new line e.g.
-
Required: This specifies if this field
should be mandator. If set to 'Yes' then employers will not be able to
submit the order form without filling this field.
-
Hint: This allows you to define a
descriptive text that tells the user what type of data is expected for
that field. Please note that this only works for Text and Texarea field
types.
-
Enabled: This specifies if the field will be visible on the order form or not.
Once you have created all your sections and their associated fields, your order form should be ready for use!
Note however that you will need to add your form to a
menu in order for it to be visible on the site. You can add the form to
the header or footer menu by going to 'Settings'-'Menu'. Click on the
'Header Menu' or 'Footer Menu' option.
On the menu editing page, click on the 'Order Forms'
panel. You will see the list of all your order forms there. Click on
the 'ADD' button for the form you wish to add to your menu.

Your form should now be easy to locate by your
employers. For more information on managing menus, please see the
'Managing Menus' help page
Payment Methods
CarePro allows you to configure payment methods that give your users different options for making payments for your invoices.
We support multiple payment gateways. All payments go
through these gateways directly into your bank accounts or online
wallets as determined by the gateway. You get to configure gateways
using credentials you obtain directly from the gateway.
To manage your payment methods, go to 'Settings'-'Payment Methods'
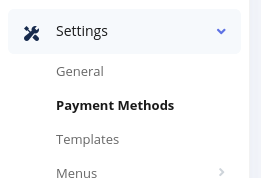
This brings up the list of all available payment methods in the system.
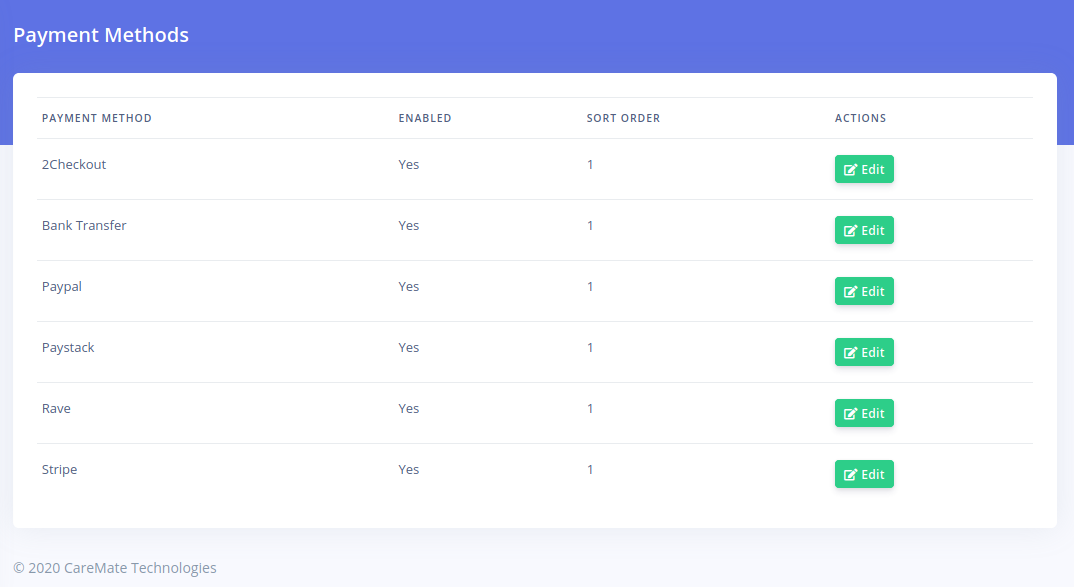
To enable a payment method, click on the 'Edit'
button. Each payment gateway has unique settings. Hence, the form for
editing each gateway will be different. For the 'Paystack' option, the
following page opens
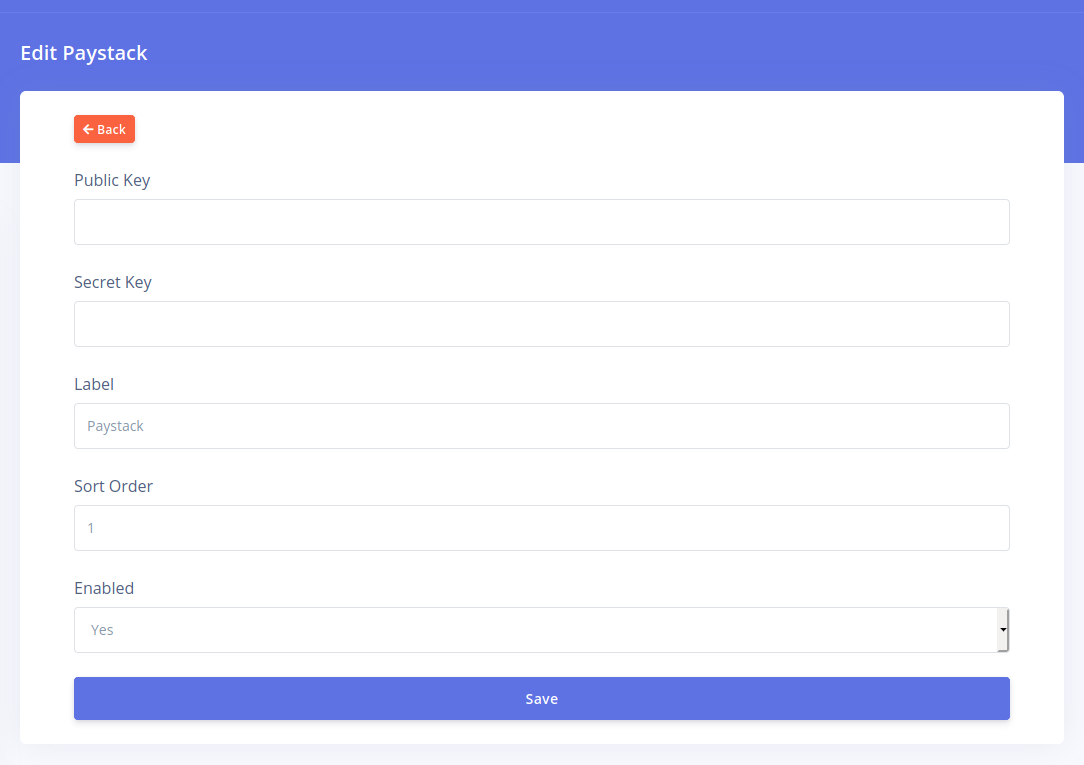
Note, however, that for each gateway, the following fields will always be present
- Label: This is the name of the gateway that is displayed to the user as a payment option during checkout.
- Sort Order: This is the order of the payment gateway relative to others.
- Enabled: This controls whether the payment gateway is active or not.
For each gateway, you'll need to get the relevant
credentials from the provider. Please consult the documentation for each
provider.
Templates
CarePro comes with different templates you can choose from. A
template is a design that gives the public area of your CarePro
application a special look. Each template comes with different options
that enable you to customize the general appearance and content of various
aspects of the template.
To customize your current theme or choose a new one, go to 'Settings'-'Templates'
The templates page is split into two sections: Active Template and All Templates.
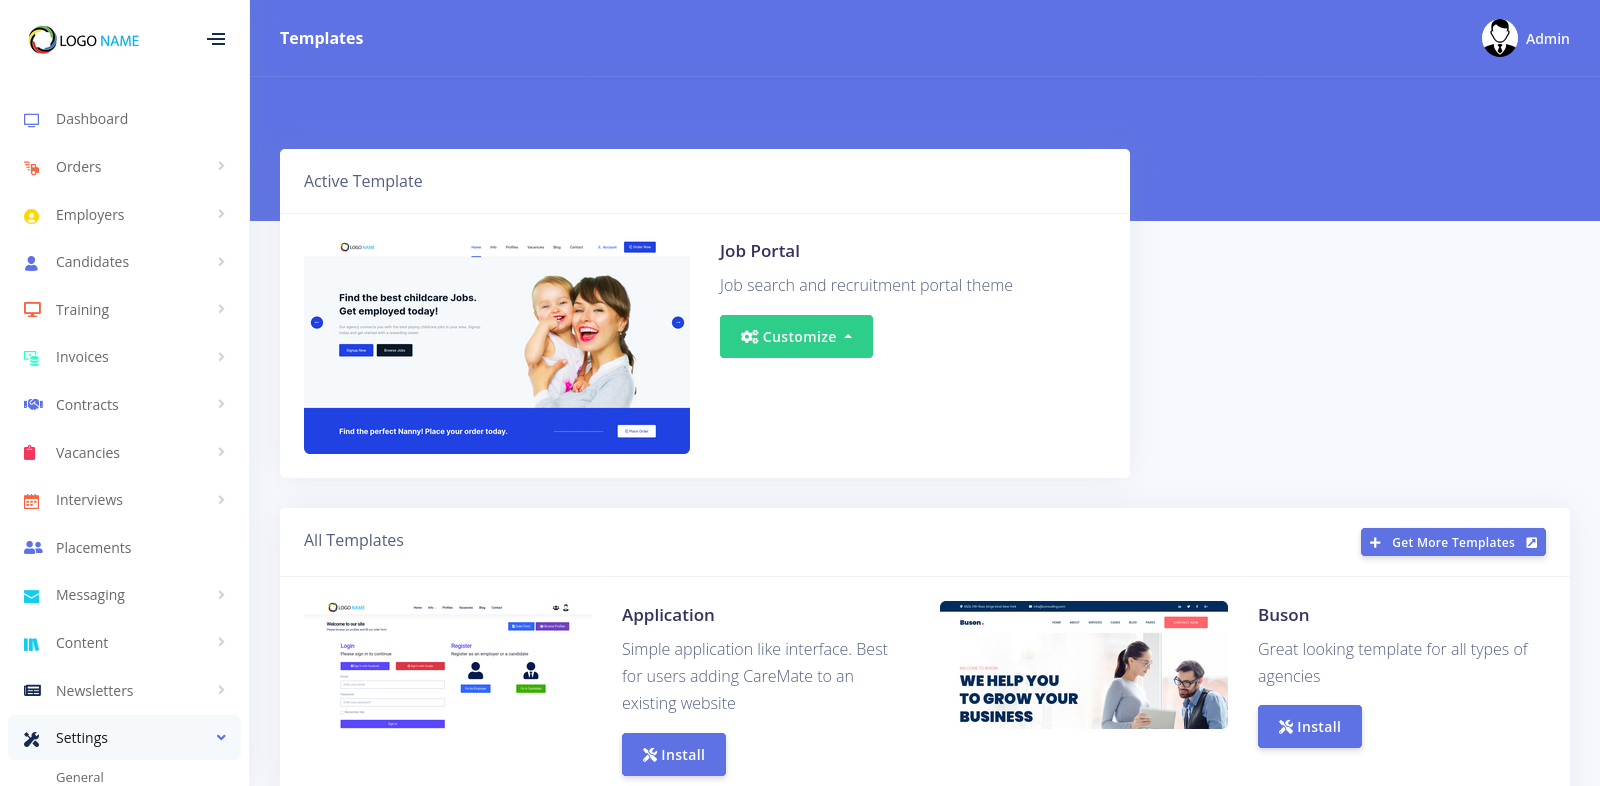
The Active Template section shows the currently installed template
and also displays buttons for modifying the template. The 'All
Templates' section displays all the available templates you can choose
from. Click on the 'Install' button if you would like to switch to a new
template. To modify your existing template, click on the 'Customize'
button.
Clicking the 'Customize' button presents two options: Settings and Colors
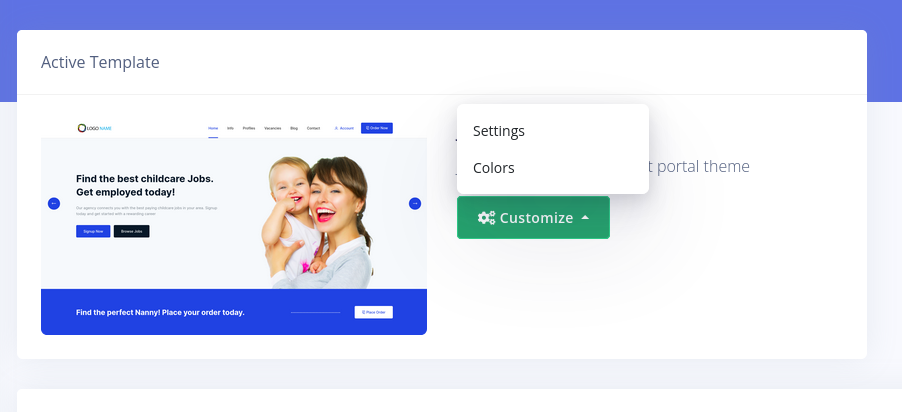
The 'Settings' button is the main option for modifying the template.
It leads to a page that contains various forms for customizing the
template. The 'Color' option leads to a page that enables you change the
different major colors used by the template.
Clicking on the 'Settings' option leads to a page like below:
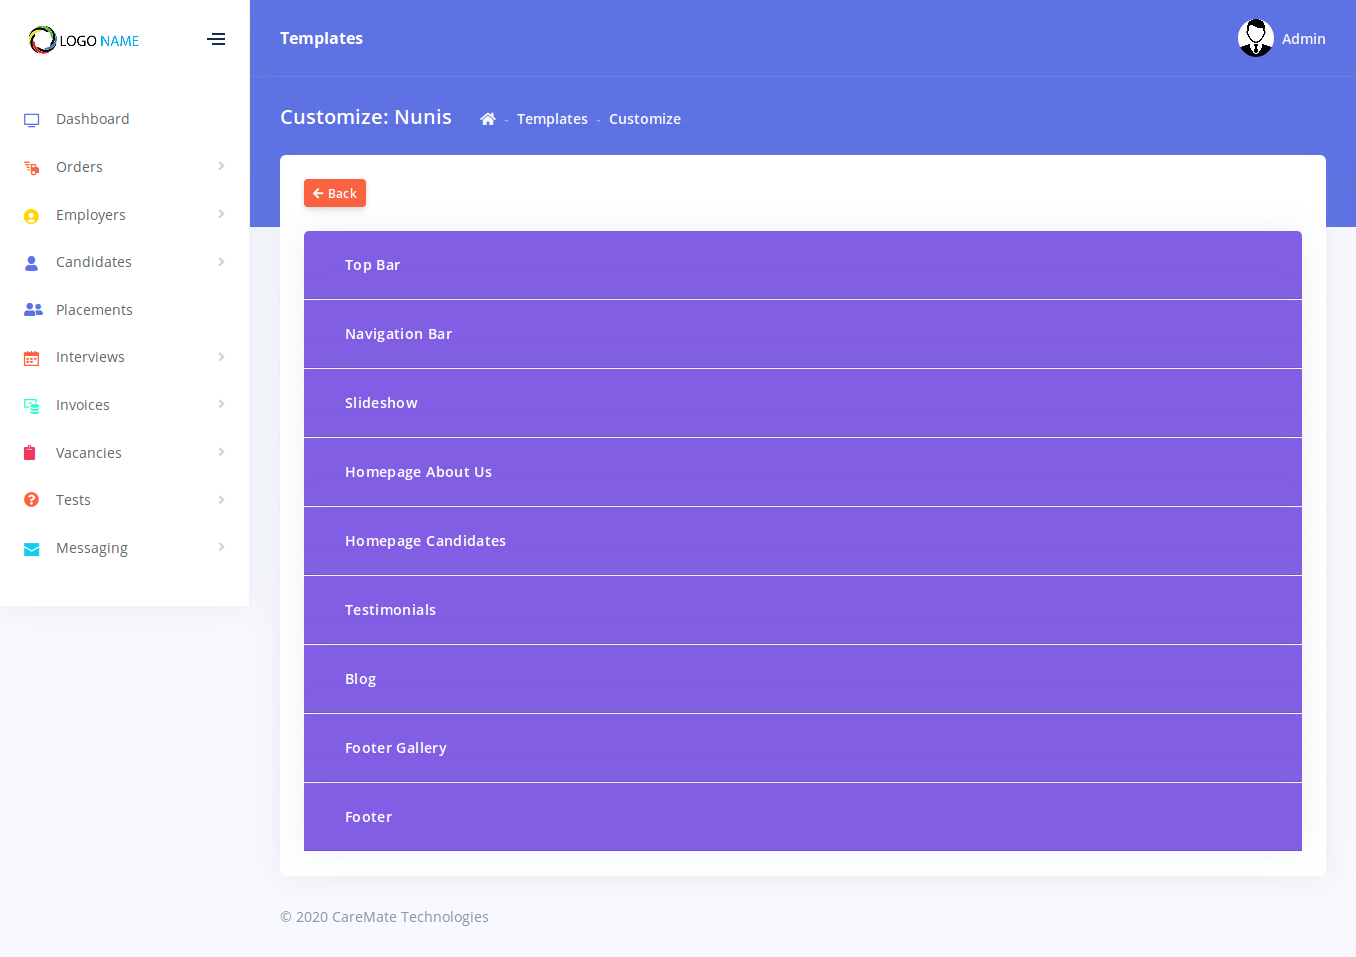
Please note that each template's settings page will give different options other than that shown in this image.
Clicking on any of the options opens the panel to reveal the controls available for modifying that option.

Each option always has an 'Enabled' dropdown control at the top left.
This can be used to completely enable or disable that option. Once you
modify any of the content of an option, click on the 'Save Changes'
button. Your changes will reflect on your portal immediately.
Managing Menus
The CarePro menus feature allows you to completely
customize the options and arrangement of menu its on the header and
footer sections of your web portal.
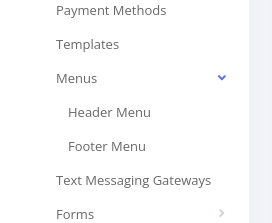
The Menus options can be found under 'Settings'-'Menus'

You will see the 'Header Menu' and 'Footer Menu' options.
The Header menu controls the top menu on all the Frontend's public pages (except login and registration). For example:

The links in this image are call set by the 'Header Menu' feature.
The Footer Menu sets the links at the bottom of all the site's public page. For example
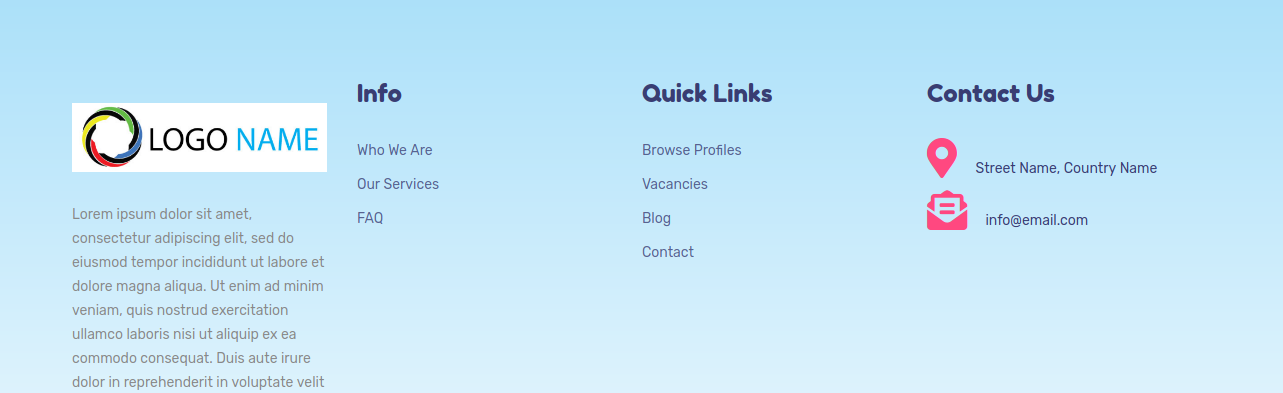
In this example, the Info and Quick Links columns are controlled by the footer menu feature.
The functionality of the Header Menu and Footer Menu
pages is identical. Lets look at setting the header menu. Clicking on
the 'Header Menu' option opens a page like below:
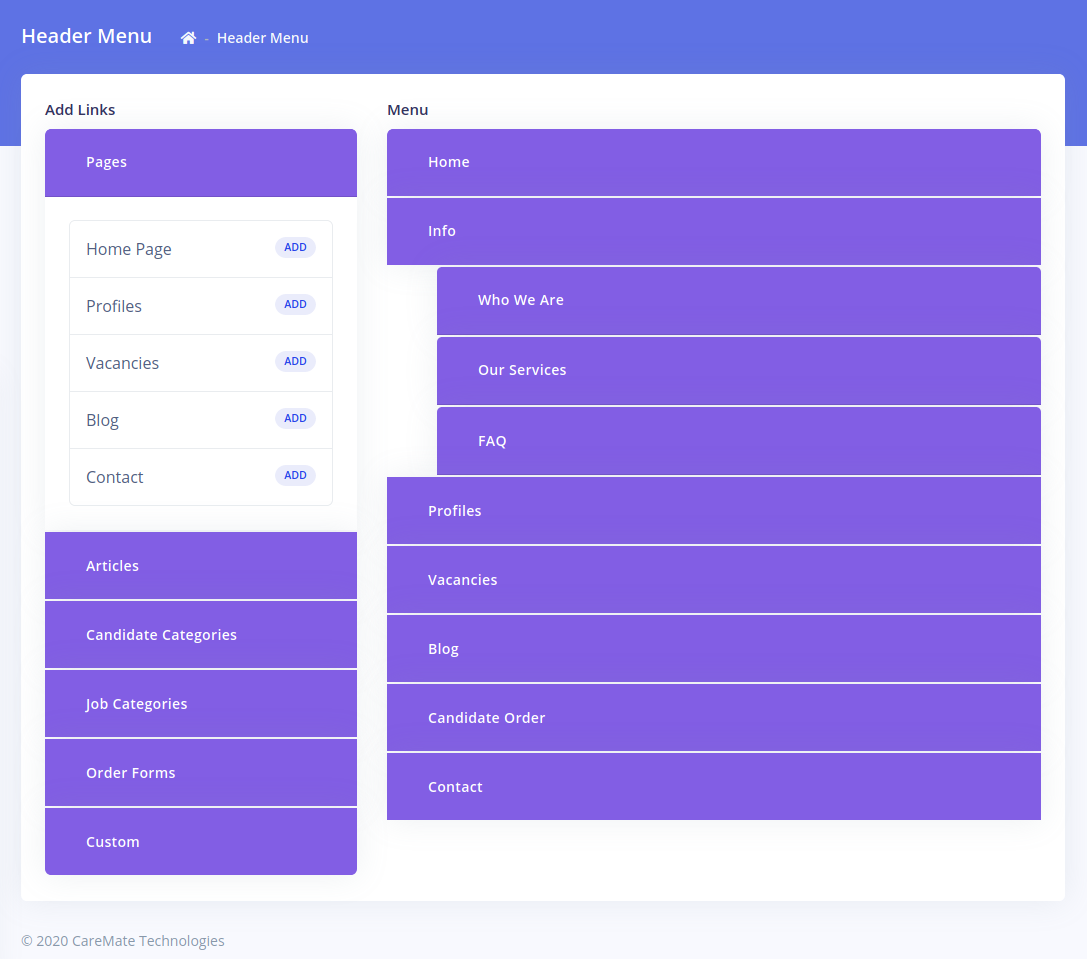
The 'Add Links' column on the left gives you all the
available pages to add to menu. The 'Menu' column to the right shows the
current menu. The 'Add Link' column contains the following tabs which
can be expanded to display available pages:
- Pages: These are standard pages of the
frontend. Pages such as the Homepage, Profile Page, Contact page etc can
be added to the menu from here.
- Articles: All your articles (Created under 'Content'-'Articles') can be added from here
- Candidate Categories: All your candidate categories can be added from here.
- Job Categories: All your 'Vacancy Categories' can be added from here
- Order Forms: You can add any of your order forms from here. Please ensure that the form is enabled.
- Custom: This is a special panel that allows you
add custom links to the menu. You can link to any page within or outside
your portal.
Once you click on the 'Add' link for any of the pages
(or the 'Add' button for custom pages), the page will be added to the
right hand column. Clicking on the newly added page will reveal the
following fields
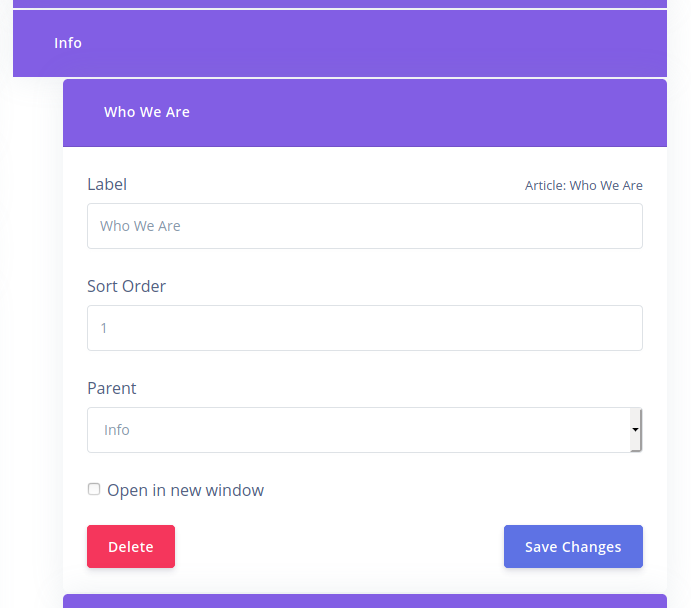
The 'Label' field contains the actual text that is
displayed on the menu for this page. The 'Sort Order' field controls the
position of the menu item relative to its siblings. The 'Parent'
dropdown is used to place a menu underneath another item. In this
example, the 'Who we are' page is placed under the 'Info' page.
SMS Gateways
CarePro allows you to send out Text messages using
different SMS gateways. The SMS gateways settings section allows you to
configure what gateways should be available for sending.
To open the SMS Gateways page, click on the 'Settings'-'SMS Gateways' page
The list of available gateways will come up
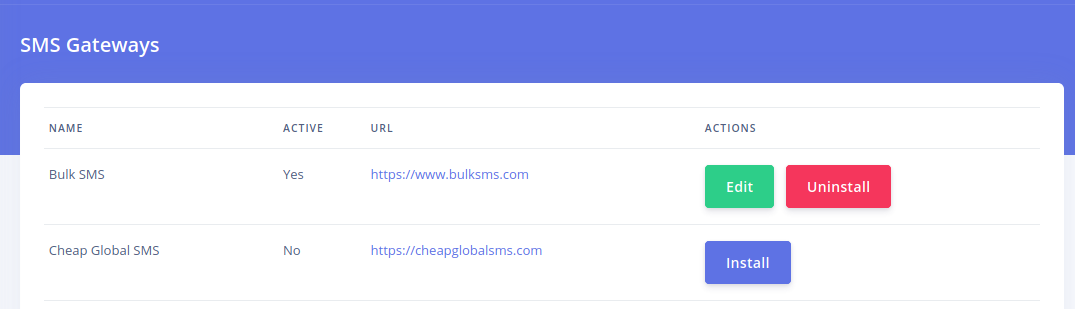
The list shows if a gateway is active or not. The url
of the gateway can also be seen here. If you do not already have an
account with any of these gateways, please follow the link and create
one.
Click on Install to enable a gatway. Click on the
'Edit' field to edit a gateway. Each gateway's settings page will appear
different. Save the credentials required by the gateway and save.
Setting your language
CarePro allows you to change the language used for
the enter interface of the Frontend and the Backend. To change the
language, go to 'Settings'-'Language'
This opens the language selection page
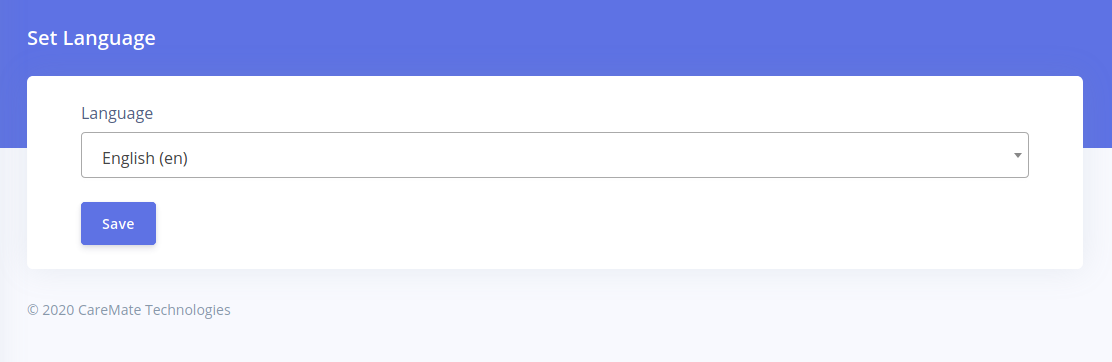
Select the language from the list and click on 'Save'.
Please note that end users are not able to change languages on the fronted. The application can only use one language at a time.
Email Settings
The 'Email' tab on the 'General Settings' page allows you to change the way your portal sends out emails.
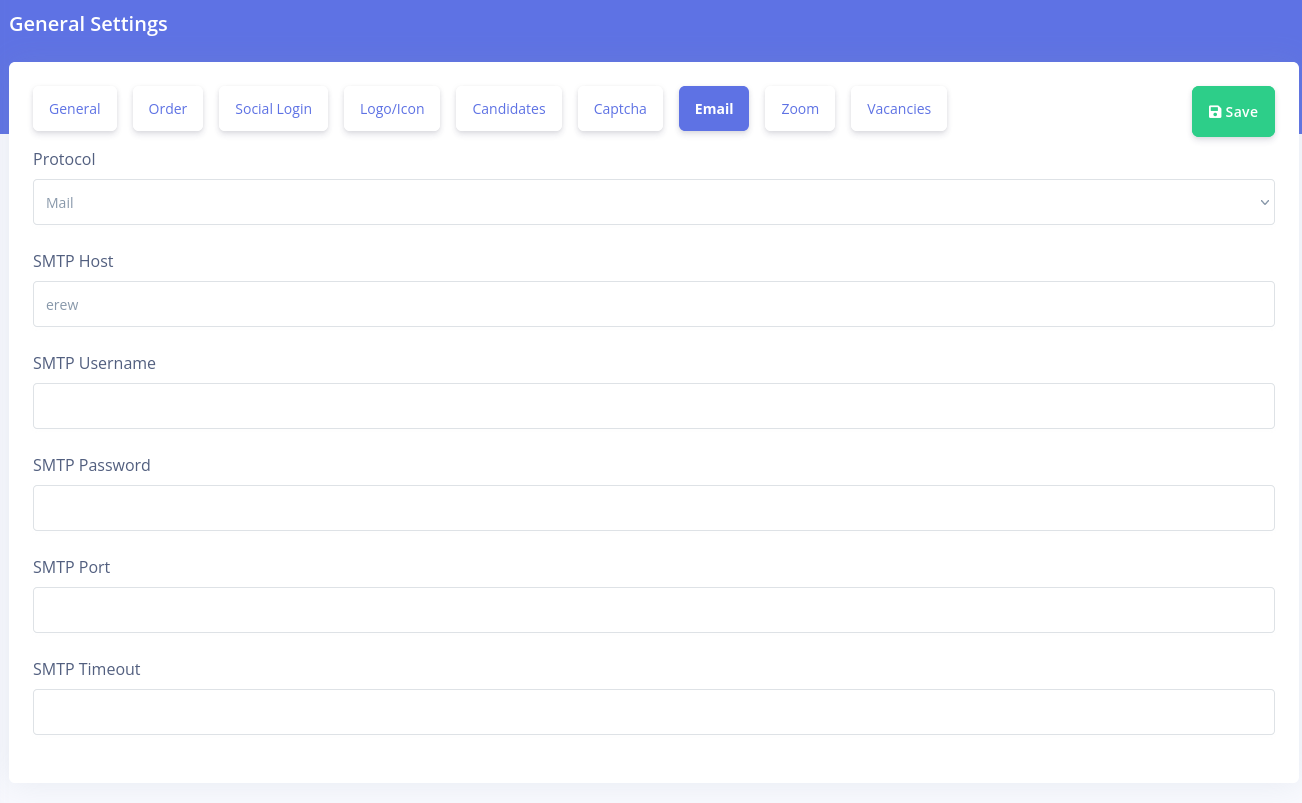
By default, the protocol is 'Mail'
This sends out emails using the PHP mail feature. If you wish to
use an SMTP server, you can change the protocol to 'SMTP' and set
the credentials here. If you wish to use another email driver other than SMTP, you can set the protocol to 'Mail'. Then edit the .env file in your application root folder and configure the mail driver. Please learn more here: https://laravel.com/docs/mail
Social Login
CarePro allows your users (both Employers and
Candidates) to log in via their social media accounts. We strongly
recommend that you enable social login as it will greatly increase your
registration rates. Also, for candidates, social login will
automatically import the display picture of your candidate thus
relieving them of the task of uploading it manually.
To enable social login, please click on the 'Social Login' tab on the 'General Settings' page
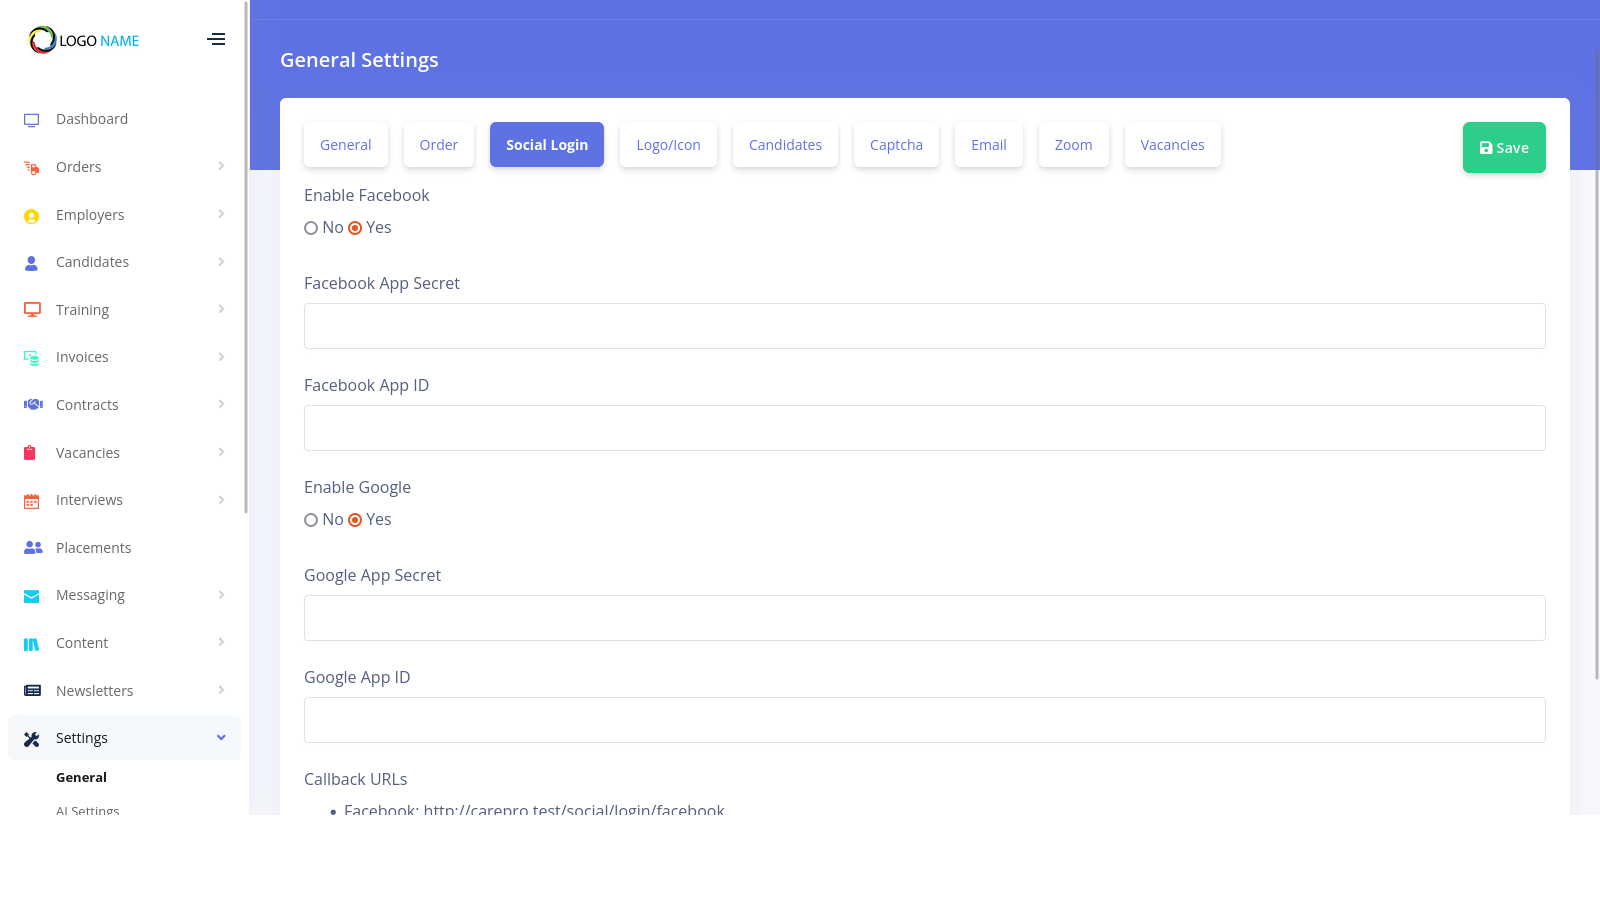
Use the options available to enable Facebook or
Google (or both). You will need to supply the Facebook App ID and Secret
as well as the Google App ID and secret. Please follow these links for
sample instructions on how to get these
- Facebook: http://support.storemantis.com/docs/post/38/facebook-login-setup
- Google: http://support.storemantis.com/docs/post/39/google-login-setup
Also note the Callback URLs for Facebook and Google on this page. You will need these as well during setup.
Setting up your logo
One of the first things you will want to do is to setup your Logo. To do so, click on the 'Logo/Icon' tab on the General Settings page
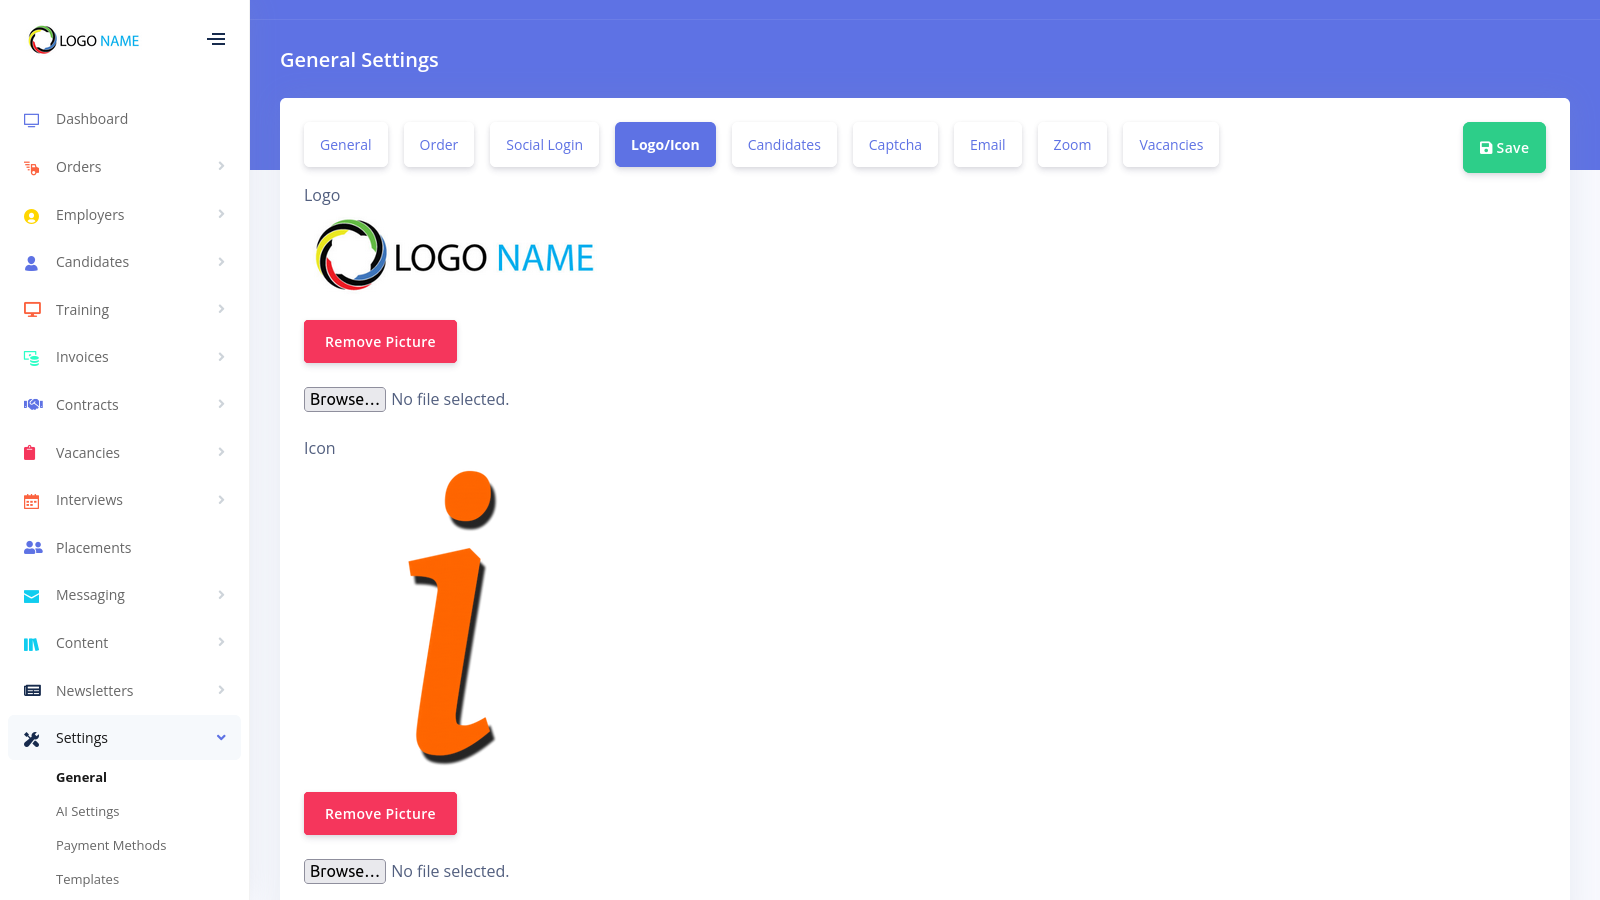
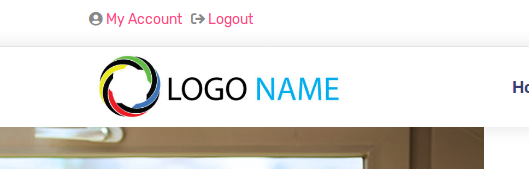
The logo is the main image that is displayed at the header of your site's pages as show below
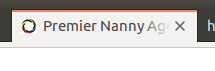
The icon on the other hand is the small image that is displayed on your web browsers tabs e.g.
Click on the 'Save' button and your logo will be set immediately.
Managing Administrators
The Administrators page is where you can create Admins that can login to the backend and administer your portal.
Clicking on this link displays all your current administrators
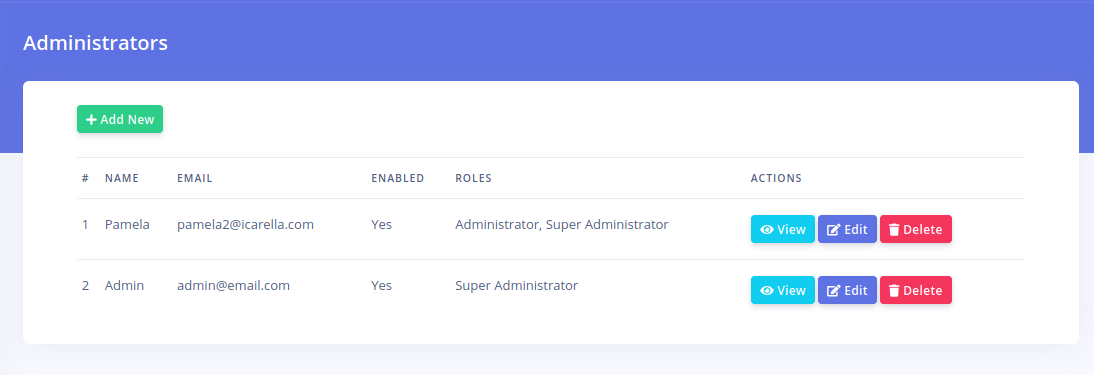
On this list you can see the 'Roles' that are
assigned to this user. An admin can have multiple roles assigned. The
role an admin has determines the restrictions he might have on the
portal.
To create a new Admin, click on the 'Add New' button
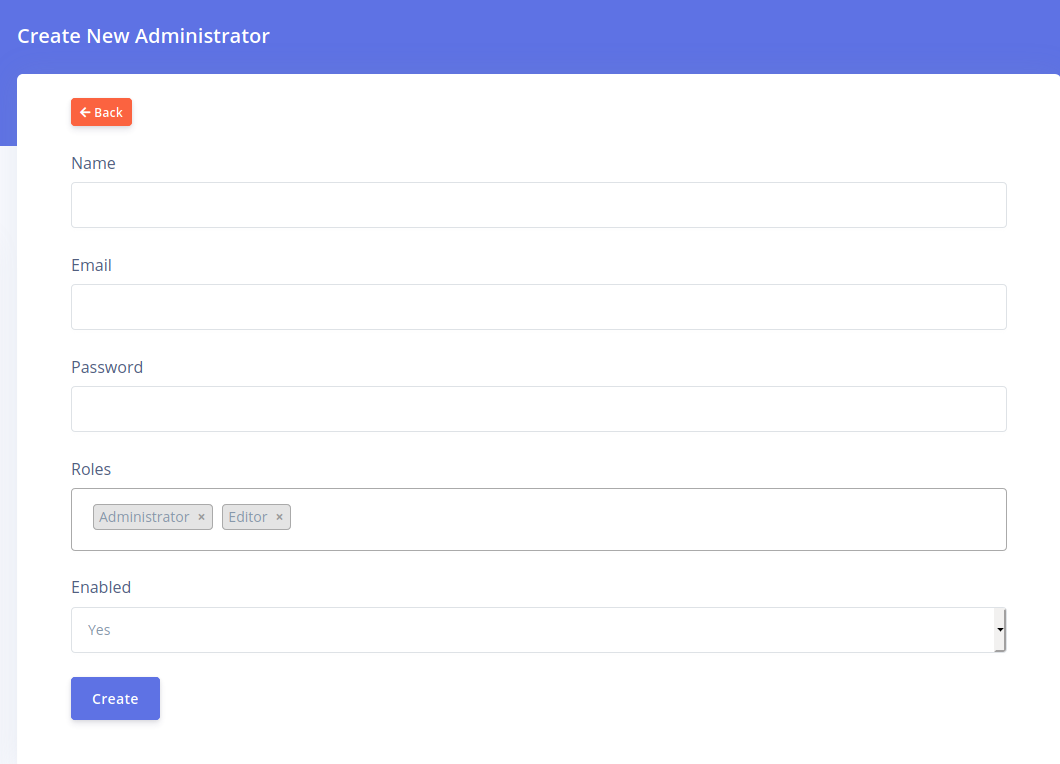
Enter the details for the user. Specify the roles
from the dropdown that you would want the user to have. Click on Create
when done.
Managing Roles
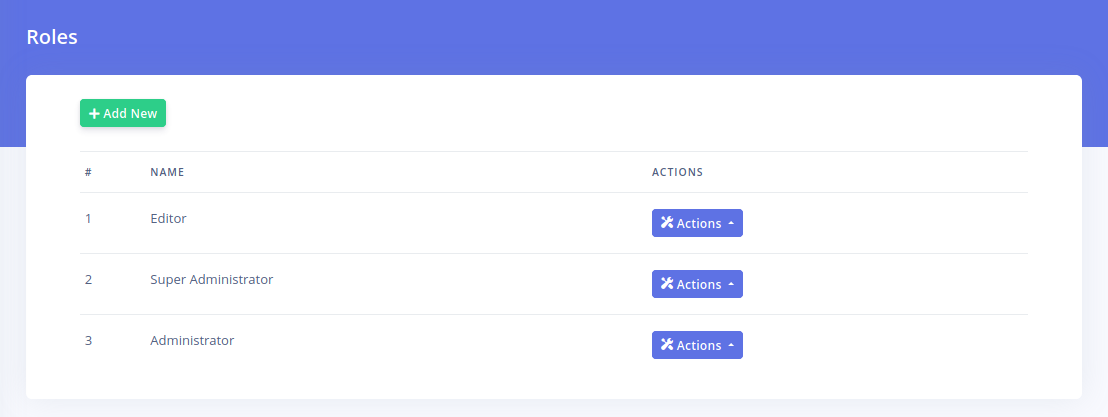
The 'Roles' settings section controls all the roles that are available on the system. You can create as many roles as you like. By default, there are two roles 'Super Administrator' and 'Administrator'. These two roles can not be deleted.
The super administrator role has all privileges on the system. You can not edit this role.
The other roles can be edited. Clicking the edit button for a role or clicking on 'Add New' brings up a page like below:
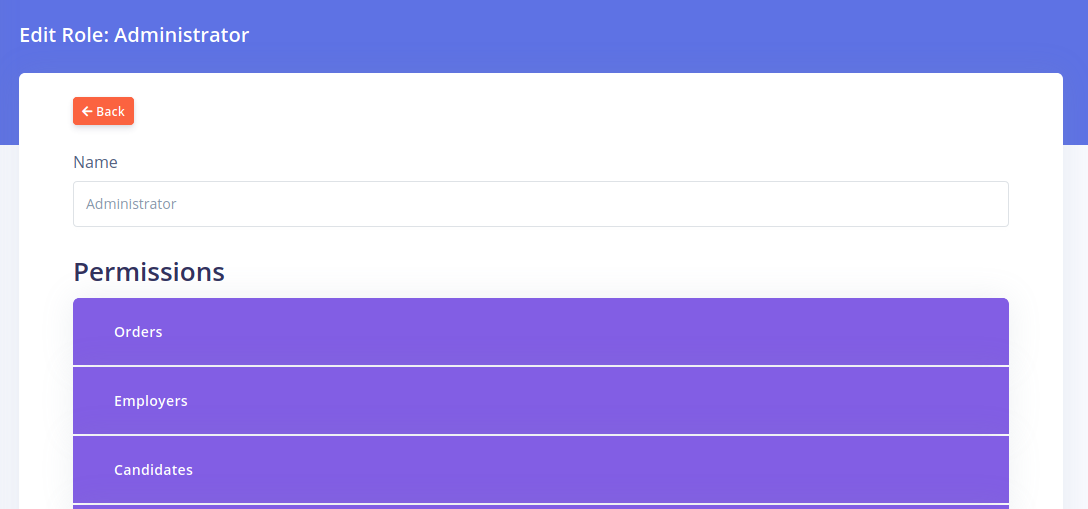
The first field is the 'Name' field which contains the name for the role.
The next section is the 'Permission' section. This
section contains a series of panels. Clicking on a panel displays the
permissions within that group
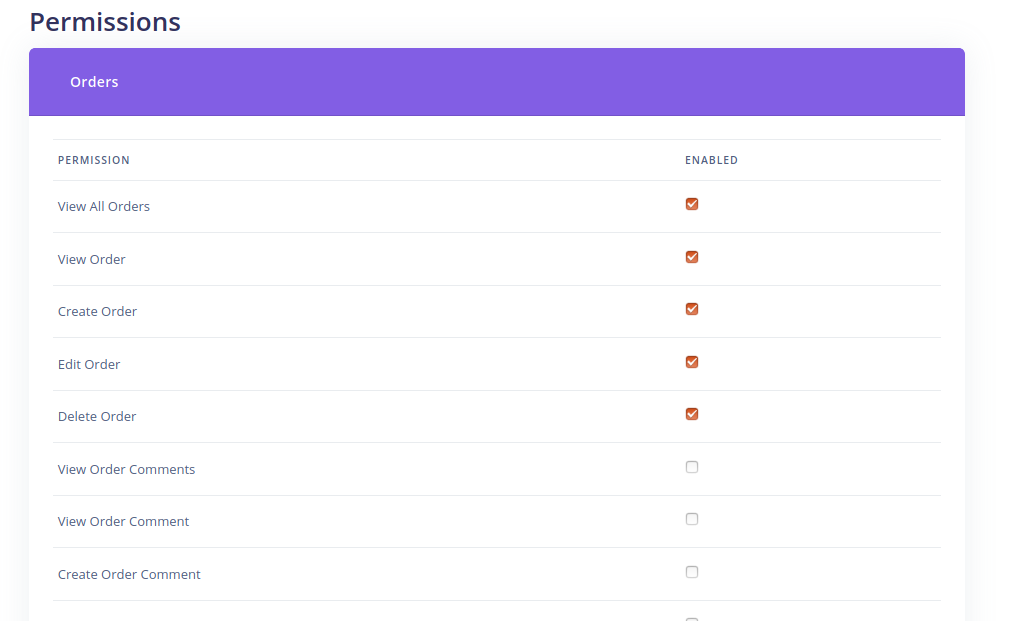
In the 'Enabled' column, select if you wish for that permission to active for that role or not.
Save or update the form when you are done setting all your permissions for the role.
Managing Users
The Manage users page under 'Settings' displays every single user on your portal
You get to see the type of the user. The 'Filter'
button gives you options for searching for a particular user or
filtering based on a type e.g. Employers, Candidates or Admins.
Candidates
The 'Candidates' tab on the 'General Settings' page gives you the following settings:
- Visibility:
Allow candidates set profile visibility: This section allows you to control if candidates can set their profile visibility by themselves. We recommend you set up the AI candidate bio filter if you wish to turn this on.
Automatically restrict new candidates: This option allows you to make all new candidates' account to be restricted. This is especially useful if you allow candidates to set their visibility but you only want verified candidates to be visible on your portal. Restricted candidates can not be viewed by employers.
- Candidate Filter: This controls what filtering fields are available to employers when they are searching for candidates.
Vacancies
The 'Vacancies' tab on the 'General Settings' page gives you the following settings:
- Allow employers create vacancies: This allows you to set if employers can post vacancies and view candidate applications. We recommend that you setup the AI Vacancy filter if you wish to turn this on.
- Require approval for employer-created vacancies?: If you set this on, then new vacancies that employers create will be marked as pending. They will only be visible to candidates if you approve them from the backend.
- Notify employers about new applications? : If you set this on, the system will automatically send a report to each employer that has an active vacancy which has received at least one new application in the past 24 hours.
- Notify candidates about new vacancies? : This will send notifications to all active candidates once a day listing new vacancies created in the past 24 hours.
- Notify admins about pending job vacancies?: This will notify admins about pending job vacancies created by employers in the past 6 hours.
- Vacancy creation instructions for employers: Here you can write text that will be displayed to employers on the page where they create or edit vacancies. You can let employers know what is permitted and what isn't according to your terms of service.